Container Gardening for Beginners: The One-Pot Starter Plan
If your entire garden is a balcony, patio or windowsill, start with one 15-litre (4-US-gallon) pot of loose-leaf lettuce. For a spot with roughly 1–3 hours of direct sun plus bright light for the rest of the day, that is a more forgiving first test than a mixed planter packed with plants that want different things.
I would not make a tomato the default. A compact tomato needs about 20–25 litres (5–6.5 US gallons) of mix and roughly 6–8 hours of direct sun for a reasonable fruiting attempt, so it asks more of a beginner and of a dim balcony. One lettuce pot will not supply a household, but it can give you several small pickings and teach you the useful parts of container gardening for beginners: choosing volume, reading moisture and placing a plant where the light actually falls.
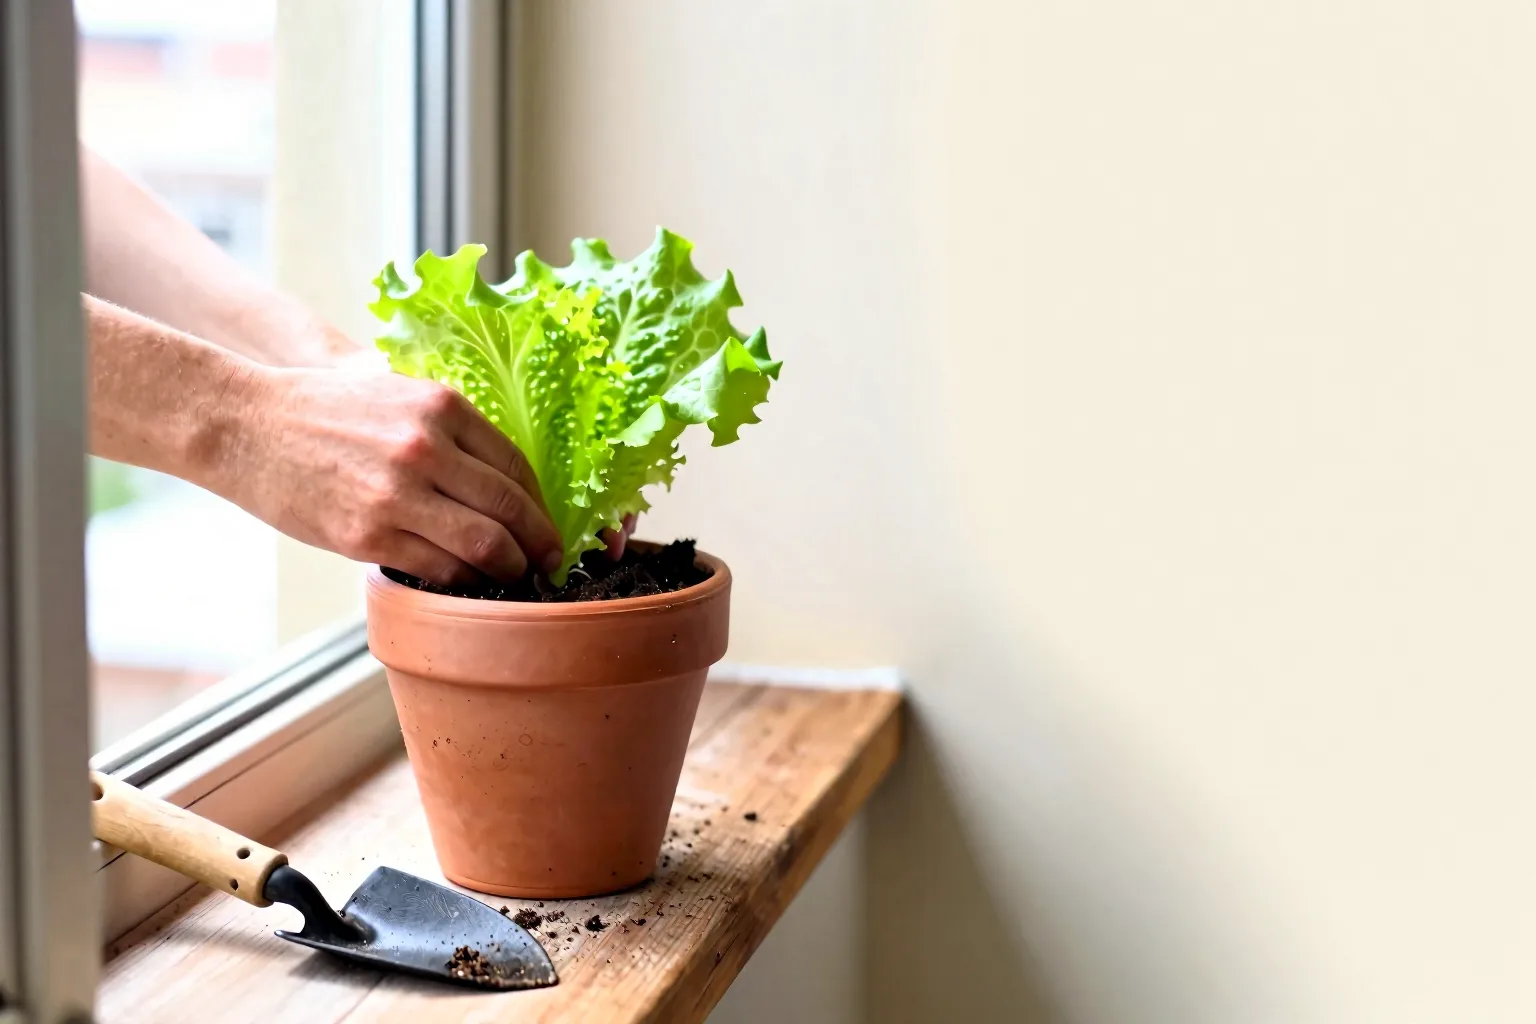
The beginner plan: one 15-litre pot of loose-leaf lettuce
Choose a loose-leaf variety rather than a lettuce that must form one large, tight head. You can take a few outside leaves as they become usable and leave the centre growing. That makes the harvest forgiving: a missed watering may spoil a few leaves without wasting an entire head at once, and you can sow a second small batch after the first one begins to run out.
Lettuce is also a sensible crop for a shallow-to-medium container because its useful crop is leaves, not fruit held on a tall stem. It does not need the same root support or sustained sunlight that a tomato or pepper needs to flower and fill fruit. I still would not call it shade-proof. With only a weak, bright patch and no direct sun, seedlings may stretch, leaves may stay small and the crop may mature slowly.
Audit the light before you buy the pot. Pick a clear day and look at the intended spot at breakfast, late morning, midday, mid-afternoon and early evening. In your phone notes, record when the sun’s disc actually reaches the floor, wall or pot. Bright sky light is useful, but it is not the same as direct sun; a strong shadow from your hand is a quick way to distinguish the two.
- Mark the first and last time a direct beam reaches the spot.
- Notice whether a neighbouring building, railing or roof cuts the beam into a short strip.
- Watch the beam in summer as well as spring if you can, because the angle changes through the year.
If the pot gets around 1–3 hours of direct sun and bright ambient light afterward, lettuce is a reasonable first choice. If it gets no direct beam at all, I would switch to the crop list in Best edible plants for a balcony with only two hours of sun rather than forcing a tomato into a poor location. If it receives a long, unobstructed run of sun, you have more options, but the one-pot lettuce plan is still the easiest way to learn without spending on a collection of containers.
Set the harvest expectation before sowing. Think of this as a salad garnish and a repeated handful of leaves, not a complete supply of greens. A single pot gives you a small growing experiment with something to pick; it does not remove the need to buy vegetables.
The shop-aisle specification: 15 litres of mix, real drainage and no gravel
Buy a container marketed at about 15 litres (4 US gallons) and roughly 25–30 cm (10–12 inches) deep. The litre capacity matters more than the rim diameter. A tapered pot with a 30 cm (12-inch) opening can narrow sharply toward the base, while a straight-sided pot with the same opening may hold considerably more.
Here is the shopping estimate I would use. The middle column is working mix, not a promise about every manufacturer’s label. I am allowing roughly 2–3 cm (1–2 inches) of empty space below the rim, then allowing for wall thickness and a tapered or rounded base. Bags also settle after filling, so buying slightly more mix than the exact arithmetic calls for is sensible.
| Labelled container capacity | Mix to budget for the filled pot | Practical use |
|---|---|---|
| 10–12 litres (2.6–3.2 US gallons) | About 8–10 litres (2.1–2.6 US gallons) | Baby leaves, herbs or a smaller lettuce sowing |
| About 15 litres (4 US gallons) | About 12–15 litres (3.2–4 US gallons) | The recommended one-pot loose-leaf plan |
| 20–25 litres (5.3–6.6 US gallons) | About 17–23 litres (4.5–6.1 US gallons) | More lettuce, or a container with greater moisture reserve |
That table is a rule for standing in a garden-centre aisle, not a replacement for measuring an unusual pot. If you are comparing another shape, How much soil does a 12-inch (30 cm) container hold? will help you redo the volume calculation. My practical judgment is to buy the 15-litre pot and a bag that leaves a little spare rather than trying to make the last cup of mix fit. A pot filled right to the brim is awkward to water, and loose mix can settle after the first few thorough waterings.
Choose a container with open holes in its base. Put it on a saucer or tray that catches runoff, but empty that tray after watering so the pot is not sitting in a reservoir. A hole hidden by a sticker, a plug of compacted mix or a sealed decorative insert is not working drainage.
The material changes how quickly the pot loses water. Plastic is light and, in the same position, generally holds moisture longer than unglazed terracotta. Terracotta can lose moisture through its sides, which is useful in a wet location but demanding on a windy, sunny balcony. Glazed ceramic is less porous than unglazed terracotta, but it is heavier and harder to move once full. For an elevated space, I would choose a sturdy plastic pot unless the extra weight and fixed position of ceramic solve a specific problem.
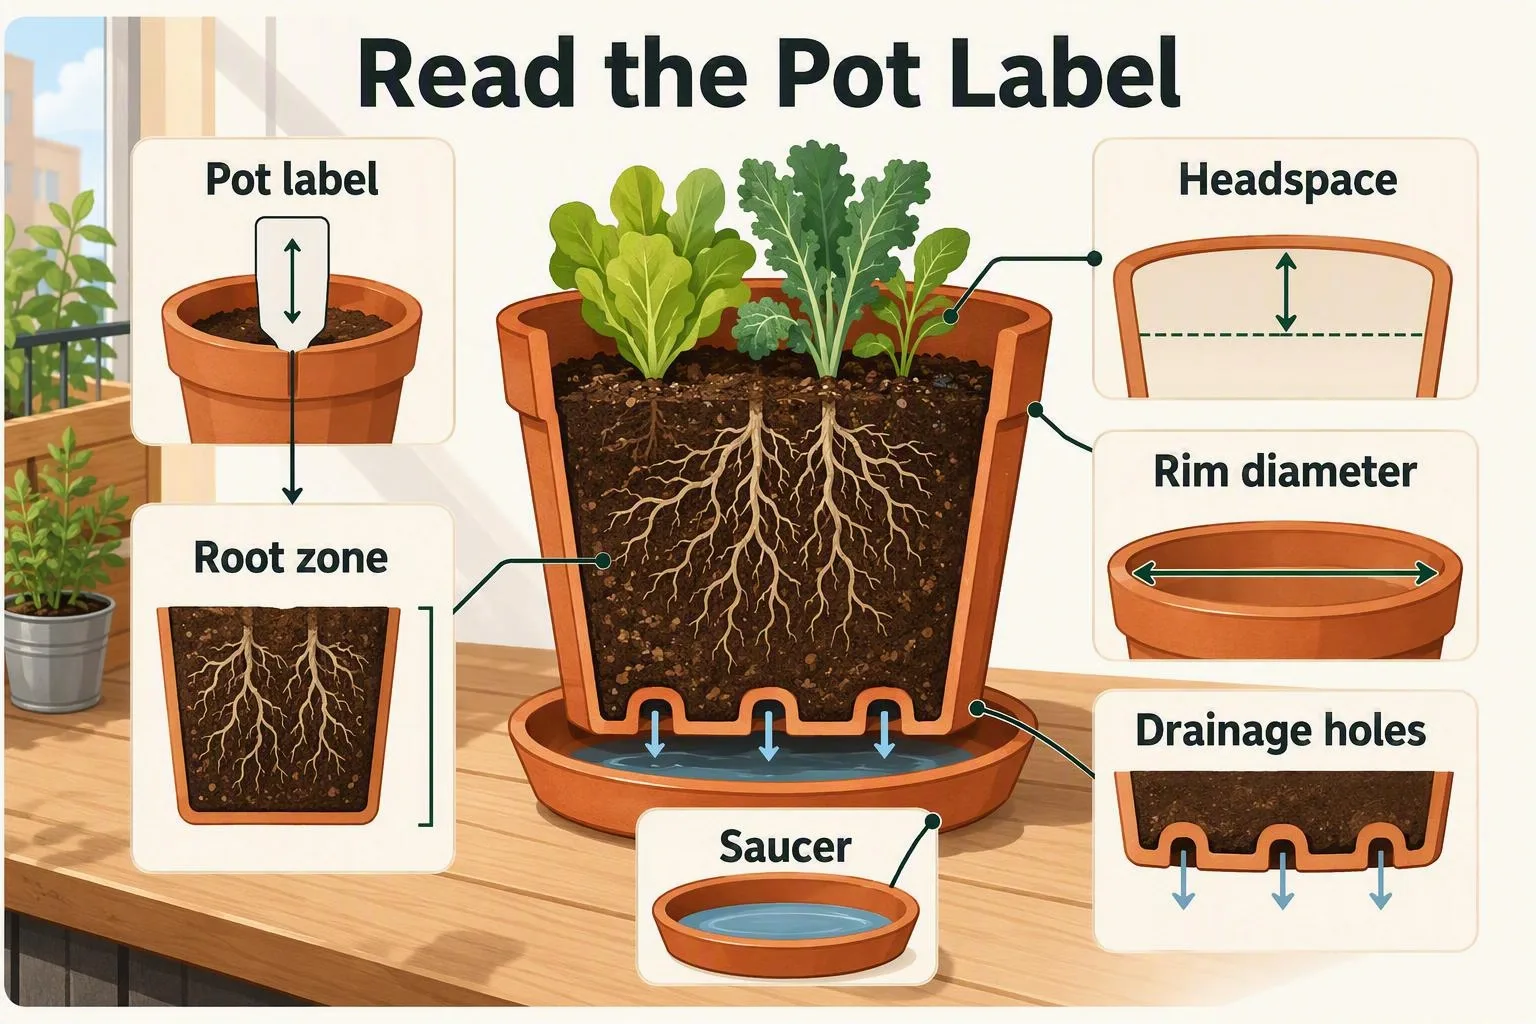
Skip the gravel layer. The common idea is that coarse stones at the bottom will make water leave the pot faster. In a pot filled with fine, airy mix, water does not treat the gravel as a new set of drainage holes. The fine mix can remain saturated above the coarse layer; that trapped wet band is called a perched water table, which simply means water is held above the outlet instead of falling freely through the whole profile. Gravel also takes away root volume. Open holes, an airy mix and a sensible saucer are the better arrangement for this lettuce pot.
Use potting mix made for containers, not soil dug from a garden bed. A confined pot has no broad soil column for worms, roots and weather to loosen; fine particles can settle, pores close, air movement falls and the mix becomes difficult to wet evenly. If the bag is already fertilized, note the stated feeding period before adding anything else.
For an edible planter, I would also reject treated timber whose treatment history is unknown and a glazed pot whose food-contact suitability is unclear. A decorative container can be attractive without being a sensible growing vessel. Put a food-safe plastic liner or a purpose-made edible planter ahead of an uncertain material.
Put the pot where it will live, then plant: the setup sequence
Do not create a heavy, wet container in the middle of the room and discover afterward that it blocks a door or cannot be shifted away from a railing. The order below is deliberate.
- Place the empty pot first. Put it where the light audit looked best, on a stable surface rather than on the outer edge of a balcony. Check that you can reach it with a watering can or hose and that wind cannot easily catch the foliage or rock the pot. If you rent, make sure runoff will not stain a wall or drip onto the space below.
- Check every hole. Hold the empty container up to the light, clear away a loose manufacturing plug and set the saucer underneath. Do not rely on a decorative outer pot with no outlet of its own unless the inner pot can be lifted out and drained.
- Fill with room to water. Add the potting mix until it sits about two fingers, roughly 3–5 cm (1–2 inches), below the rim. That shallow headspace gives water somewhere to collect before it moves through the mix instead of spilling over the edge.
- Moisten before sowing. Dry container mix, particularly a mix containing a high proportion of peat or fine dry material, can resist the first splash. Water in stages and stir only very gently with your fingers if you need to break a dry pocket. Pre-moist mix gives tiny seeds a more even bed and reduces the chance of them floating into a corner during the first watering.
- Sow or transplant at the packet’s depth. Scatter loose-leaf seed thinly, cover it as the packet directs and label the variety and date. A young transplant can give you a faster-looking start, but direct sowing avoids disturbing a small root ball and makes it easy to repeat a sowing later. If you transplant, keep the plant at the same depth it was growing in its cell and do not bury the crown, where the leaves meet the roots.
- Thin rather than let every seedling compete. Thinning means removing surplus seedlings so the remaining plants have room for leaves and roots. If you want baby leaves, I use about 2–5 cm (1–2 inches) between plants as a starting range. For larger leaves, start closer to 10–15 cm (4–6 inches). Treat those as working ranges, not laws: the seed packet should take priority because varieties differ, and a dense sowing can be harvested young rather than forced to become full-sized.
- Water gently once more. Use a fine rose on the watering can, wet the whole surface and continue until a small amount exits the holes. That confirms water has reached the lower mix rather than stopping in a dry upper crust. Empty the saucer once the runoff has finished.
During germination, inspect the surface frequently. Small seeds have very little stored water and a thin top layer can dry before the deeper mix looks changed. Aim for evenly damp mix, not a shiny, saturated surface. If the top dries into a crust, water more gently and review whether sun or wind is arriving sooner than expected.
For cultivar-specific details, compare the packet with national horticultural guidance on lettuce seed spacing and harvest timing. The packet is the immediate authority for that variety; a universal spacing chart cannot know whether you bought a compact baby-leaf type or a large loose-leaf selection.
Keep the pot productive for six weeks: read signals, then water, feed and harvest
The pot does not need a schedule; it needs a reading.
That is the maintenance rule I would put on a label beside the pot. Weather, pot material, wind, plant size and the position of the sun can change the drying rate too much for a fixed calendar to stay useful.
A two-minute reading loop
While the seedlings are germinating, touch the surface most days. Once the plants are established, check the top 2–3 cm (about 1 inch) of mix with a finger, then lift or tilt the pot slightly if it is safe to do so. The top layer tells you about the surface; the weight tells you whether the whole container still holds much water. A light, dry pot and a cool, heavy pot are different situations even if the leaves look limp in both.
When watering is needed, pour slowly over the entire surface rather than making one hole beside the stem. Pause if water runs straight down the side, then continue until a little exits the drainage holes. That pause lets dry pockets absorb water instead of sending all the runoff through one channel. Empty the saucer afterward.
Use frequency as a condition, not a timetable. A plastic pot in hot sun and wind may need checking every day. A glazed pot in part shade may go two or three days between checks. Those are inspection examples, not instructions to water automatically on day one, day three or any other date.
Feed according to the mix. If the bag says it contains starter fertilizer, wait through that stated period. Afterward, use a fertilizer labelled for vegetables at its label rate. Water a wilted, dry plant first and let it recover before applying concentrated feed; fertilizer salts in a dry root zone can add another stress instead of solving the original one. More fertilizer will not compensate for a dark position, missing drainage or a pot that dries to dust every afternoon.
Read the failure before changing everything
- Dry, lightweight mix with limp leaves: check for underwatering first. Water slowly across the full surface and see whether the mix accepts it. If water immediately runs down the sides, the root ball may have dried unevenly and may need several gentle passes.
- Wet mix, yellowing leaves and a sour smell: inspect drainage and watering frequency before adding feed. Persistent saturation leaves less air around roots, and a blocked hole or permanently full saucer can keep the lower zone wet.
- Long stems and pale, widely spaced leaves: the plant is reaching for more light. Move the pot toward the brightest safe position rather than feeding it harder. Extra fertilizer cannot turn missing light into leaf energy.
- A central flower stalk and harsher-tasting leaves: the lettuce is bolting, meaning it is switching from leaf production toward flowering and seed. Heat, plant age and day conditions can contribute, and the variety changes how quickly the switch appears. Harvest usable leaves promptly, then resow rather than trying to force the old plant back into its young-leaf stage.
If the symptoms still do not make sense, use How to tell whether a potted plant is overwatered or underwatered as a separate symptom check. Look at the mix and the roots’ conditions, not just the leaf posture; both too little and too much water can produce limp foliage.
Harvest in a way that buys another picking
Take the oldest usable outer leaves first. Pinch or cut them close to the base, leave the central growing point intact and avoid stripping the plant bare in one session. That keeps the part capable of making new leaves in place. Baby-leaf sowings can be cut with scissors once they are a useful size, while a more widely spaced plant can be harvested leaf by leaf.
I would project several small pickings from a well-positioned pot rather than promise a fixed weight or a continuous supply. The result depends on variety, temperature, light, watering mistakes and how much leaf you remove at each harvest. The projection has an easy test: if you are taking leaves but the centre continues to produce fresh ones, the pot is paying back in the intended way; if it bolts or stalls, the crop window has closed.
For a weekend away, water only when the mix has reached its normal watering point, move the pot out of the hottest reflected heat and wind, and ask someone to check it if the weather is unusually hot. Do not leave a pot standing in a full saucer as a substitute for care. The practical companion is How to water container plants while you are away for a weekend.
Before the weekend, buy the 15-litre pot, container mix, a saucer and one loose-leaf lettuce packet. Put the empty pot in its final position before you fill it. In seven days, check for new leaves, an open drainage path, no standing water and mix that is neither bone-dry nor constantly soggy; if the seedlings are tall and pale, move the pot toward the brightest direct beam you recorded.