Growing Peppers in Containers: 10 Litres for Small Varieties
For growing peppers in containers, 10 litres (2.6 US gal; 2.2 imperial gal) is enough for one compact chilli, patio pepper, or small sweet variety, not the size I’d choose for a full-sized bell pepper. If you have only 1–2 hours of direct sun, the pot cannot rescue the harvest; aim for 6–8 hours, although a plant receiving 4–5 hours can still produce fewer fruits.
That is the useful 10-litre verdict: choose the right plant, give its roots a genuine volume of mix, and treat water as a changing measurement rather than a Tuesday appointment.
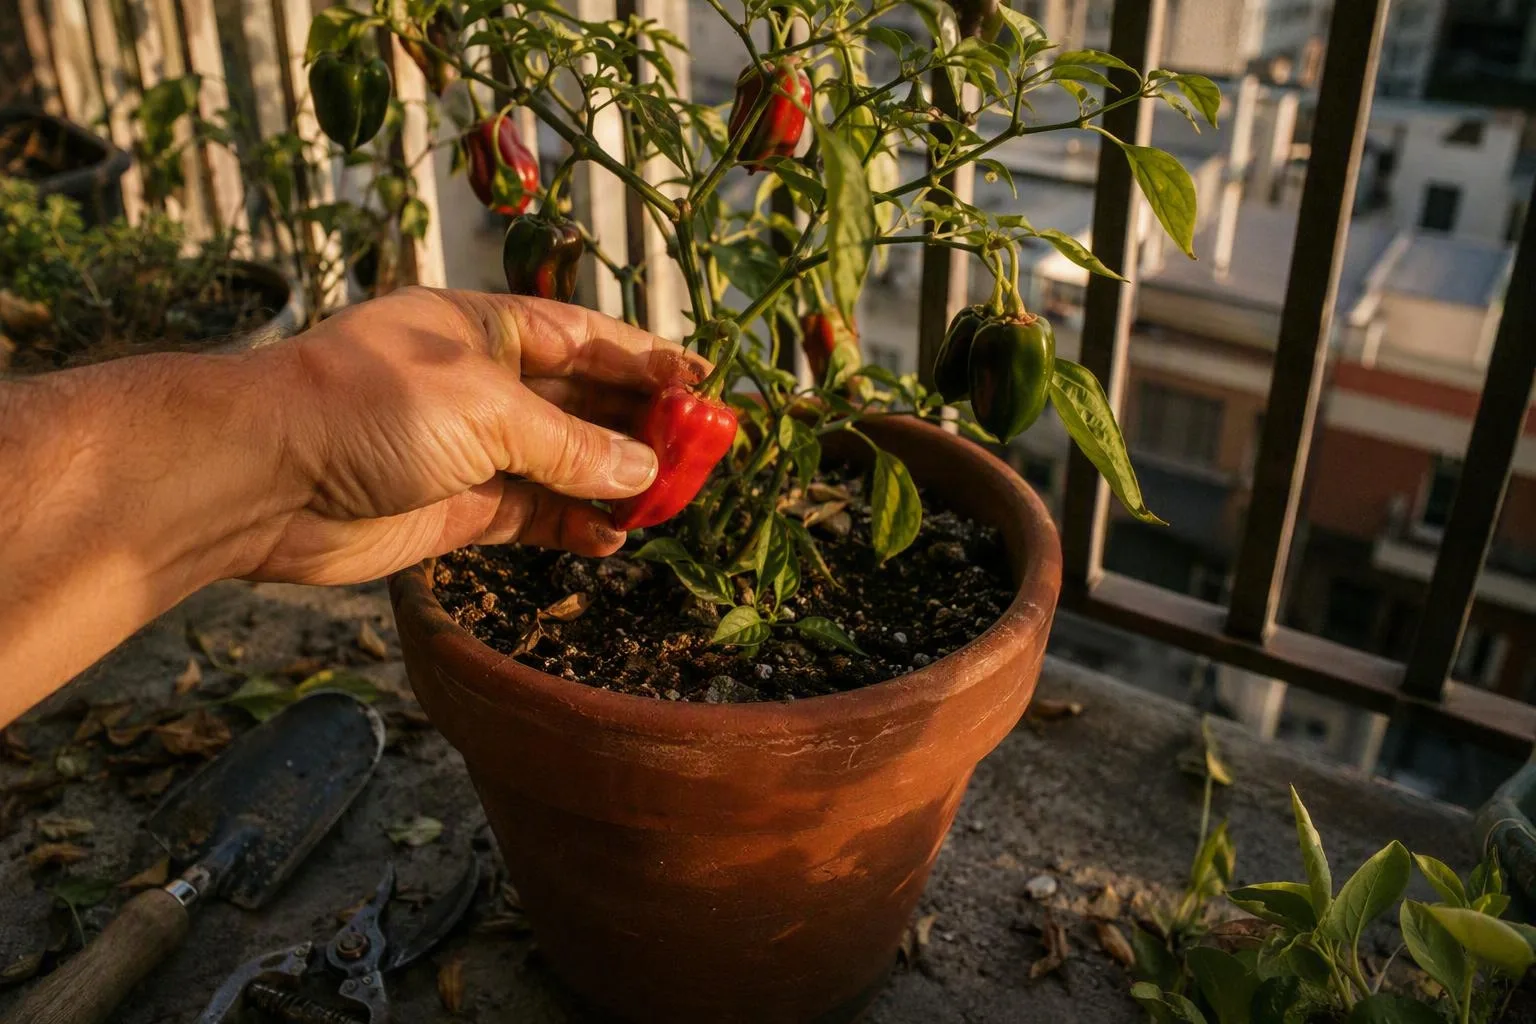
The 10-litre verdict: one compact plant, not every pepper
I’d use a 10-litre final pot for a compact chilli, a patio pepper, or a small-fruited sweet pepper. I’d move up to roughly 15–20 litres (4–5.3 US gal; 3.3–4.4 imperial gal) for a vigorous sweet pepper or bell type, especially if the plant will sit in full sun and carry heavy fruit.
The fruit on the label is not a reliable guide to the size of the whole plant. A small chilli can make a surprisingly broad canopy, while a compact sweet pepper may stay short but carry thick-walled fruit that puts more demand on its stems and root zone. I read mature height, mature width, branching habit, and the expected fruit load before I read the colour name.
Light is the other half of this decision. Six to eight hours of direct sun gives a container pepper a much better chance of flowering and ripening steadily. One or two hours may keep the leaves green, but that is different from supplying enough light for a useful crop. With four or five hours, I’d expect a smaller set of fruit and a slower colour change.
The same root-volume logic sits behind best container size for vegetables, but peppers make the trade-off easy to see: a larger pot buys water and nutrient buffering, while a sunnier position buys the energy needed to turn that buffer into fruit. I’d spend my first extra pound, dollar, or euro on the sunniest safe position before upgrading a compact plant from 10 to 15 litres.
Read the plant label before you buy the container
Look for a mature height of about 45–75 cm (18–30 in) if the pepper is going into a 10-litre pot on a balcony. That is a practical selection range, not a promise that every plant in it will stay tidy. Check the mature width as well. A plant that reaches only 50 cm (20 in) tall but spreads 60 cm (24 in) can still crowd a narrow ledge and catch wind.
I treat words such as chilli, patio, dwarf, and compact as clues rather than specifications. The label’s height and width are more useful. If the label gives no mature dimensions, look for a plant with short internodes, a sturdy lower stem, and several branches already forming rather than a tall, thin seedling carrying one flower.
Put one plant in one 10-litre container. Two plants may look economical at the garden centre, but they share one finite reservoir of water, air, and nutrients. Two separate 5-litre pots are usually the more forgiving arrangement because you can move, water, or discard one plant without disturbing the other. The trade-off is that each 5-litre root zone dries faster and gives less room for a heavy crop.
A 60–90 cm (24–36 in) stake becomes worthwhile when the plant is tall, the stem forks high, or fruit begins pulling the branches outward. Insert it at planting time, close to but not through the root ball, then tie the stem loosely with soft material. Adding support later is possible, but pushing a stake through an established root zone is an avoidable disturbance.
If this is your first edible container, the selection advice in growing vegetables in pots for beginners applies here too: buy the plant whose mature shape fits the space, not the packet with the most exciting fruit photograph.
Build the root zone: 10 L of mix, 25 cm of depth, and open drainage
A pot labelled 10 litres does not necessarily give the plant 10 litres of usable mix. The label may describe its capacity to the brim, while you’ll fill it 3–5 cm (1–2 in) below the rim so water does not run straight over the edge. A true 10-litre root zone may therefore require a pot labelled closer to 12–15 litres (3.2–4 US gal; 2.6–3.3 imperial gal).
| Pot choice | What I’d expect | Best use |
|---|---|---|
| 10-litre labelled pot | May hold slightly less than 10 litres when left below the rim | One genuinely compact pepper |
| 12–15-litre labelled pot | Better chance of retaining about 10 litres of actual mix | Compact sweet pepper or a larger patio plant |
| 15–20-litre labelled pot | More water and root-volume buffer | Large sweet or bell pepper, windy site, or long season |
For the 10-litre setup, I look for roughly 25–30 cm (10–12 in) of width and 20–25 cm (8–10 in) of internal depth. A slightly different shape can work if the total volume is similar, but a shallow bowl gives less vertical root space and dries through its broad surface quickly. A narrow, tall pot may hold the volume yet tip more easily when the canopy catches wind.
Use a commercial container mix rather than soil dug from a garden bed. A container mix is made to hold enough water for the plant while leaving air-filled spaces around the roots. Garden soil can settle into a dense layer in a pot, slowing drainage and reducing those air spaces. I fill the pot loosely, press only enough to remove large voids, and leave the final 3–5 cm below the rim.
Drainage means an open route for excess water to leave. Several clear holes underneath are more useful than one tiny opening, and every hole needs to remain unobstructed by a saucer, paving surface, or compacted mix. A layer of gravel at the bottom does not improve this arrangement. Water moves through the mix until it reaches the change in texture at the gravel, where capillary forces hold a wetter layer above the boundary. You have used some root volume for stones and may have raised the saturated layer rather than lowering it.
That wet lower layer is the perched water table: water that remains suspended in the lower part of a pot above the drainage openings instead of instantly disappearing. It is not a separate underground tank. Its height changes with the mix, pot shape, and drainage conditions, which is why a deep, open pot of appropriate mix is more useful than a shallow pot with a gravel shelf.
Weight deserves a place in the pot specification. Ten litres of retained water weighs about 10 kg (22 lb), before adding the wet mix, container, plant, and saucer. On a rooftop or balcony, several containers can therefore become a meaningful load. Before grouping pots, check your building’s balcony load limits or ask the building manager for the relevant guidance; I would not treat a lightweight plastic pot as proof that the whole arrangement is lightweight.
For edible plants, I use a bucket marked as suitable for food contact or a purpose-made planter. I avoid containers that previously held chemicals, treated timber used as an unlined planter, and unknown or decorative glazes whose composition I cannot check. The question Are 5 gallon buckets safe for growing vegetables? comes down to the bucket’s material and previous use, not its size. I check the manufacturer’s food-safe container guidance before reusing one.
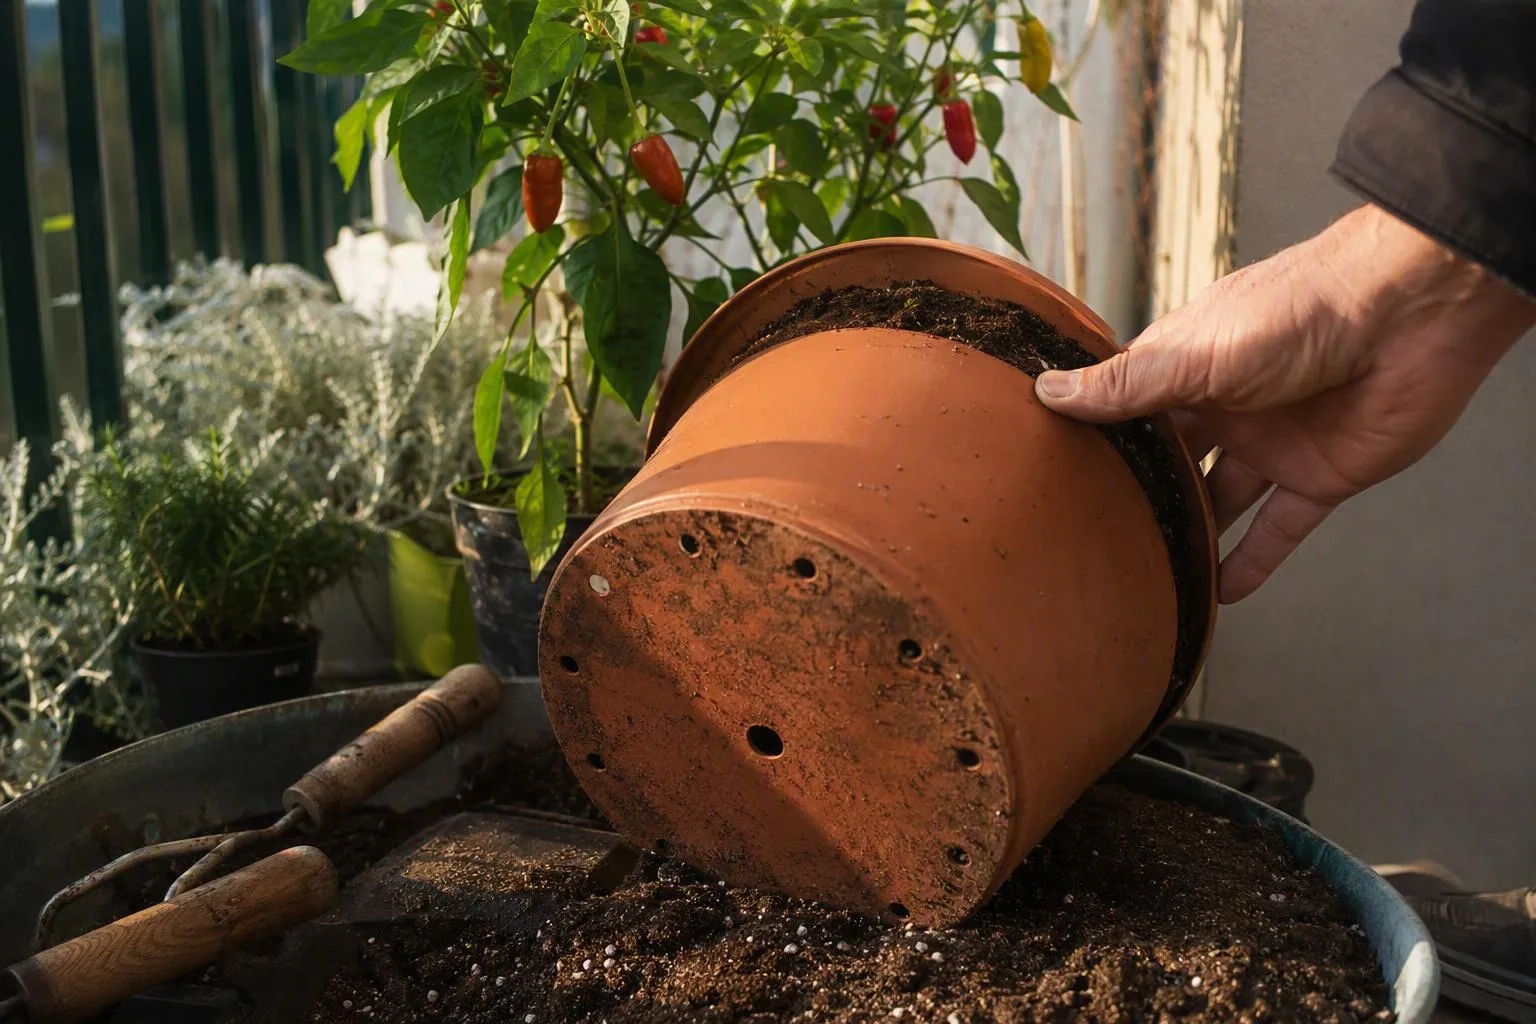
The first four weeks: warmth first, then roots, flowers and fruit
Peppers are warm-season plants. I would not move a nursery plant directly from a protected shop or windowsill into a cold, exposed balcony corner. Harden it off over 7–10 days by giving it increasing exposure to outdoor light and air, starting in a sheltered position and bringing it back if the forecast turns cold or windy.
Transplant after the local frost risk has passed and when night temperatures are consistently around 12°C (54°F) or warmer. If you can check the mix, about 18°C (64°F) is a more comfortable target for root activity. The air temperature and the pot temperature are not identical: a cold container against a wall can stay chilly after a sunny afternoon, while a dark pot in direct sun can heat quickly.
- Before planting: water the nursery plant if the root ball is dry, prepare the final pot, and place it where the finished plant will receive its best light.
- At planting: make a hole the same depth as the nursery root ball. Set the pepper at that level rather than burying a long section of stem as you might with a tomato.
- Immediately afterward: water the mix through once so it settles around the root ball, allowing excess to leave through the holes.
- During the first weeks: keep the mix evenly supplied with water while the roots move into the surrounding mix, but do not keep it constantly saturated.
In my own balcony setup, I once moved a pepper from a sheltered windowsill straight into the brightest afternoon position. The mix was damp, yet the leaves hung by evening. I shaded it, stopped adding water, and returned it to shorter periods of outdoor sun before increasing the exposure again. It recovered as the leaves toughened, and the useful lesson was simple: a wilted pepper is not automatically asking for another drink.
Put the pot in its final sunny position before the canopy becomes large. A movable container is a real advantage here. I can chase a strip of afternoon sun or pull the plant back from a hard wind without repeatedly digging around the roots. The broader advice in growing vegetables in pots on balcony is useful, but peppers repay an especially careful sunlight audit because a bright-looking wall can still cast shade across the pot for most of the day.
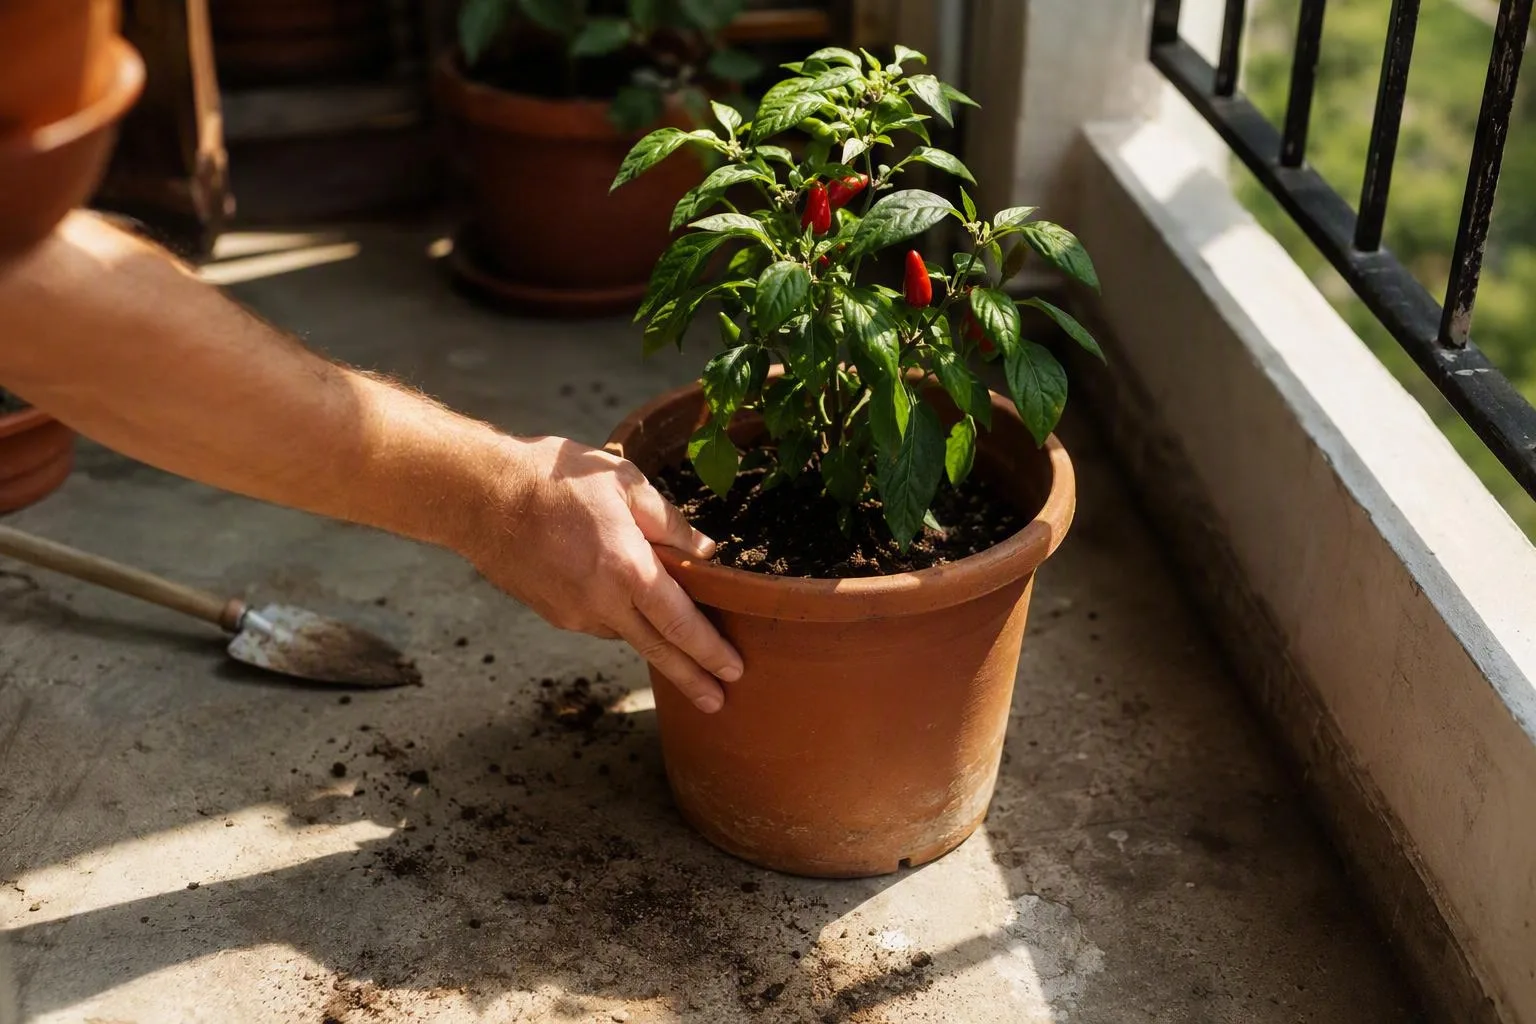
Use the pot’s weight to time water—not a Tuesday schedule
A calendar is a poor moisture sensor. In a 10-litre pot, I check the top 2–3 cm (about 1 in) of mix and lift or tilt the container enough to judge whether it feels markedly lighter than it did after watering.
- Surface dry and pot noticeably light: water now. Pour slowly around the root zone until the first drops appear at the drainage holes.
- Surface dry but pot still heavy: wait and check again later. The lower mix may still be wet, and adding more water can remove air from the root zone.
- Plant wilted while the pot remains heavy: do not assume thirst. Check the drainage holes, smell for sour stagnant mix, and look for a stem or root problem.
- Water has run down the side: the mix may have pulled away from the pot or become water-repellent. Use the two-pass method below.
When the pot needs water, soak slowly enough that the mix can absorb it. Once drainage begins, wait about 10–15 minutes and empty the saucer. Leaving the pot standing in that runoff keeps the lower mix saturated and can make the next moisture check misleading.
There is no honest fixed interval for every 10-litre pepper. A plastic pot in full sun may need a daily check and, during a hot, windy spell, a second check later in the day. A glazed pot in part shade may go two or three days between thorough waterings. Terracotta can shorten the interval because the porous wall loses water, while a crowded root ball can shorten it because more roots are actively taking water from the available mix. Wind can dry the plant and surface even when the day does not feel especially hot.
If the mix has become water-repellent, give it a small first drink around the entire surface, wait 5–10 minutes, then return with a slower, deeper watering. The first pass softens the dry pockets; the second pass is the one that should reach the full root zone. Do not solve a repellent surface by leaving the pot submerged.
For a practical moisture log, write down the date only after you have checked the pot. After a week or two, you’ll see a pattern for that exact material, position, wind exposure, and root mass. That pattern is more useful than borrowing a schedule from a pepper grown in a different pot on a different balcony.
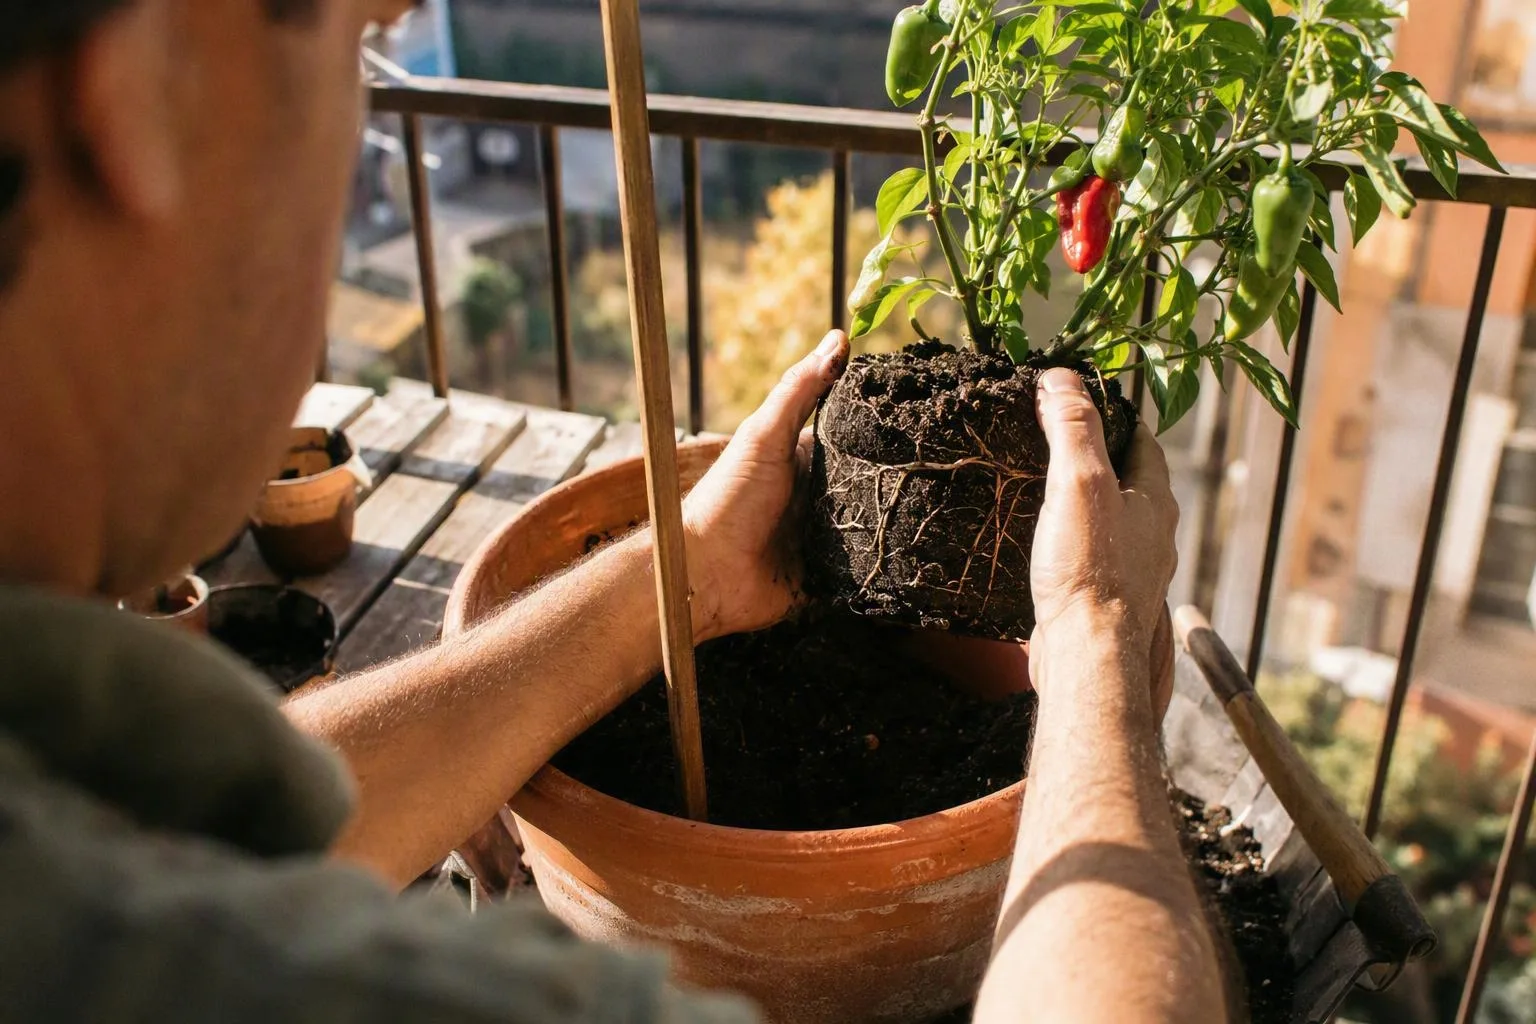
When flowers fail, separate water stress from feed and temperature
Once the plant has settled, begin a complete liquid feed about 2–3 weeks after transplanting if the mix contained starter nutrients. Continue at the product label rate, commonly every 7–14 days during active flowering and fruiting. A small container receives repeated watering but has little reserve, so dissolved nutrients can leave through the drainage holes faster than they would from a large bed.
More feed is not a shortcut to more peppers. Excess nitrogen can push the plant towards large, soft leaves and long shoots while flowers and fruit lag behind. If leaf tips turn brown and a pale or whitish crust appears on the mix surface, I consider salt buildup before increasing the feed. Improve drainage, pause concentrated feeding, and water thoroughly enough for some runoff; if the problem persists, replace part of the mix rather than continuing to add fertiliser.
Symptom: flowers appear, then drop after a hot day. Temperatures near 32°C (90°F), abrupt drying, and a hot root zone can interrupt flowering. A cool night below roughly 15°C (59°F) can do the same for a plant that has been growing in warmer conditions. My first fix is steady moisture and temporary protection from the harshest afternoon heat, not a stronger fertiliser. On a calm morning, gently shake the main stem or tap the flower branches to help pollen move.
Symptom: flowers drop even though the weather is mild. Check light, water swings, and the plant’s general balance before blaming pollination. A pepper in bright shade may look healthy but lack the daily light needed to keep setting fruit. A plant that has repeatedly wilted may also abort flowers while it rebuilds roots and leaves. Move the pot gradually into more direct sun if the current position is dim, and keep the moisture pattern steadier.
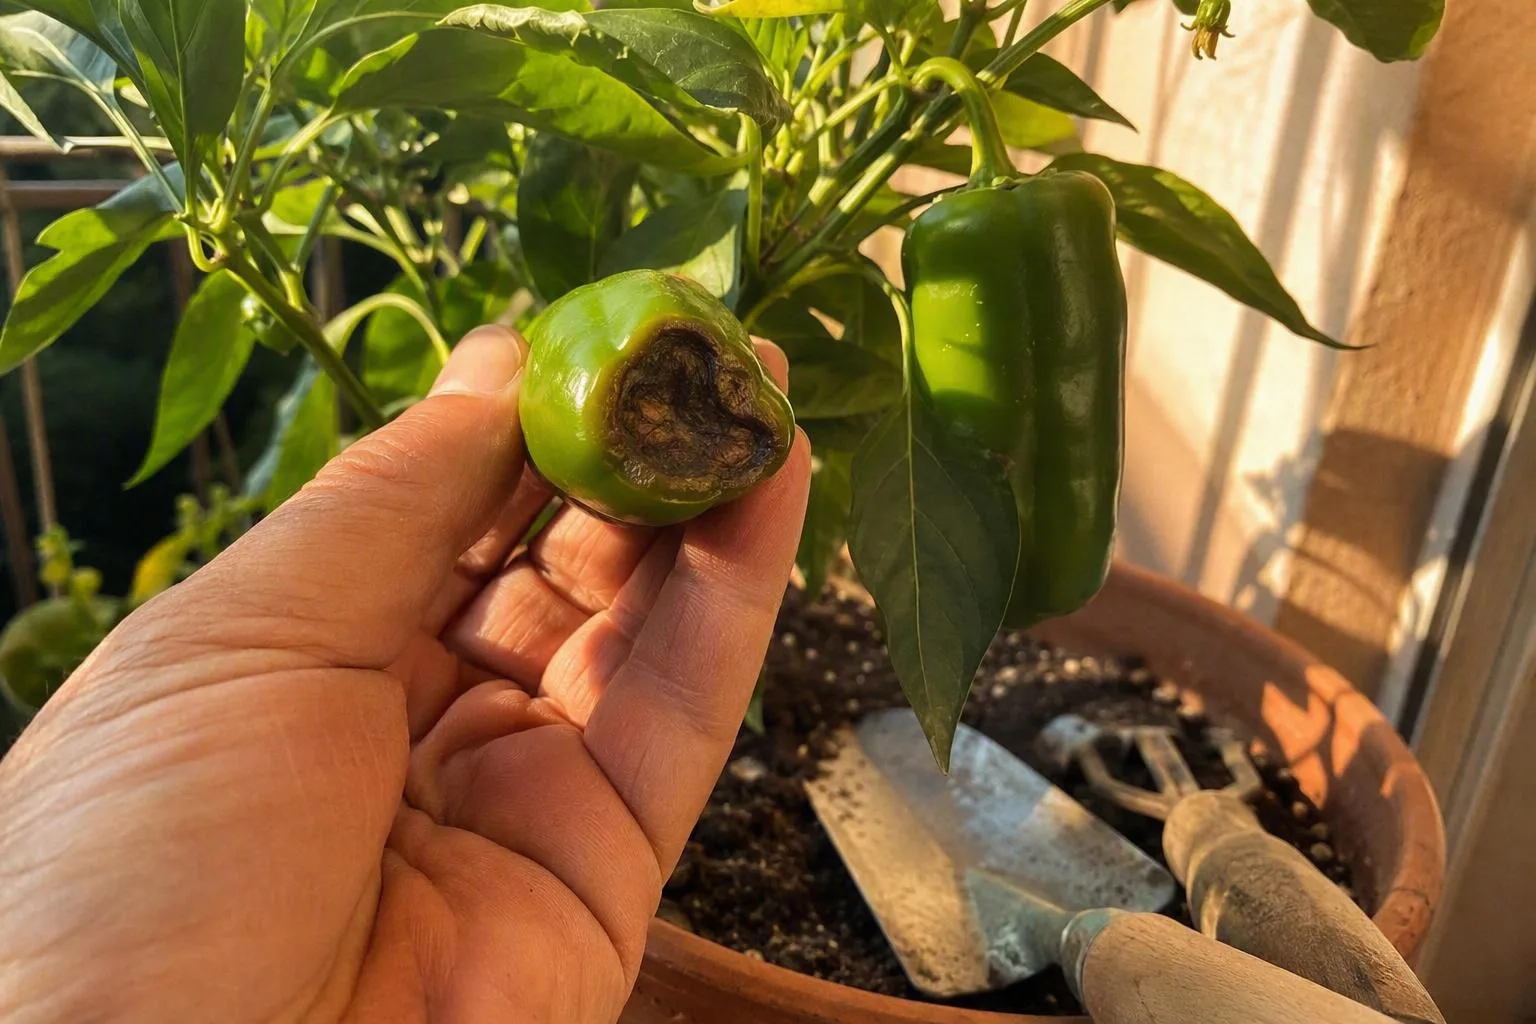
Symptom: a dark, sunken patch develops at the blossom end of a fruit. That is the familiar appearance of blossom-end rot. I treat it first as a calcium-delivery problem caused by interrupted water movement, often after a dry spell followed by heavy watering, rather than assuming the mix contains no calcium. Root damage, high salt concentration, and uneven watering can all interfere with delivery. Correct the moisture pattern and inspect the roots and drainage before reaching for a calcium additive.
Symptom: sticky leaves, pale stippling, or fine webbing. Check the undersides of leaves once a week for aphids, whitefly, and spider mites. A small infestation is easier to manage before curled leaves and flowers hide it. Isolate a badly affected pot, wash pests from sturdy leaves with a controlled stream of water, and use only a treatment labelled for edible crops, following its directions and harvest interval.
As fruit gains weight, inspect the main fork and tie the plant loosely to its stake. A rigid tie can cut into a swelling stem, while a loose loop gives the branch room to move. I prefer adding one support tie early rather than trying to catch a leaning, fruit-loaded plant after wind has already bent it.
Harvest by colour, then decide whether next season deserves 15–20 litres
Pick a pepper green once it has reached the size and shape expected for its variety. That gives the plant more room to direct energy towards later fruit. If flavour and sweetness matter more than speed, leave it until the variety reaches its mature colour. The fruit should look fully filled rather than thin and sharply ridged, and a clean snip is kinder to the branch than twisting hard.
For planning, I use a first-ripe-harvest window of about 60–90 days after transplanting, or roughly 8–12 weeks. Variety, light, night temperature, transplant shock, and whether the plant was already carrying flowers can move that window. Once a fruit reaches full size, allow roughly another 2–4 weeks for its final colour change in warm, bright conditions; cool nights or low light can stretch the wait.
For one 10-litre plant, a sensible seasonal planning range is about 5–20 substantial fruits for compact sweet or medium-fruited types. Small chillies may produce dozens of little pods because each fruit places a smaller load on the plant. A large bell pepper in the same volume may produce fewer, smaller, or delayed fruits, particularly if the site is dim or the pot dries repeatedly. Treat the 5–20 figure as a space-planning range, not a harvest promise.
My upgrade rule is physical. If the plant dries twice in a hot day, leans despite a stake, or sets fruit poorly while its light and temperature are reasonable, I’d give it 15–20 litres next season. If it stays upright, the mix dries gradually, and fruit continues setting, I’d repeat the 10-litre arrangement rather than upsizing just because a larger pot is available.
Three questions outside the main growing path
Can I grow peppers in a 10-litre self-watering pot?
Yes, one compact plant can use one. Check that the reservoir has a functioning overflow, the mix can wick water without becoming airless, and the pot is protected from prolonged saturation after heavy rain. A self-watering reservoir changes the watering method; it does not remove the need to match plant size to root volume.
Can I grow a pepper from seeds saved from a supermarket fruit?
The seeds may germinate, but a hybrid pepper may not produce a plant or fruit that matches the parent. If mature size matters on a balcony, a labelled seed packet or nursery plant is more predictable. Sow several seeds if you have room, then keep the strongest compact seedling.
Can I keep a container pepper alive indoors over winter?
Peppers can behave as short-lived perennials in frost-free conditions. Bring the pot indoors before nights approach 10°C (50°F), inspect closely for pests, reduce watering as growth slows, and put it in the brightest available window. Low winter light usually means slower growth and fewer flowers, so the plant may survive without producing much until spring.
Before the weekend, buy one labelled 12–15-litre pot if you want roughly 10 litres of actual mix, a compact plant whose mature height fits 45–75 cm, and a stake if the stem is already tall. Set the pot in its final sunny position, check every drainage hole, and mark the day you transplant. A week later, lift the pot before watering: the surface should be drying between drinks, while the morning leaves should be upright rather than permanently limp.
Frequently Asked Questions
Can I grow peppers in a 10-litre self-watering pot?
Yes, one compact plant can use one, but the reservoir needs a functioning overflow, the mix must allow wicking without staying airless, and the pot still needs protection from prolonged saturation.
Can I grow a pepper from seeds saved from a supermarket fruit?
The seeds may germinate, but a hybrid pepper may not produce plants or fruit like the parent; bought seed or a labelled nursery plant is more predictable when mature size matters.
Can I keep a container pepper alive indoors over winter?
Peppers can behave as short-lived perennials in frost-free conditions; bring the pot indoors before nights approach 10°C (50°F), inspect for pests, reduce watering and expect slower growth in low winter light.