Growing Basil in Pots: How to Keep It Bushy All Summer
A mature basil plant needs roughly 3–5 litres (0.8–1.3 gallons) of potting mix and a repeatable cut to stay bushy; a decorative 15 cm (6 in) pot often gives you neither. Once the plant has three or four pairs of true leaves, snip the growing tip 5–10 mm (about ¼ in) above a leaf pair, then keep making that cut as new stems lengthen.
That is the simple version of growing basil in pots. The rest is about protecting the root zone from cold, keeping the pot from swinging between bone-dry and saturated, and harvesting in a way that creates more branches instead of leaving one tall stem. I’d rather grow one well-spaced plant in a movable pot than cram a supermarket clump into a container and call it a herb garden.
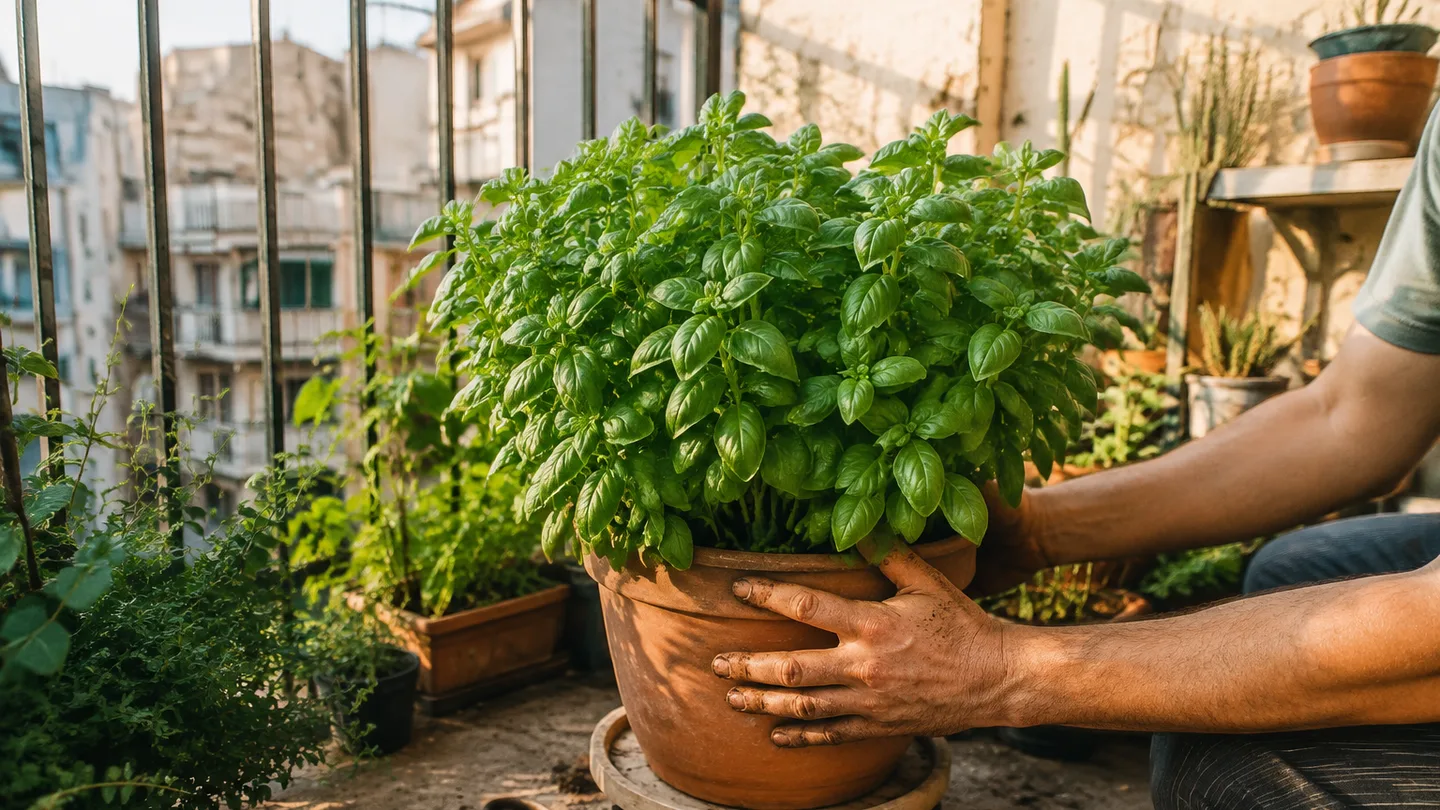
Growing basil in pots starts with the right variety and the light you actually have
I choose the variety after checking the light, not before. Large-leaf Genovese basil gives the classic pesto leaves and can fill a useful pot quickly, but it rewards strong sun and regular harvesting. Greek or globe basil stays naturally more compact, so it is a better fit for a narrow balcony, a small patio container or a spot where the light is good but limited.
Aim for roughly 6–8 hours of direct sun if you want fast, dense growth. A compact variety can manage with about 4–6 hours, but I’d expect slower growth and fewer leaves. Weak light creates long gaps between leaves—the bare stem becomes obvious—and pinching cannot completely repair a plant that is still being asked to grow in shade.
I treat a balcony as a moving light map. A railing can shade the pot in the morning, while a pale wall can bounce hot afternoon light back onto the leaves. Wind matters too: it strips moisture from the leaves and makes a small container behave as if it were even smaller. My own rule is to move the pot toward better light before I start pruning it. A basil plant that is short on sun needs more sun first, not more cuts.
If basil is your first experiment, the broader guide to growing herbs in containers uses the same root-volume logic but compares crops with different watering habits. For balcony-specific planning, I also use the sun-and-wind audit described in growing vegetables in pots on balcony.
The pot specification: 20–25 cm deep and 3–5 L of mix per plant
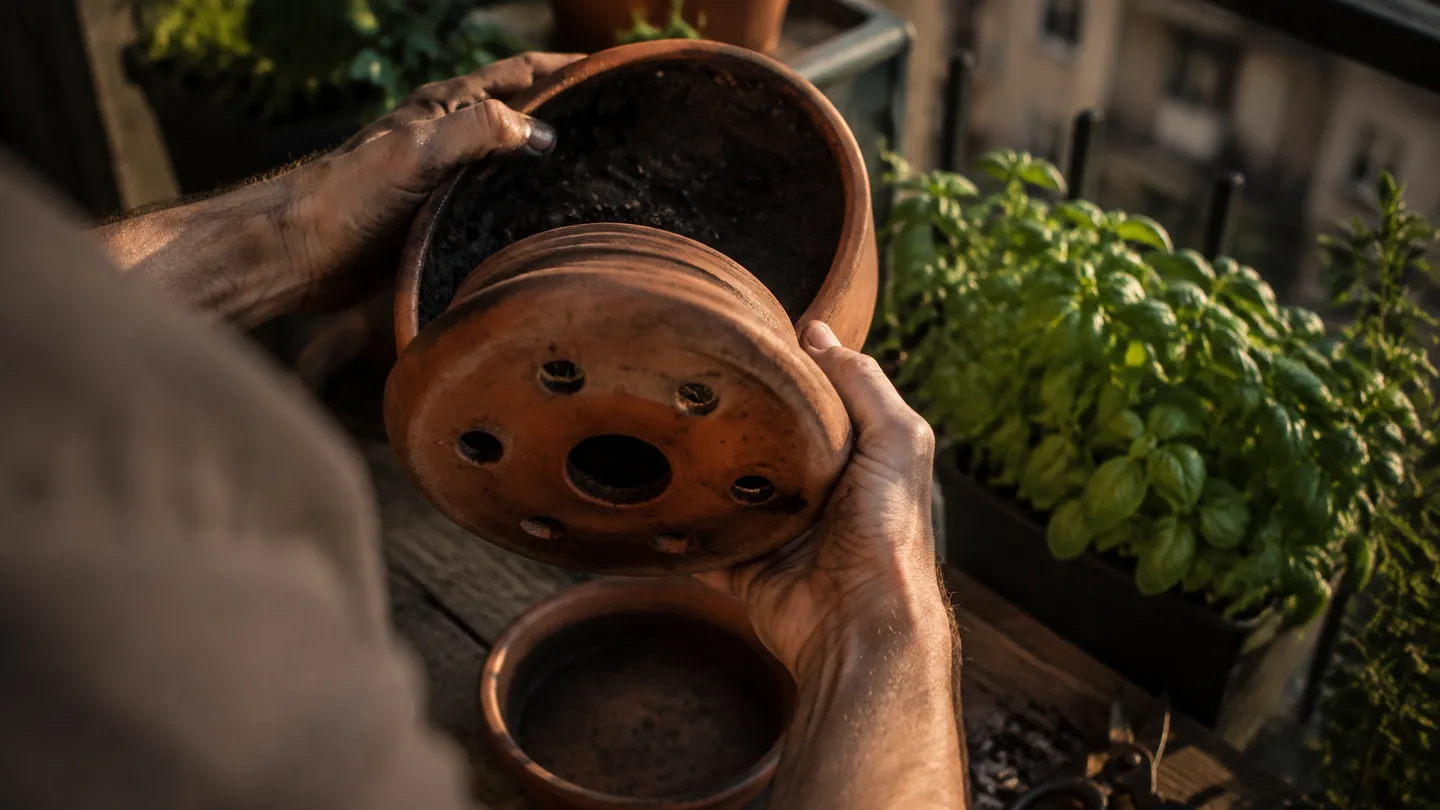
I’d shop for a container by usable depth and mix volume, not by the photograph on the label. For one mature basil plant, look for about 20–25 cm (8–10 in) of usable depth and 3–5 L (0.8–1.3 gal) of potting mix. That gives the roots room to spread while leaving a reasonable moisture buffer between waterings.
| Container | Good use | How I’d plant it |
|---|---|---|
| 15 cm (6 in) | One compact plant or a short crop | Use it only if you can check moisture often; it dries quickly. |
| 20–25 cm (8–10 in) deep | One mature basil plant | Allow 3–5 L (0.8–1.3 gal) of mix and a clear drainage path. |
| 30 cm (12 in), 10–15 L (2.6–4 gal) | Two or three plants | Space stems about 15–20 cm (6–8 in) apart and leave airflow between them. |
Use a quality potting mix rather than soil dug from a garden bed. In a container, the mix has to hold enough water for the roots while still leaving air spaces after watering. Garden soil can settle into a dense layer, making the pot heavy and slow to drain.
Drainage holes are exits, not optional accessories. I want several holes underneath or around the base, with a saucer beneath the pot only to protect the balcony or patio. Empty the saucer after watering if it remains full; a pot sitting in water has no chance to regain air around its roots.
Skip the gravel layer at the bottom. A coarse layer under fine potting mix can hold a wet band above the boundary instead of improving drainage. That trapped band is called a perched water table: water pauses above the gravel because the fine mix holds it until enough air space and pressure allow it to move. This is the same reason container-gardening guidance on potting media and drainage focuses on open mix and drainage holes rather than a false drainage layer.
Plant after the nights warm up, then protect the first week
Basil is a warm-season plant, so I wait until overnight temperatures are reliably above about 10°C (50°F) before leaving a young plant outside. A cold root zone slows growth, and a large pot filled with cool, wet mix can stay uncomfortable for longer than the small nursery pot you brought home.
If the plant was raised indoors, harden it off. That means gradually increasing its outdoor exposure instead of moving it straight from a windowsill into full sun and wind. Over roughly seven days, begin in a sheltered bright spot, extend the time outdoors, and introduce stronger sun in stages. On a balcony, afternoon shade or a temporary windbreak is often more useful than repeatedly carrying the plant from one extreme to another.
- Fill the container with potting mix to about two fingers below the rim. The space gives you room to water without washing mix over the edge.
- Set the root ball at the same depth it was growing before. Do not bury the stem to compensate for a shallow pot.
- Firm the mix lightly around the roots, then water slowly until the first steady trickle comes through the drainage holes.
- For the first few hot or gusty days, keep the pot sheltered while the leaves and roots adjust.
Avoid putting a tiny transplant straight into an enormous container if the weather is still cool. More mix means more water held around a small root system, so the pot can remain wet between checks. Basil grows into a larger pot well once warmth and light are working in its favour; the problem is the cold, saturated start.
The two-cut routine that turns one stem into a bush
Basil branches from leaf joints, or nodes. Your job is to remove the top growing point just above one of those joints so the two side buds below it get a chance to extend.
This is the cut that changes the plant’s shape: wait until the plant has three or four pairs of true leaves, then pinch or snip 5–10 mm (about ¼ in) above a leaf pair. Do not cut through the node itself. Leave the buds and leaves below the cut intact.
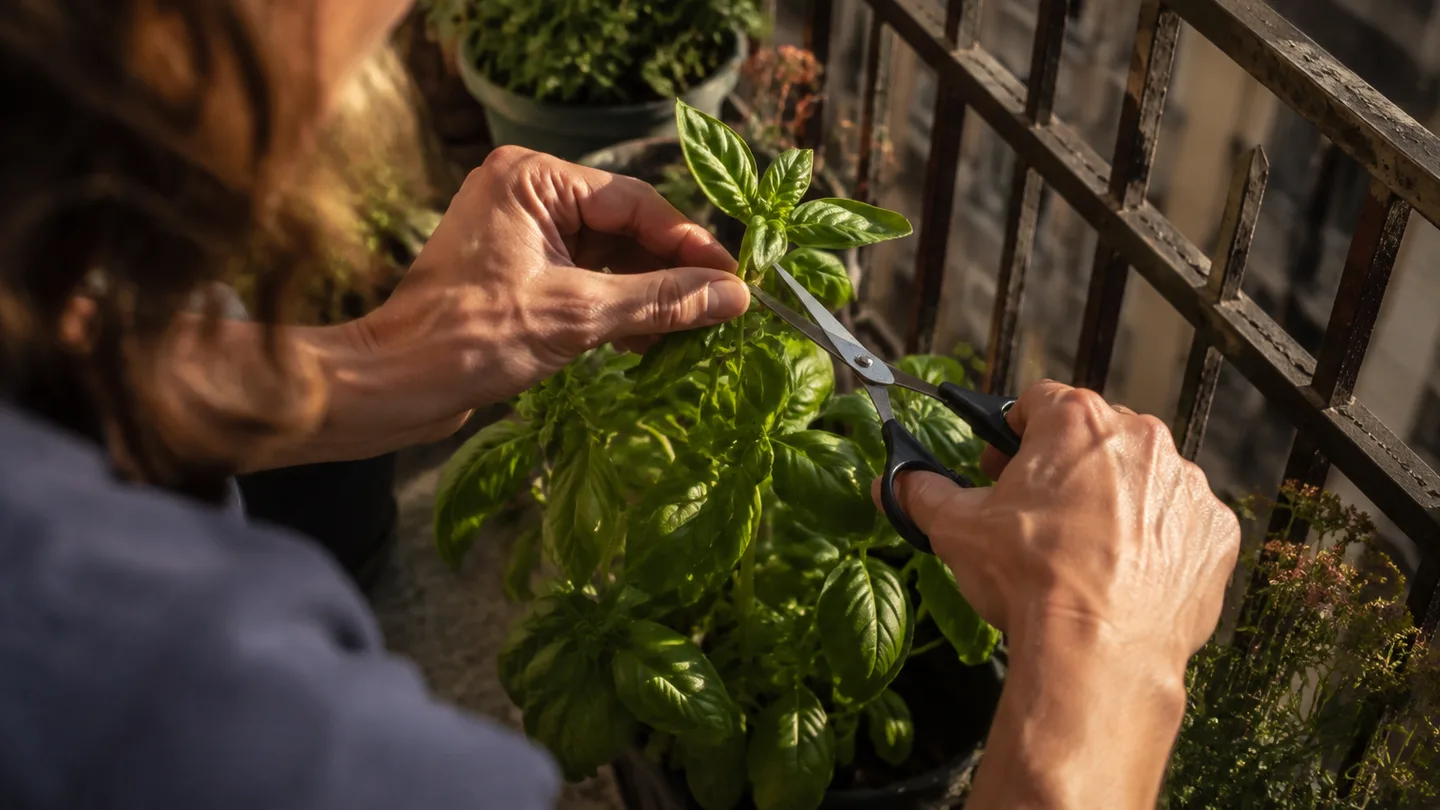
The mechanism is simple enough to remember. The top growing tip sends chemical signals that keep lower side buds quieter, a pattern called apical dominance. Remove that tip and the buds at the next node can start extending. One stem becomes two, and those two stems can later become four if you keep harvesting them in the same way.
Repeat the cut every 7–14 days while the new shoots are lengthening. I don’t follow the calendar blindly: if the tips are still short and leafy, I wait; if they are stretching upward and forming a new pair of leaves, I cut. Pinching too early leaves a weak plant with too little leaf area, while waiting until the stems are bare gives you a harder rescue.
For a leggy plant, find a healthy leaf pair lower down the stem and cut just above it. Leave several active leaves on the plant and remove no more than about one-third of the canopy at once. A cut below every leaf pair leaves a bare stick that has fewer places to regrow.
My blunt opinion is that a slightly late pinch is recoverable, but a basil plant repeatedly grown in weak light is not a pruning problem. Move it to brighter light first, then shape the new growth.
If you want to cross-check the timing, compare this routine with university extension guidance on basil pinching and harvest. The wording may differ, but the useful idea is the same: remove the growing tip above a pair of leaves, not halfway down a leafless stem.
Harvest by stem tips—and remove flower spikes before they take over
Harvesting and pruning are the same job when the goal is a bushy plant. Take 5–10 cm (2–4 in) stem tips just above a leaf pair, and leave at least two healthy leaf pairs on the branch that remains. The cut gives you leaves for the kitchen and gives the plant a new branching point.
Avoid stripping individual leaves from the base of a stem whenever you can. That removes leaf area without creating a useful fork, leaving a tall branch that is harder to keep compact. If you need only a small amount for dinner, take the tip rather than picking scattered leaves all over the plant.
Watch for a pointed flower spike emerging from the top of a stem. Flowering means the plant is shifting attention toward reproduction. If leaves are your priority, pinch the spike out as soon as you notice it, cutting back to the next leaf pair if the stem has stretched.
Flowering is not a disaster. If you want seeds, leave one or two flower spikes and accept that those stems will give you fewer tender leaves. Let the seed capsules dry on the plant, then collect them once they are fully dry. I usually sacrifice one branch for seed and keep the rest in the leaf-harvest cycle.
Water by the top 2–3 cm of mix, not by the calendar
I don’t water basil on a fixed weekday. I check the top 2–3 cm (about 1 in) of mix and lift the pot, because the same plant can need very different treatment after a windy afternoon and a cool, cloudy night.
- If the top layer is dry and the container feels noticeably lighter, water.
- Pour slowly across the surface, wait for the mix to absorb it, then pour again until water exits the drainage holes.
- Empty the saucer once the pot has finished draining.
- If the surface is dry but the pot still feels heavy and the plant is limp, check deeper before adding more water. A wet root zone needs air, not another drink.
In a small plastic pot in hot, windy full sun, basil may need water daily. A larger glazed pot in cooler part shade may go two or three days. Terracotta loses moisture through its porous sides, while plastic holds moisture longer; wind, reflected wall heat and a dark container can all shorten the interval.
Underwatered basil is usually limp with dry mix and a light pot. Overwatered basil can also wilt, but the mix stays wet and the pot remains heavy. That second case is easy to worsen if you respond to the leaves without checking the roots. Basil roots need air spaces as well as water, so the cure for wet wilt is better drainage and a pause, not a longer watering session.
Feed for steady leaf growth, not a flush of floppy green
Container plants lose nutrients every time water moves through the mix, but basil does not need a constant heavy feed. If the fresh potting mix contains starter fertilizer, wait roughly 3–4 weeks or until growth clearly slows. Then use a balanced liquid fertilizer every 2–4 weeks at the label dilution, or use a controlled-release fertilizer according to its label.
Pale, slow new leaves can point to depleted nutrition, but pale lower leaves in constantly wet mix can also signal stressed roots. Check moisture and drainage before reaching for nitrogen. Too much fertilizer can produce soft, floppy growth and leave a pale or white salt crust on the surface of the pot.
If you see that crust, water thoroughly with plain water and let the pot drain completely before feeding again. Never apply fertilizer to bone-dry roots; water first, allow the mix to absorb it, and feed later if the plant still needs it.
Midseason diagnosis: tall, yellow, wilted, scorched, or chewed
I use a two-part check before reaching for fertilizer or pest treatment: look at the light and feel the mix. Then inspect the roots and the undersides of leaves. One symptom can come from several causes, so adding a product before checking the pot often sends the plant in the wrong direction.
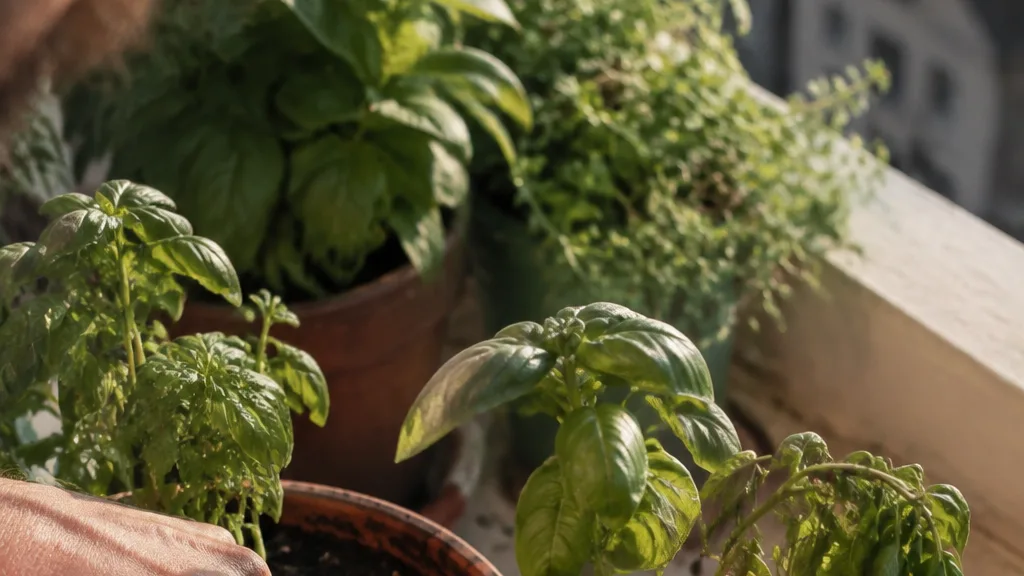
- Tall stems with long gaps between leaves: Start with weak or one-sided light, then consider a delayed pinch. Move the pot to brighter light and cut back to a healthy leaf pair. New growth is the part that will show whether the correction is working.
- Yellow lower leaves with persistently wet mix: Suspect a slow-draining pot, an overfilled saucer or watering too often before assuming the plant needs fertilizer. Check the holes, remove standing water and let the mix begin to dry.
- Midday limpness with dry mix and a light pot: Treat this as heat or water stress. Water slowly, then give temporary afternoon shade or wind protection while the plant recovers.
- Midday limpness with wet mix: Do not keep watering. Check whether the container is blocked, whether the pot sits in water, and whether the roots look soft or dark.
- Crisp pale patches on the sun-facing leaves: Consider scorch, especially after moving indoor basil directly into strong sun, or consider a root zone that dried too far. Gradual exposure and steadier moisture are the first adjustments I’d make.
- Holes, distorted tips or sticky residue: Turn over the leaves and inspect the undersides. Wash away small pests with a firm stream of water if the plant tolerates it, then keep checking new growth rather than treating the whole pot without identifying the problem.
The order matters. Light determines how much growth the plant can support; moisture determines whether the roots can function; roots determine whether feeding will help; only then would I choose a pest response. That sequence is less dramatic than adding three fixes at once, but it tells you which change actually helped.
Three side questions worth answering
- Can I transplant supermarket basil into a larger pot?
- Yes, but treat the supermarket clump as a crowded tray of individual seedlings. Water it first, slide it out gently, and separate the plants while the roots are hydrated. Keep the stronger seedlings and give each one roughly 3–5 L (0.8–1.3 gal) of mix instead of keeping the entire crowded bundle together. Expect a short pause while the roots recover.
- Can basil and other herbs share one container?
- They can share a large container if they want similar light and watering. Basil is easier to manage alone because its harvest and moisture needs are fairly active. I’d give mint its own pot because its spreading roots can crowd slower herbs.
- What if I want basil seeds instead of a bushy leaf harvest?
- Leave one or two flower spikes to mature and accept fewer leaves on those stems. Let the seed capsules dry fully before collecting them. Keep harvesting the other branches if you want leaves at the same time.
Keep the supply going with cuttings, a second pot, and a frost cutoff
Basil often becomes harder to keep compact once stems turn woody or the plant flowers heavily. My preferred backup is a second pot rather than a heroic rescue: take an 8–10 cm (3–4 in) non-flowering cutting, remove the lower leaves, and place it in water or moist potting mix. Keep it bright but out of harsh midday sun while it forms roots. Depending on warmth and the cutting, rooting can take roughly 1–3 weeks.
You can also start another pot or sow again about 3–4 weeks before you expect the first plant to decline. That timing is a planning estimate, not a promise; heat, variety, pot size and how often you harvest all change the pace. The point is to have a younger plant coming along before the older one becomes a tangle of flower spikes.
Bring basil indoors before nights approach 10°C (50°F) only if you have a genuinely bright window or supplemental light. A dim room may keep the plant alive briefly but can produce thin, stretched stems. If you need a winter container plan, the guide to growing vegetables in pots indoors covers the light problem more broadly.
Your next physical check is seven days from now: look for new side shoots below the last cut, lift the pot before watering, and confirm that water exits freely. If there are no new shoots, check light first. If the pot stays wet, fix drainage before feeding. If a new flower spike appears and leaves are still the priority, pinch it out above the next healthy leaf pair.
Frequently Asked Questions
Can I transplant supermarket basil into a larger pot?
Yes, but the crowded clump usually contains many individual seedlings. Separate it gently while the roots are hydrated, thin the weakest plants, and give each remaining plant roughly 3–5 L (0.8–1.3 gal) of mix rather than keeping the entire crowded bundle together.
Can basil and other herbs share one container?
They can share a large container only when they need similar sun and watering. Basil is easier to manage alone; mint should generally have its own pot because its spreading roots can crowd other herbs.
What should I do if I want basil seeds instead of a bushy leaf harvest?
Leave one or two flower spikes to mature, accepting that those stems will produce fewer tender leaves. Let the dry seed capsules form, then collect the seeds once they are fully dry.