Growing Chives in Pots: A Simple Setup for Repeat Harvests
A chive pot can be simple: choose one at least 15 cm (6 in) deep and about 20–30 cm (8–12 in) wide for a clump, with open drainage holes. Give it decent light, water when the mix is drying near the surface, and harvest in partial cuts; those choices matter more than an elaborate container.
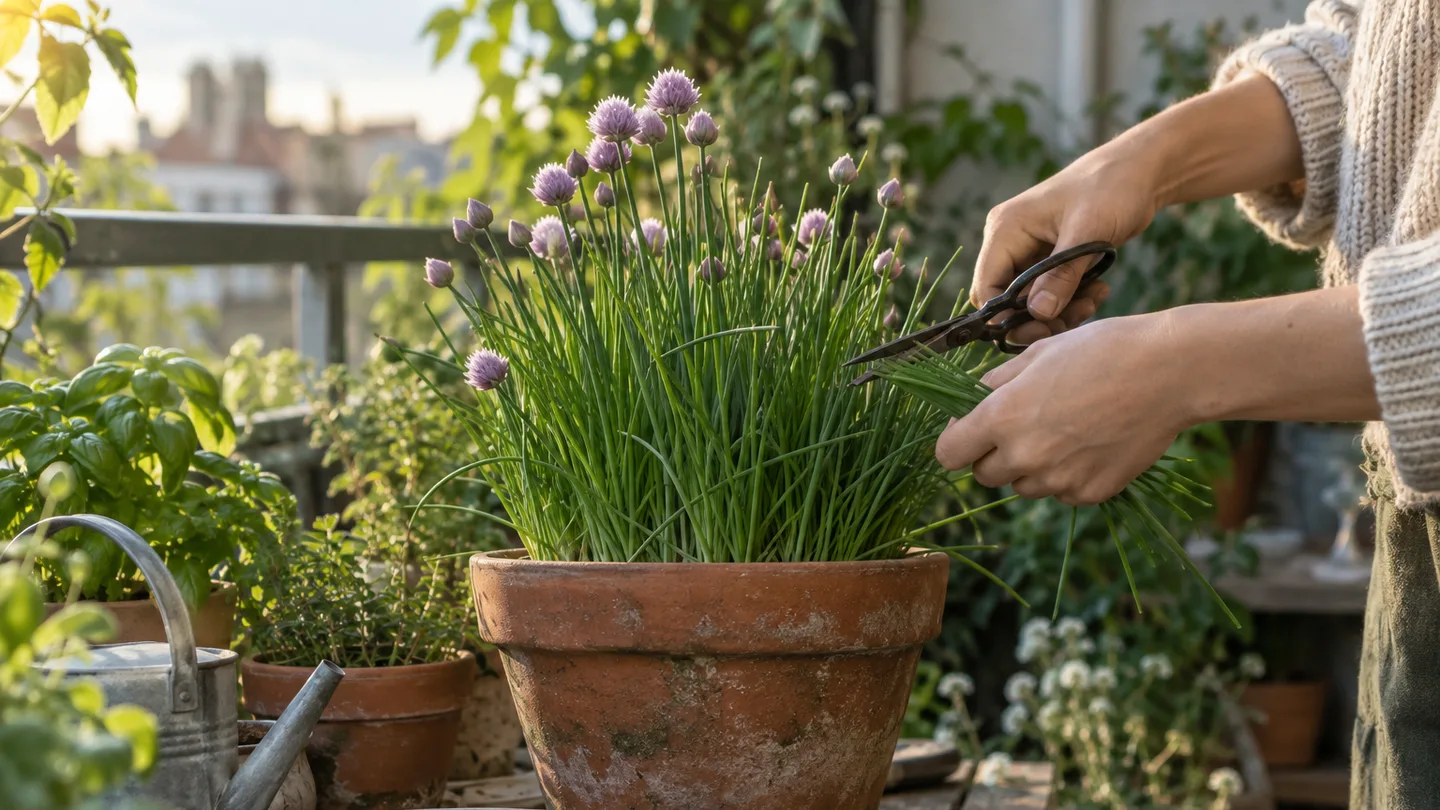
That’s the setup I’d choose before buying seeds or a plant. Chives are a forgiving crop for a small space, but a pot that stays soggy or a clump cut down to the soil can turn an easy repeat harvest into a thin, slow recovery. Here’s how I’d set up the pot, choose a starting point, and read what the leaves are telling you.
The pot that keeps a chive clump productive: 15 cm (6 in) deep, with room to spread
For one clump, look for a container roughly 20–30 cm (8–12 in) across and at least 15 cm (6 in) deep. Chives form a compact mass of roots and new shoots rather than needing a deep taproot, so a broad opening gives the clump room to thicken while the depth holds enough potting mix to buffer drying. A wider pot is also easier to water evenly than a narrow, deep one.
Check the base before you pay: it needs drainage holes that are actually open. If the pot has one small hole, make sure it isn’t blocked by a flat surface or a saucer full of runoff. Set the pot on feet or empty the saucer after watering so the drainage hole isn’t left sitting in water.
Skip the gravel layer. Water doesn’t move freely from fine potting mix into a layer of coarse stones; it tends to hang in the mix above the boundary until that layer is saturated. Gravel also takes up space that could hold mix and roots. Use a potting mix made for containers from top to bottom, and let the holes do the draining.
A practical shop-floor example: if you have a 25 cm (10 in) wide pot that is 15 cm (6 in) deep, with several clear holes, you have a sensible home for one established clump. For a second clump, I’d buy another pot rather than crowding both into that one. The trade-off is less spare counter space in exchange for better access to each clump and a simpler harvest.
Choose a potting mix for containers rather than dense garden soil. Container mix is designed to leave air spaces while holding some moisture; ordinary garden soil can compact in a pot, making it harder for water and air to reach roots evenly. Fill the pot, water it once to settle the mix, then top it up if the surface sinks. Leave a little room below the rim so water doesn’t spill over before it can soak in.
If you’re still weighing up materials and shapes, the broader guide to growing herbs in containers can help you compare the trade-offs. My preference for chives is uncomplicated: choose a pot with a wide opening, dependable holes, and a size you can lift safely when it’s wet.
Seed or division? Pick the starting point before you fill the pot
Seeds cost you time; a division costs you a plant. If you want a small clump established sooner, start with a healthy chive plant or a division from a mature clump. If you like watching a crop begin from seed, or want several pots, sowing is a reasonable choice—but plan on waiting longer before you take a meaningful harvest.
For seed, dampen the mix first so the small seeds don’t wash into a heap. Sow them about 6 mm (¼ in) deep, spaced roughly 2.5 cm (1 in) apart, then cover lightly and water gently. Keep the surface lightly moist, not waterlogged, while you wait. If several seedlings come up close together, you can leave them as a small cluster or thin the crowded ones once they’re easy to handle. Don’t keep lifting the surface to check for germination; that can disturb seeds before they establish.
Seedlings grow into harvestable plants gradually. Let them put on a useful stand of leaves before you start cutting, and make the first harvest light. In a small pot, it’s better to wait for a sturdy clump than to treat a few young blades as a full crop. Growing basil in pots follows a different rhythm, but the same container principle applies: a plant needs enough established growth to recover after you remove leaves.
With a division, ease the root ball out of its nursery pot and tease apart a section only if it has its own roots and several shoots. Set it in the new pot at the same depth it was growing before: the point where the leaves emerge should sit at the mix surface, not buried under several centimetres of soil. Firm the mix gently around the roots, water until excess drains, and keep an eye on moisture while the plant settles.
A division usually gives a quicker start because it already has roots and established shoots; a seedling has to build both before it can replace harvested leaves. That doesn’t mean a division is automatically trouble-free. A damaged, dry, or very crowded piece can stall, so keep the first few cuts modest and watch for fresh growth before treating it as a regular supply.
Don’t pack the crown under the mix to make the plant feel secure. Buried leaf bases stay damp, and a loose division can settle lower after watering. If the crown looks covered, lift the plant gently, add or remove mix, and reset it so the leaves emerge at the surface.
Light and water decide whether the leaves stay full and tender
Aim for about six hours of sun if your balcony or patio gets it. Chives can grow with less, but reduced light may mean slower growth and thinner leaves. If your only spot gets a shorter stretch of direct sun, try it before giving up: place the pot where it gets the brightest available light, and rotate it now and then if one side leans toward the window or open sky.
Water by checking the mix, not by following a fixed weekday schedule. Push a finger about 2.5 cm (1 in) into the surface. If it feels dry at that depth, water slowly until some runs from the drainage holes; if it still feels moist, check again later. The goal is evenly damp mix with the excess gone, not a pot that stays saturated.
The interval changes with the pot and the spot. A small plastic pot in hot sun and wind can dry much faster than a larger glazed pot in part shade. Wind pulls moisture from leaves and the potting surface; heat speeds evaporation; and a bigger volume of mix usually takes longer to dry through. That’s why “water every two days” is a poor rule for a balcony garden. Your finger and the pot’s weight after watering are more useful guides.
Thin leaves can point to low light, but check the whole setup before moving the pot. Is the clump getting brighter light than it did last week? Has it been cut hard? Is the mix dry right through, or persistently wet at the bottom? A chive plant responds to several stresses with slow or weak growth, so changing one condition at a time makes the result easier to read.
For more on reading container moisture, the site’s guide to watering herbs in pots: how to tell when they need a drink is a useful companion. The Royal Horticultural Society’s guidance on growing chives is another reference to check if you want a second horticultural perspective; local conditions can change the care your pot needs.
Cut for another flush: harvest at 15–20 cm (6–8 in), not down to the crown
Start harvesting when the leaves are around 15–20 cm (6–8 in) tall and the clump has enough blades to spare. Gather a small handful and snip the leaves about 2.5–5 cm (1–2 in) above the mix. That short stub leaves the base intact, where new growth can emerge. Cutting flush with the soil or pulling leaves out by hand can damage the crown and roots.
Take no more than roughly one-third of the clump in a single harvest, especially while it is young or recently divided. The remaining leaves keep feeding the plant while it replaces what you cut. If you need more, harvest from a second established pot rather than stripping the first one bare.
When the leaves reach harvest size, gather a few from around the clump instead of taking every blade from one side.
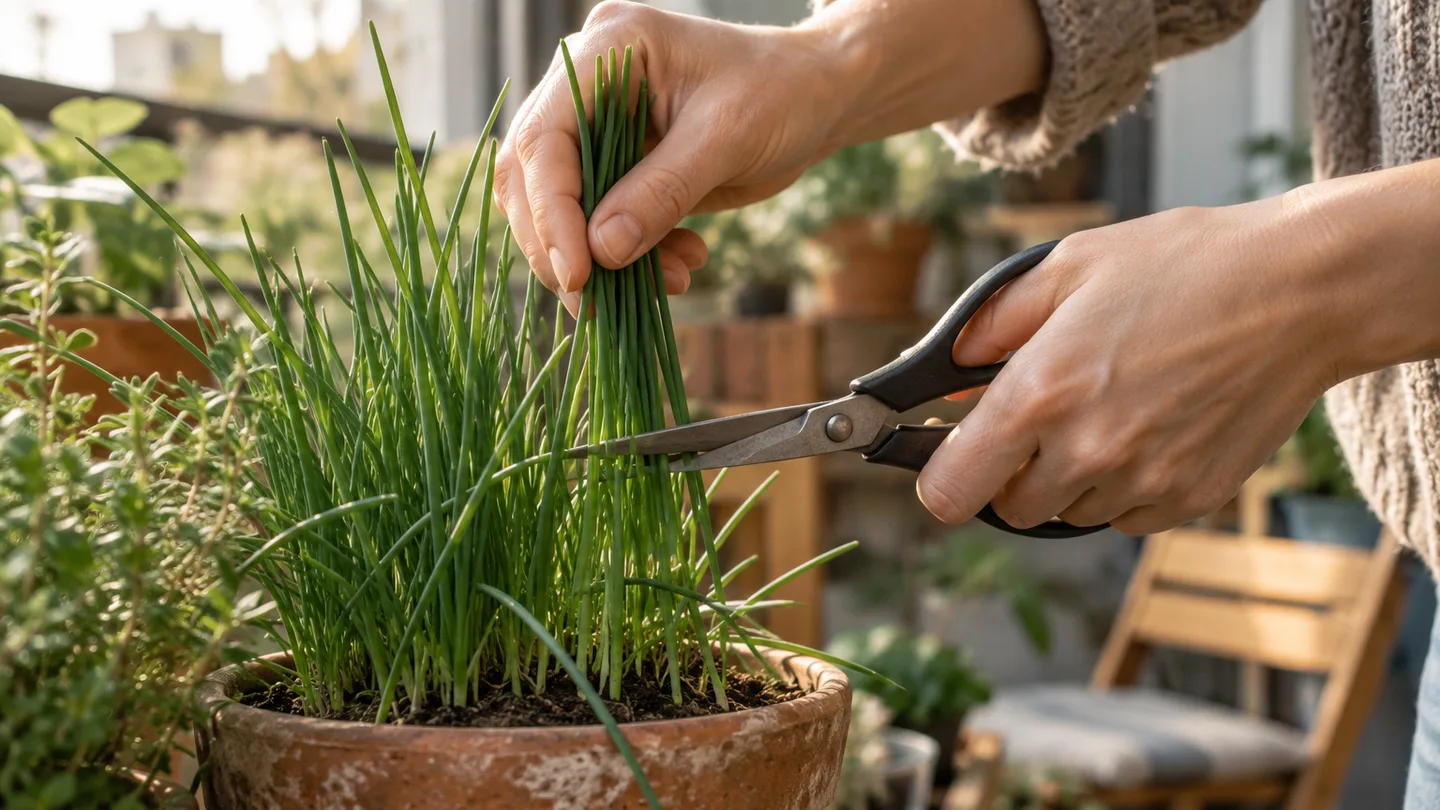
Fresh leaves can appear again during active growth, but don’t expect the same turnaround in every pot or season. A plant with good light, steady moisture, and plenty of uncut leaves can replace a light harvest sooner than a stressed clump or one slowed by cool weather. Watch for new shoots rather than putting a date on the next cut.
Here’s a useful decision rule: if the clump has short new blades but few mature ones, wait. If several leaves have reached cutting height and the plant still looks full, take a modest handful. If the plant looks sparse, let it rebuild. That’s more reliable than harvesting on a calendar just because it has been a week.
Use clean scissors and make a tidy cut. When you’re harvesting for dinner, cut only what you’ll use soon; the leaves are at their best fresh, and a full shearing doesn’t improve the plant. My judgment call is that restraint is the whole trick with chives in a small pot: frequent light cuts are easier for the clump to recover from than one ambitious haircut.
After the first flush: flowers, feeding, division, and winter dormancy
Chives can flower as the clump matures. Flowering is a normal stage, not a sign that the pot has failed. If you mainly want leaves, snip flower stalks near their base when they appear; once flowering has begun, leaf growth may not be as tender or uniform as before. You can also leave some flowers if you like their look and want to see how the plant develops.
Feed modestly while the plant is actively growing, following the directions on a fertilizer labelled for edible plants or herbs. Don’t add extra fertilizer just because leaves look pale: low light, waterlogged mix, dry roots, and an overcrowded clump can all produce weak-looking growth. Feeding a stressed plant before checking those basics can add salts to the pot without fixing the cause.
After a few seasons, a clump may become crowded: the centre can thin, the roots fill the pot, or new shoots have little open mix around them. That’s a cue to divide, not a deadline. Lift the plant, split it into rooted sections, refresh the potting mix, and replant one section in each suitable pot. If the plant is still growing well and the pot isn’t packed, there’s no prize for dividing it early.
In cold weather, growth may slow or the leaves may die back. Chives are perennial, but roots in a pot are more exposed to cold and temperature swings than roots in the ground. How much protection is appropriate depends on your local winter and the pot’s exposure. In a mild climate, the pot may be fine where it is; in a colder or windier spot, moving it beside a sheltered wall or into an unheated protected area can reduce exposure without keeping it warm indoors.
Water less as growth slows, but don’t assume a dormant pot can never dry out. Check the mix occasionally and water if it has become dry through the root zone, allowing runoff to drain. When new leaves appear again, return to checking moisture more often. The plant’s growth, not the month on the calendar, tells you when to resume routine care.
Yellow tips, thin leaves, soggy centers: diagnose the pot before adding anything
Yellowing leaves: check moisture first. If the mix is wet well below the surface and stays that way, look for blocked holes, a saucer holding water, or a pot without enough drainage. Clear the holes, empty standing runoff, and let the mix drain. If the mix is dry at finger depth and the pot feels light, water thoroughly instead. Both too little and too much water can leave a plant looking tired, so the feel of the mix helps separate the two.
Thin, floppy, or sparse growth: check light, then harvest history. A pot receiving only a little direct sun may produce more slowly; a clump cut too hard needs time to replace leaves. Move the pot toward brighter light if you can, stop harvesting for a while, and look for fresh shoots. If the crown is buried, reset it at the mix surface rather than adding fertilizer.
Mix that stays soggy: inspect the drainage path from the surface to the saucer. Make sure the holes are open, the pot isn’t sitting in runoff, and there isn’t a gravel layer underneath the mix. If the potting mix has compacted or the container has no working outlet, correcting the container is more useful than changing the watering schedule alone.
Dry mix soon after watering: water slowly over the surface instead of pouring in one spot. If water immediately runs down the sides and out, the mix may have pulled away from the pot or become difficult to rewet. Apply water in a couple of passes, pausing between them, so the mix has time to absorb it; then check that the centre is moist rather than assuming runoff means the whole pot is watered.
Before you buy anything to solve a weak-looking plant, check three things in order: the mix at root depth, the drainage holes, and the light the pot actually receives. That quick inspection often tells you whether the next move is water, a better position, a clear hole, or simply leaving the scissors alone for a week. Take a look at your pot today, then check for new upright leaves in seven days.