Growing Garlic in Containers: Pot Size, Timing & Yield
A 20 cm (8 in) pot is the workable floor for garlic, but I prefer 25–30 cm (10–12 in) of depth because the extra mix gives the roots a steadier moisture reserve. In a container holding roughly 10–15 litres (2.6–4 US gallons), plan on about 4–6 cloves rather than trying to squeeze in a whole head.
That is the useful starting point for growing garlic in containers: choose the pot first, then count the cloves. Garlic is not difficult, but it spends months in a small, exposed root zone, so a shallow pot, wet mix or poorly timed planting can quietly decide the harvest long before you see a bulb.
My broader guide to growing vegetables in pots for beginners starts with the same constraint: the container is part of the growing system, not just a decorative holder. Garlic rewards that way of thinking.
The pot specification: 20–30 cm deep, 10–15 litres of mix
Garlic bulbs form close to the planting clove rather than travelling deeply through the pot. Extra depth is still useful, but mainly because it slows drying and gives the roots more room for an even supply of air and water. A deeper pot does not make the bulb grow proportionally deeper.
| Container choice | How I’d use it | What it changes |
|---|---|---|
| 20 cm (8 in) deep | Minimum workable size for a small crop | Dries faster and gives less room for watering errors |
| 25–30 cm (10–12 in) deep | Preferred size for a balcony or patio pot | Provides a better moisture buffer through wind and cold |
| 10–15 litres (2.6–4 US gal) of mix | Useful target for one 25–30 cm diameter pot | Usually allows about 4–6 cloves at sensible spacing |
Spacing is the second part of the specification. Set cloves about 10–15 cm (4–6 in) apart. In a 25 cm pot, four cloves may be the sensible capacity; in a wider 30 cm pot, six can fit if the shape is broad enough and you keep them away from the wall by a few centimetres.
Check the container’s actual internal measurements rather than trusting a label such as “large.” A tapered pot may hold much less mix than its top diameter suggests. A rough cylinder estimate is enough for shopping: diameter multiplied by diameter, multiplied by depth, then adjusted downward because you will leave headspace and because many pots taper. You do not need laboratory precision; you do need to notice when an attractive pot is really a shallow bowl.
Before planting, confirm that water can leave through several open drainage holes. Fill the pot to about two fingers below the rim. That empty strip gives water somewhere to spread before it runs over the edge, which matters on a balcony where runoff can stain walls or drip onto the neighbour below.
Also lift the pot mentally, not just physically. Wet mix is much heavier than dry mix, and a tall crop of leaves can catch wind. On an exposed balcony, a broad, stable container is a better choice than a narrow lightweight one. If the pot will sit on a ledge, check the building’s rules and the ledge’s load limit before you fill it.
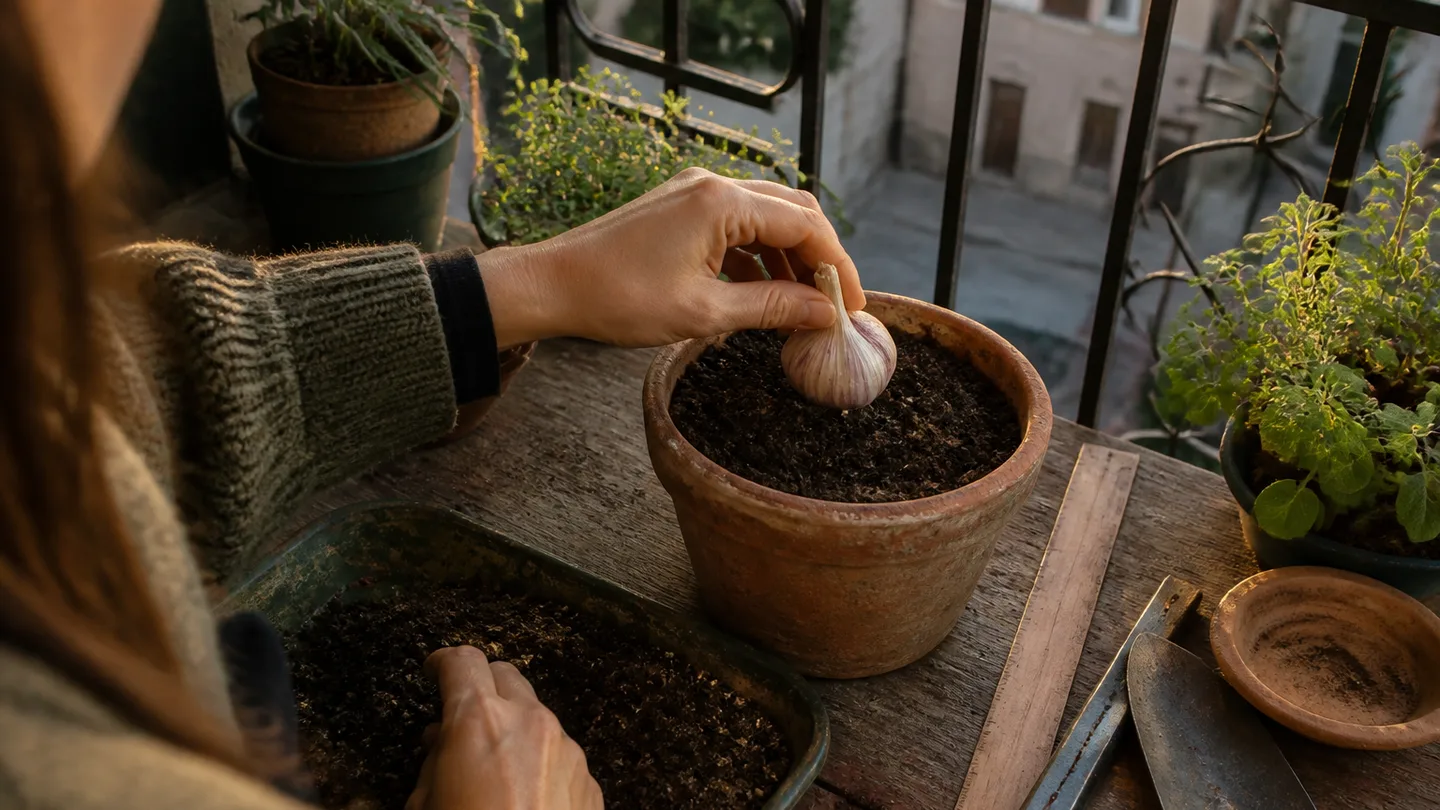
Planting date is a countdown, not a calendar month
The most useful timing rule is to plant fall garlic about 4–6 weeks before the ground in your area would normally freeze. That gives the clove time to make roots before the coldest weather without encouraging a long flush of soft top growth.
Use local frost-date guidance as a starting point, but remember that a pot is not the ground. A container has cold air on more sides, so the mix can freeze and thaw more quickly. A sheltered pot near a wall may behave differently from the same pot on an open rooftop. I would rather adjust the position of the container than pretend one calendar month works for every balcony.
Spring planting is still possible as soon as the mix is workable and not frozen solid. The trade-off is time. A spring-planted clove has less opportunity to experience the cool period and build a large root system before warm weather pushes it toward bulb formation. I would expect smaller bulbs from a late spring planting, although the result depends on the variety, light and length of the growing season.
Hardneck and softneck garlic make slightly different container choices. Hardneck types are more likely to send up a scape, which is a firm flowering stalk that appears before the bulb finishes swelling. Softneck types generally suit milder climates and often store well. If your winter is reliably cold, hardneck varieties are worth considering; if your winters are mild, softneck may be the less complicated choice.
Do not treat the first green shoot as proof that the timing was perfect. A clove can sprout in a warm spell and still need a proper cool season before it produces a substantial bulb. The useful question is whether the plant has enough time left for steady leaf growth and bulbing once spring arrives.
One clove per hole: mix, drainage and 3–5 cm of cover
Use a free-draining container mix rather than soil dug from a garden bed. Garden soil settles heavily in a pot, leaves less air around the roots and can form a dense wet layer after repeated watering. A container mix with coarse material such as bark fibre, perlite or a similar drainage component gives excess water a clearer route out.
Do not add a layer of gravel to the bottom as a cure for poor drainage. Water does not simply fall through the gravel and leave the mix above perfectly dry. At the boundary between fine mix and coarse stones, water can remain held in the finer material. This is often called a perched water table: a wet zone that sits above the drainage layer instead of disappearing into it. If the holes are blocked, gravel will not solve the underlying problem.
When I first tried garlic in a balcony pot, I treated it like a miniature garden bed. I used heavy soil, left the container in an exposed corner and watered according to the calendar. The leaves looked acceptable for a while, but after a cold, wet spell the mix stayed heavy and two cloves softened. Since then, I have made drainage and shelter decisions before I count the planting cloves.
- Check the holes. Make sure they are open and not sealed against a flat surface. Raise the pot on feet or narrow blocks if water collects underneath.
- Pre-moisten very dry mix. Dry potting mix can repel the first watering, so dampen it lightly and mix it through before planting.
- Fill to two fingers below the rim. Leave enough headspace for watering and for a light mulch layer.
- Set each clove root plate down. The root plate is the flat, rough base where the roots emerge. The pointed tip faces upward.
- Space cloves 10–15 cm (4–6 in) apart. Press them into shallow depressions rather than making deep narrow holes that can fill with water.
- Cover with 3–5 cm (1–2 in) of mix. Firm the surface gently so the clove is held in place, but do not compact the whole pot.
Finish with a loose 2–5 cm (1–2 in) layer of mulch. Chopped leaves, straw or another clean, airy material can reduce rapid temperature swings and slow evaporation. Keep it loose around the shoots rather than packing it against the neck. In a wet winter, a thick, soggy mulch can hold too much moisture, so thin it if the surface stays saturated.
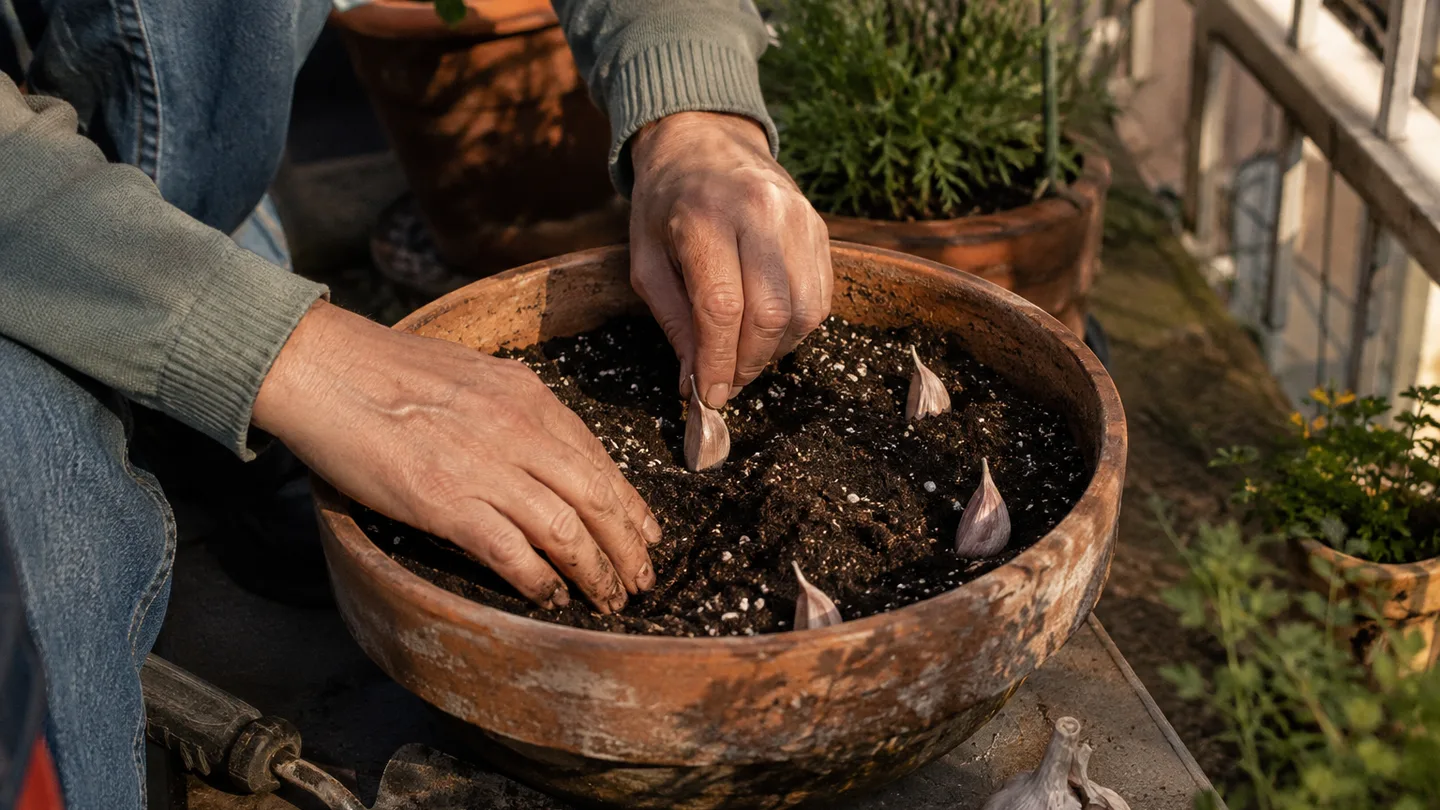
Winter on a balcony: protect the pot without waking the cloves
Winter care is a balancing act. You want the cloves cold enough to follow their seasonal rhythm, but you do not want the entire root ball repeatedly freezing, thawing and sitting in water.
Move the pot close to a sheltered wall, ideally where it is protected from the strongest wind but still exposed to outdoor cold. Wrap or insulate the outside of the container if the material is thin, leaving the drainage holes clear. Raising the pot above standing water matters just as much as wrapping it; insulation will not help if the root zone remains waterlogged.
For winter watering, test the top 2–3 cm (about 1 in) of mix with your finger. If that layer is dry and the pot is not frozen, water lightly enough to moisten the root zone without leaving a saucer full of runoff. If the mix is damp, leave it alone. Calendar watering is a poor fit for winter containers because rain, wind and temperature can change the drying rate from one week to the next.
If a hard-freeze forecast is much colder than your usual conditions, move the pot under cover into an unheated shed, garage or porch if you have one. I would not move it into a heated room for routine protection. Warm indoor conditions, weak winter light and dry air can encourage leaves to grow before the roots and bulb are ready.
This is the same reason growing vegetables in pots on balcony space needs a position plan, not just a planting plan. The best container spot can change between autumn, winter and spring.
Green leaves, swollen bulbs: the active-growth checkpoints
Once spring growth is underway, garlic wants as much direct sun as your space can provide. Aim for roughly 6–8 hours where possible. If your balcony gets only one or two useful hours, you may grow leaves, but I would treat a full bulb harvest as an optimistic project rather than the main plan. Green garlic can be the more honest crop in that situation.
Water deeply when the top 2–3 cm (about 1 in) dries during active growth. Apply water slowly enough that it reaches the centre of the pot, then stop when a little drains from the holes. Empty any saucer or tray that holds runoff. The goal is a fully moistened root zone followed by some air returning to the mix, not a permanently wet pot.
Adjust the interval rather than memorising a schedule. A plastic pot in full sun and wind may need checking daily in hot weather. A glazed or thick-walled pot in part shade may stay damp for several days. A small container can dry before a larger one even when both sit side by side. If you are already growing vegetables in pots, garlic is a useful crop for learning this moisture check because its leaves show stress without requiring daily attention at the same hour.
Feeding is most useful while the plant is building leaves. If the mix contains starter fertiliser, wait until active growth is established before adding more. Otherwise, use a balanced container feed or a modest nitrogen-containing feed according to its label during the leafy stage. I prefer several restrained feeds to one heavy application.
Too much nitrogen late in the season can keep the plant producing lush leaves while the bulb lags behind. Once the lower leaves begin to yellow naturally and the bulb is swelling, taper feeding rather than trying to force another flush of green. Garlic needs healthy leaves because they support the bulb, but more foliage is not automatically more garlic.
As the harvest window approaches, let the surface dry slightly farther between waterings, while still protecting the plant from a hard, hot drought. The change should be gradual. A sudden dry-out can stress roots and leave the bulb undersized even if the leaves appear healthy.
Harvest by the leaves, then count the bulbs
Garlic gives you a better harvest signal than a fixed date. I start checking closely when roughly one-third to one-half of the leaves have browned while several upper leaves remain green. The lower leaves are no longer feeding the plant efficiently, but the remaining green leaves still help protect the bulb’s outer layers.
During the final week or two, reduce routine watering if the weather is moderate and the mix is drying at a reasonable pace. Do not force the pot into bone-dry conditions during a heatwave. In hot weather, check the plant and mix directly; the aim is to avoid unnecessary wetness before harvest, not to manufacture drought stress.
Loosen the mix beside the bulb with a hand fork or narrow trowel, then lift from underneath. Pulling hard on the leaves can bruise the neck or tear the bulb from its roots abruptly. Brush off loose mix rather than washing the bulbs if you intend to store them.
Cure the bulbs for about 2–4 weeks in a warm, dry, ventilated place. Spread them in a single layer or hang them so air can move around the necks. Keep them out of persistent damp and strong direct sun. The outer skin should dry and tighten before you trim roots or stems for storage. I use garlic harvest and curing guidance as a cross-check, but the bulb itself is the final judge: a soft neck or damp outer skin means it needs more drying time.
Yield is easiest to estimate from the planting count. For planning purposes, one planted clove is one possible bulb. A 30 cm (12 in) pot holding 4–6 established cloves can therefore produce about 4–6 bulbs if every plant develops normally. That is a capacity estimate, not a promise of six large supermarket-sized heads. Variety, planting date, winter conditions, sun and disease can all change bulb size or leave a clove unproductive.
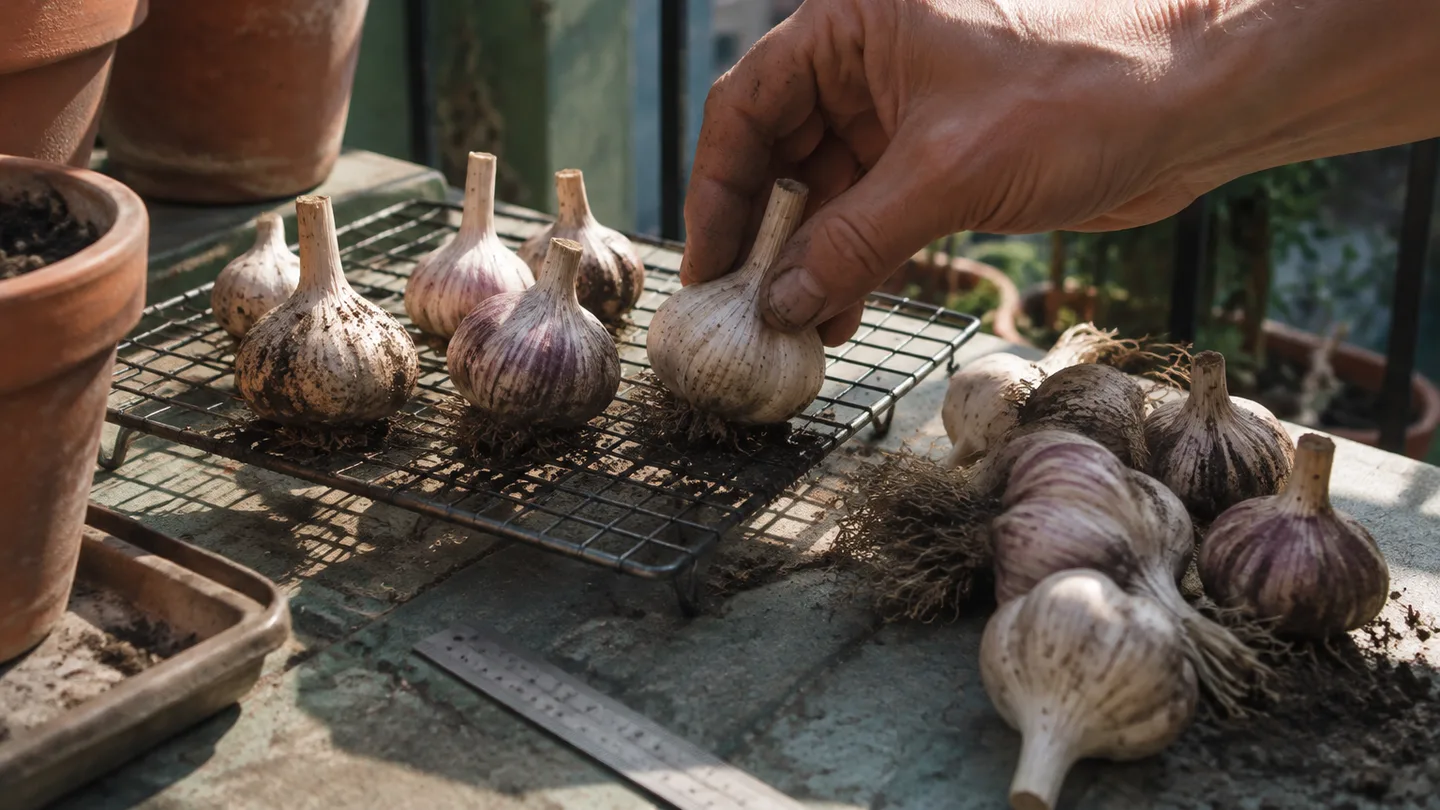
When the pot disappoints: a symptom → cause → fix map
Container garlic problems usually become easier once I separate the visible symptom from the root-zone cause. Use the table as a checking order rather than trying every possible correction at once.
| What you see | Likely mechanism | Immediate fix | Check next week |
|---|---|---|---|
| Lower leaves yellow near the expected harvest | Normal ageing as the plant shifts toward bulb maturity | Check the upper leaves and bulb swelling before adding feed | More lower leaves should yellow gradually while upper leaves remain firm |
| Most leaves yellow early and the mix stays wet | Roots are short of air because drainage or watering is poor | Inspect holes, remove standing water and move the pot under cover from rain | The mix should begin drying between checks; widespread collapse means root damage may be advanced |
| Clove or bulb feels soft and smells sour | Rot has developed in a cold, saturated or damaged planting site | Remove the affected material and do not bury it in the same potting mix | Nearby plants should have firm necks and no spreading soft patches |
| Bulbs remain tiny | Late planting, low light, crowding, insufficient cool exposure or a short growing season | Give remaining green plants steady water and sun; do not expect a late feed to rebuild lost time | Healthy leaves should stay upright while the bulb slowly enlarges |
| Leaves are vigorous but bulbs barely swell | Too much late nitrogen, too little direct sun or the plant has not reached maturity | Stop nitrogen and review the light and planting date before harvesting early | Bulb shoulders should become more distinct as the lower leaves age |
| Cloves push upward after winter | Freeze–thaw movement has lifted the upper mix or shifted a shallow clove | Add a little fresh mix around the exposed sides without burying green leaves | The clove should stay anchored and the neck should not rock when touched gently |
The distinction between normal ageing and trouble is timing. A few lower leaves turning yellow near harvest is useful information. The whole plant yellowing while the pot is cold and wet is a root-zone warning. If you check that difference before reaching for fertiliser, you avoid adding nutrients to a plant that cannot use them.
Four side decisions that save a season
Can I grow garlic from supermarket cloves?
You can try, and some supermarket cloves will sprout. The uncertainty is the problem: you may not know the variety, whether the cloves were stored in a way that affects sprouting, or whether they suit your winter conditions. Certified planting garlic usually gives a more predictable starting point for timing and bulb size. For a first container, I would buy planting stock rather than use the smallest head from the kitchen.
Can I grow full garlic bulbs indoors?
You can grow garlic greens on a bright windowsill, but full bulbs are a harder indoor project. A heated room may not provide the cool seasonal period, strong light and steady root-zone conditions that a bulb crop needs. If your only space is indoors, plant a few cloves for greens and treat bulb formation as a bonus rather than the expected result.
Can garlic grow in a grow bag?
Yes, provided the bag holds at least about 20 cm (8 in) of mix, drains freely and sits securely. A soft grow bag can dry unevenly and become unstable in balcony wind, especially after watering. Choose a broad base, keep it away from a hot wall and check the lower part of the mix rather than judging moisture from the surface alone.
Can I reuse the potting mix next year?
Refresh the mix and remove every old root before replanting. If the previous crop had soft cloves, rot or a spreading disease problem, replacing the mix is the safer choice, particularly if you plan to grow garlic, onions or shallots in the same container. Do not put diseased scraps into a small balcony compost system unless you know it reaches conditions that break down the problem.
Before the weekend, choose the container, check the drainage holes and measure the mix it actually holds. Then buy enough free-draining potting mix for the pot, select 4–6 sound cloves for a 30 cm container, and write the usual first hard-freeze date from your local frost-date guidance on the label. The job for the next week is simple: keep the planted mix lightly moist, sheltered and cold—not warm.
Frequently Asked Questions
Can I grow garlic from supermarket cloves?
Yes, they may sprout, but the variety, storage treatment and disease history are uncertain; certified planting garlic gives more predictable timing and bulb size.
Can I grow full garlic bulbs indoors?
You can grow garlic greens on a bright windowsill, but full bulbs usually need stronger light and a cool seasonal period than a heated room provides.
Can garlic grow in a grow bag instead of a rigid pot?
Yes, provided the grow bag holds at least about 20 cm (8 in) of mix, drains freely, and is stable enough not to dry or tip in balcony wind.
Can I reuse the potting mix for garlic next year?
Refresh the mix and remove every old root; if the previous crop had rot or disease, avoid replanting garlic or another allium in the same mix without replacing it.