Growing Kale in Containers: The Pot Size, Sun and Harvests
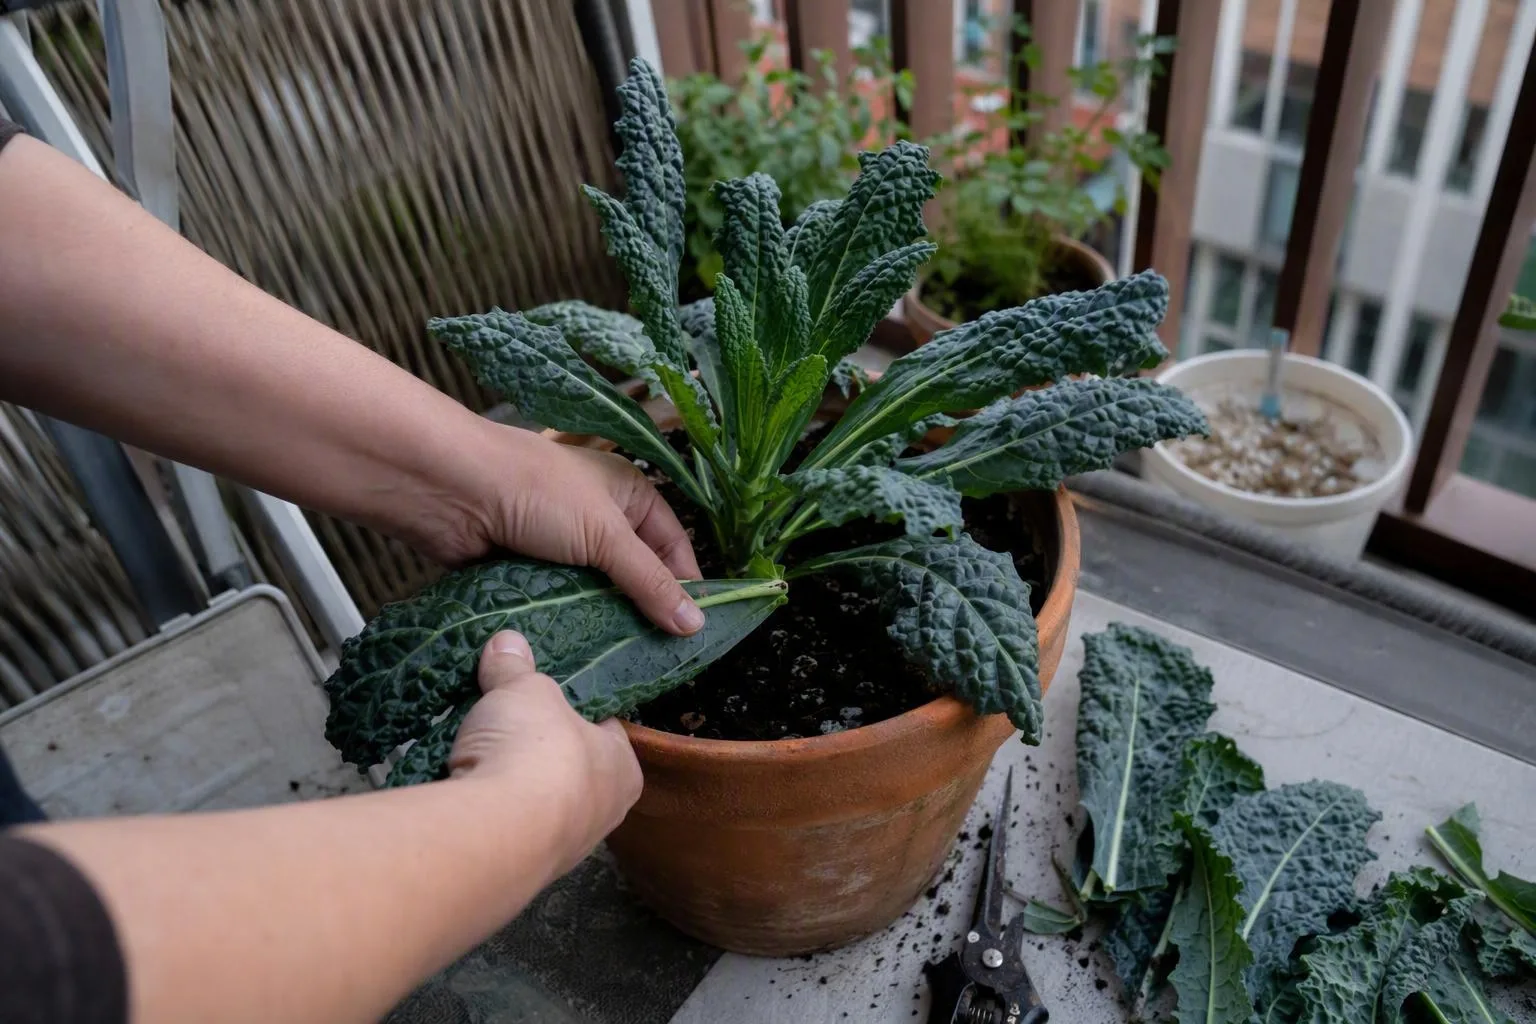
A full-size kale plant needs a 20–30 L (5–8 US gal) pot; the attractive 12-inch container beside it may hold much less usable mix. With only one or two hours of direct sun, kale can still grow, but I’d plan for slower leaves and smaller harvests rather than treat shade as free growing space.
That gives us the two decisions that matter before you buy seed: are you growing tender baby leaves or a plant you’ll harvest from for weeks, and where can the pot collect the most direct light? The right variety, root volume and harvest method work together.
I’ll use practical ranges rather than pretend one pot behaves the same on every balcony. Plastic, wind, reflected heat and the temperature at your growing spot can move the answer.
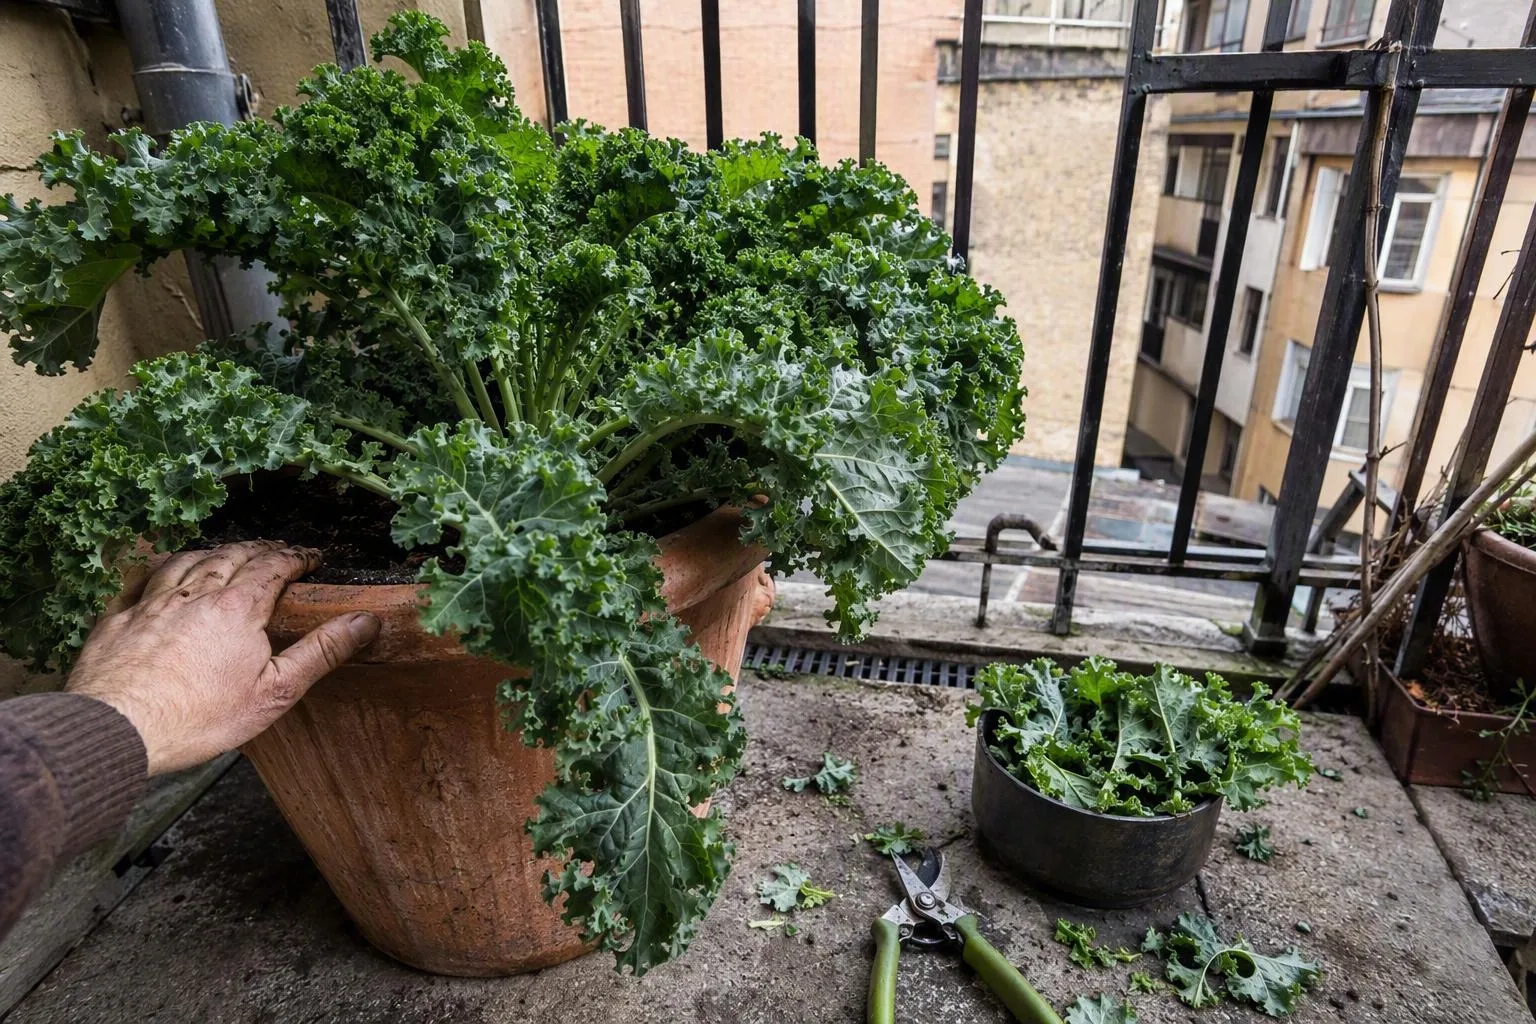
Start with the harvest you want: baby leaves or a full plant
Baby-leaf kale is the easier fit for a small container. I’d use about 5–10 L (1.3–2.6 US gal) of mix, sow fairly close together, and cut young leaves before the plants need to build a large crown. The root system has less time to occupy the pot, and you’re removing small leaves rather than waiting for a tall, heavy plant.
For a compact plant that will supply larger leaves, move up to roughly 15–20 L (4–5 US gal). A full-size kale plant deserves about 20–30 L and at least 25–30 cm (10–12 in) of usable depth. That extra mix is not decoration. It gives the roots a larger moisture buffer between waterings and more room for the plant to support broad leaves.
Look for compact, dwarf or short-stemmed descriptions if your balcony is narrow. A full-size variety can be perfectly healthy in a pot and still become awkward: the leaves spread beyond the railing, the pot catches more wind, and the plant shades its neighbours. Variety choice changes the container requirement because a plant with a larger mature frame needs more root volume and a steadier supply of water.
On my own balcony, I once put a compact kale in a 10-L plastic pot because it was the container already at hand. It looked fine through the cool first weeks, then a breezy sunny spell left the leaves limp by afternoon and pulled the mix away from the pot wall. I watered in two slow passes and the plant recovered, but its leaves stayed noticeably smaller than the kale I had given a deeper container. I now spend extra pot volume before I spend extra money on feeds.
One compact plant is best treated as a repeated side-serving crop: useful handfuls, not a constant household supply. If you want kale for several meals each week, grow more than one pot or sow a second batch later.
Pot size in litres: 5–10 L for baby leaf, 20–30 L for one mature kale
Use internal dimensions and usable fill height when you’re standing in the garden-centre aisle. A pot sold as 30 cm wide may taper sharply, and the listed capacity may describe filling right to the rim. I leave space for watering, so the number on the label is not automatically the amount of soil your kale will receive.
| Harvest plan | Usable mix | Usable depth | Practical footprint | Plants |
|---|---|---|---|---|
| Baby leaves | 5–10 L (1.3–2.6 US gal; about 0.18–0.35 cu ft) | 15–20 cm (6–8 in) | 20–25 cm (8–10 in) wide | About 3–6, thinned to 5–10 cm apart |
| Compact mature plant | 15–20 L (4–5 US gal; about 0.53–0.71 cu ft) | 20–25 cm (8–10 in) | 25–30 cm (10–12 in) wide | 1 |
| Full-size plant | 20–30 L (5–8 US gal; about 0.71–1.06 cu ft) | 25–30 cm (10–12 in) | 30–35 cm (12–14 in) wide | 1 |
For quick aisle maths, I use 28 L as roughly 1 cubic foot. The conversion is only a convenient approximation, but it prevents the common mistake of buying a bag labelled in litres for a pot described in gallons and comparing the numbers as if they were interchangeable.
For a round pot, multiply 3.14 by the square of the internal radius, then by the internal fill height, and divide the result in cubic centimetres by 1,000. A 30 cm internal diameter with 25 cm of fill height calculates to about 17.7 L before allowing for taper. A tapered pot will hold less, so I’d choose the next size up if that result lands on the boundary.
For a rectangular trough, multiply internal length × width × fill height and divide by 1,000. A trough measuring 60 × 20 × 25 cm holds 30 L to the brim; stopping 5 cm below the rim leaves 24 L of working volume. That could suit one full-size kale plant comfortably, or two plants at the wider end of a shared spacing plan.
If you’re comparing options, the useful question is not simply what is the best container size for vegetables? Ask how much mix remains after headspace, taper and the plant’s neighbours have taken their share. For kale, I’d choose depth and stability over a shallow decorative bowl.
Sunlight is the yield limit: audit 1–2 hours against the 4–6-hour target
For substantial kale leaves, aim for about 4–6 hours of direct sun. One or two hours can keep a plant alive and may produce edible leaves, but I’d expect slower growth and a smaller crown, particularly if the pot also dries quickly or the plant is crowded.
Direct sun means the sun’s beam reaches the leaves. A bright wall, pale balcony floor or open sky can make a spot look brilliantly lit without supplying the same light. Reflected light is useful for visibility and can reduce a gloomy corner, but I don’t count it as an hour of direct sun in my planting plan.
I audit a balcony by standing in the proposed spot with my phone and noting the light three times:
- Check in the morning and mark whether the leaves, railing or neighbouring buildings cast a shadow.
- Check around midday, when a narrow strip of balcony may receive its only direct beam.
- Check again in the afternoon, including the point where the sun disappears behind the building.
Do this on a clear day and repeat once if the balcony is surrounded by tall buildings. The moving shadow is more useful than a general claim that the balcony faces south or west. A pot on a low stand may receive light that disappears at floor level, while a railing position may be brighter but windier.
Mobility is the advantage a container grower has over a bed. If your balcony gets two useful hours in one corner and three in another, move the pot gradually rather than dragging a large, wet container across the floor. The best location is not always the brightest one: an exposed railing can scorch leaves or tip a tall pot, while a wall position may give steadier warmth and shelter.
In a hot climate, morning sun with afternoon shade can outperform a hotter position that receives eight hours. The reason is that leaves lose water faster as heat and wind rise; if the root volume cannot replace that water, the plant closes down or wilts before evening. In a cool, mild climate, I’d favour the longer light window.
For more balcony-specific planning, compare this audit with growing vegetables in pots on balcony before you fill every sunny corner with large containers.
Drainage before planting: let excess water leave without adding a gravel layer
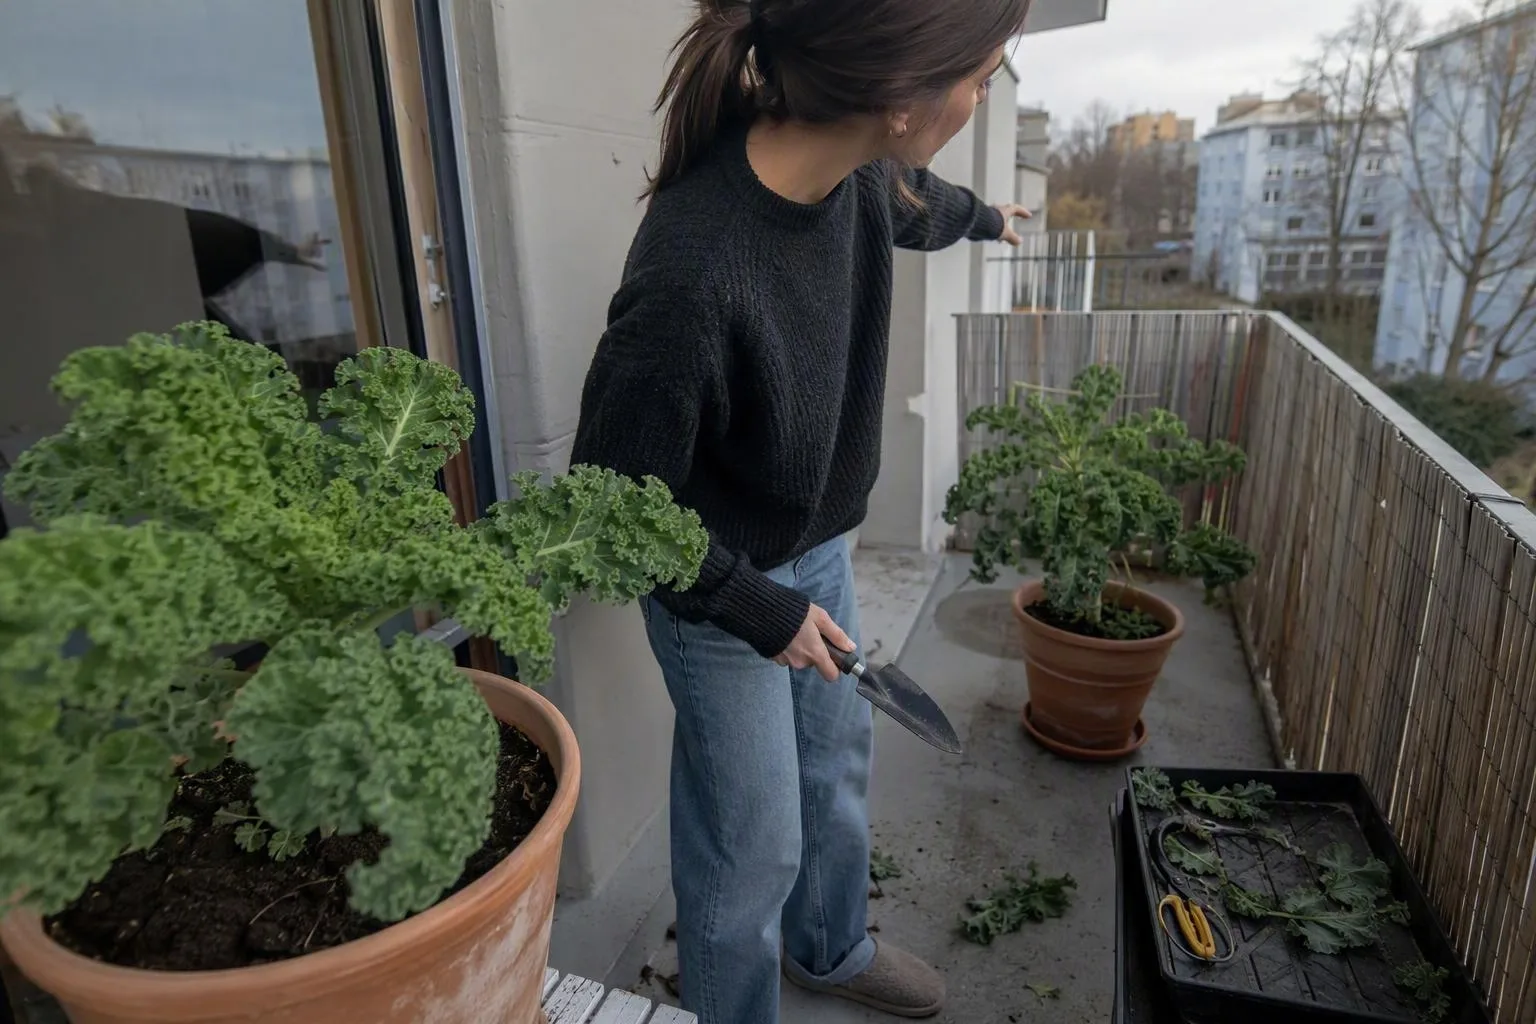
Drainage starts with the holes, not with a layer of stones. Before adding mix, turn the empty pot over and make sure several drainage openings are genuinely clear. A pot with one tiny hole can behave very differently from a pot with a broad, open base, especially after fine mix settles against it.
- Clear the drainage holes and place the pot on feet or a thin support if the surface blocks them.
- Add a small piece of mesh only if the holes are large enough for mix to fall through. The mesh should hold the mix back without sealing the base.
- Use fresh container mix rather than garden soil alone. Container mix is made to hold moisture while leaving air spaces around roots; garden soil can compact in a restricted pot.
- Fill the pot, then stop 3–5 cm (1–2 in) below the rim. This headspace gives water somewhere to sit while it soaks in instead of running over the edge.
A perched water table is the saturated layer that can remain at the bottom of a container after watering. Water moves through the mix, but fine particles and small air spaces hold some of it above the drainage openings. The lower part can therefore stay wetter than the surface suggests, particularly in a deep pot with a fine, compacted mix.
Gravel at the bottom does not remove that wet layer. It takes up root space and creates a coarse-to-fine boundary that can leave the fine mix above it holding water. The pot may drain from its hole, but the roots still occupy a smaller and potentially wetter column of mix. Put drainage material outside the pot, where it can support the container without stealing soil volume.
I add a modest amount of aerating material such as perlite or pumice only when the mix stays wet after I have confirmed the holes are open. That advice flips on a windy balcony: a very airy mix in a shallow plastic pot can dry before kale roots have taken it up. First diagnose wetness, then change the mix. Don’t use extra grit as a ritual.
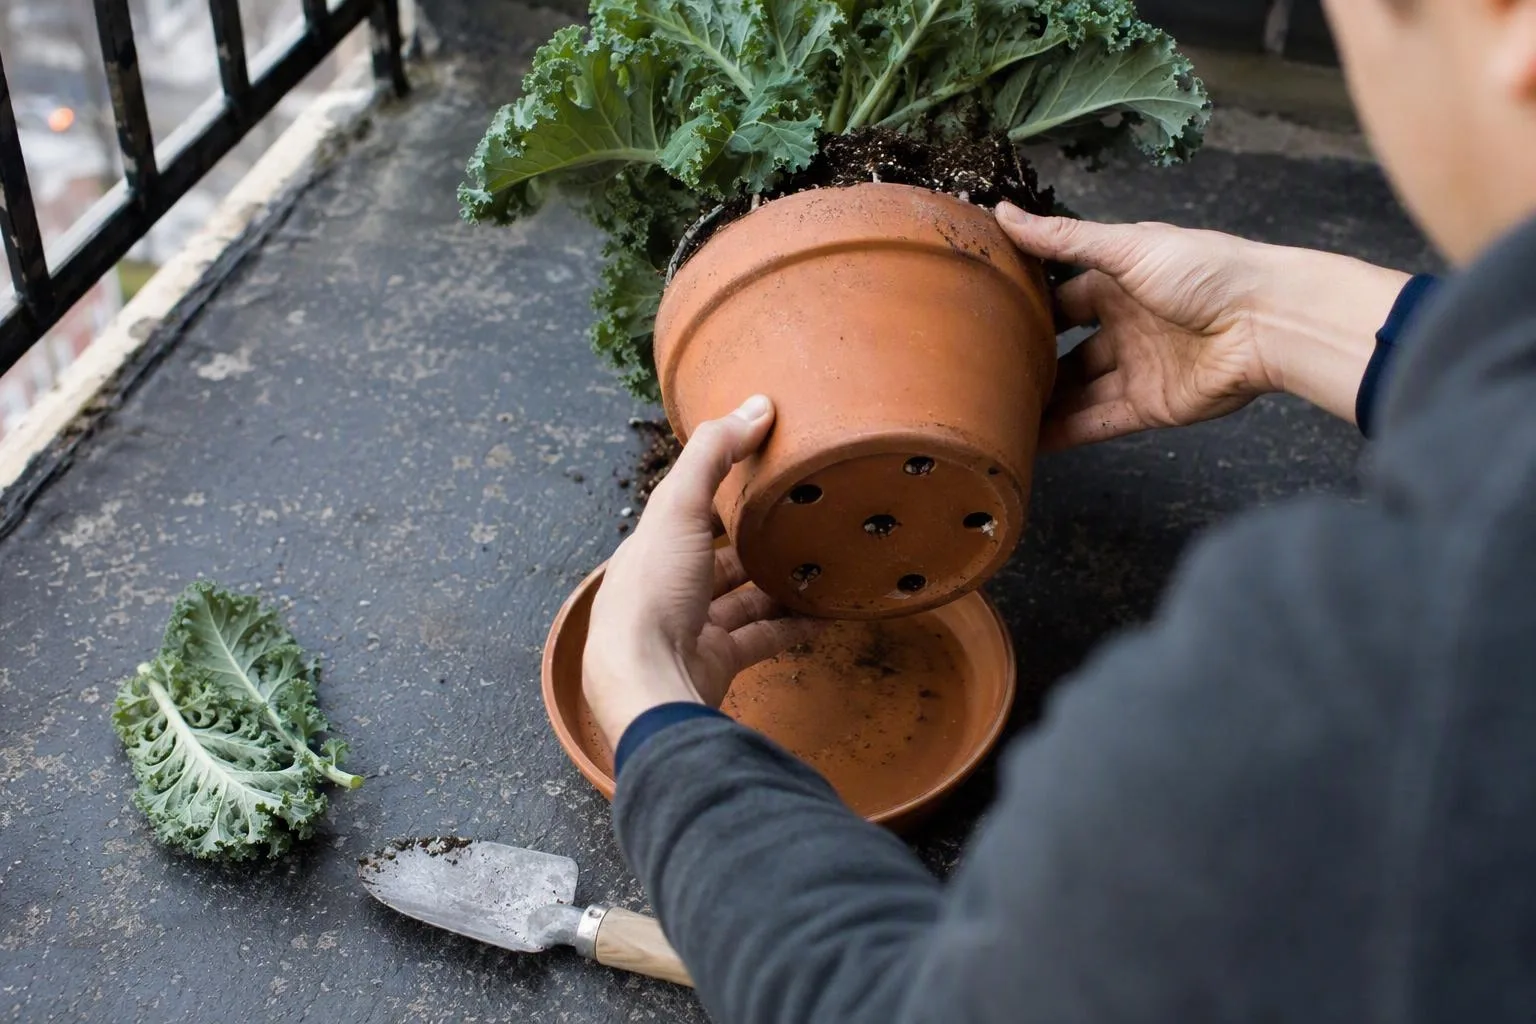
Use temperature to set the sowing window, not the calendar
Kale is a cool-season crop, so I set the sowing window by the conditions at the pot rather than by a fixed month. Sow seeds about 0.5–1 cm (¼–½ in) deep in evenly moist mix. If I’m raising transplants, I start them roughly 4–6 weeks before the intended move outdoors, then adjust that timing if the forecast is unusually cold or hot.
As a practical working range, kale grows most evenly around 13–24°C (55–75°F). Cold conditions can slow emergence and leaf expansion. Once the pot regularly sits near 27°C (80°F) or higher, especially in direct afternoon sun, I treat heat as a warning for wilting, tougher leaves and a greater chance of a flower stalk appearing. These are useful triggers, not hard switches; wind, night temperatures and the variety still matter.
Spring sowing can work as soon as the container can be kept in that cool, steady window. Late-summer sowing is useful for an autumn crop, provided the plant has time to establish before short days and cold nights. I often prefer two smaller sowings two or three weeks apart to one crowded pot planted all at once.
For seedlings raised indoors, harden them over 7–10 days. Put them outside for a short first exposure in bright shade, extend the time gradually, and introduce direct sun and wind in stages. A seedling that looks fine on a windowsill can lose water quickly when its leaves meet moving air.
For a second perspective on timing, I’d compare your local forecast with university extension guidance on cool-season kale rather than trusting a generic planting calendar.
Choose spacing by harvest style: baby leaves close, full plants wide
The two spacing plans are not contradictory. They describe two different crops: a dense patch that you cut young, and individual plants that must hold a large rosette of leaves.
For baby leaves, sow thinly and finish with roughly 5–10 cm (2–4 in) between plants. In a 20–25 cm pot, that usually means a small group rather than a solid carpet. If seedlings emerge shoulder to shoulder, snip the extras at the mix line with clean scissors. Pulling them can disturb the roots of the seedlings you intend to keep.
For full-size kale, use one plant in a 25–30 cm (10–12 in) pot. In a shared trough, allow about 30–45 cm (12–18 in) between plants. For example, a 90 cm trough may hold three plants at the closer spacing or two at the wider spacing, with room at the ends for airflow. I’d rather grow two relaxed plants than three plants whose outer leaves stay wet and pressed together.
Crowding reduces leaf size because several plants draw from the same finite root volume, and it restricts airflow around the leaves. It also makes inspection harder, so a few flea beetles or aphids can go unnoticed under the foliage. Thin early, before the seedlings have formed a tangle of roots. Baby-leaf kale is the exception: close spacing is sensible because the harvest comes before a full canopy develops.
The care loop: check 2–3 cm down, water through, feed on a 2–3-week rhythm
My care loop starts by checking the top 2–3 cm, or about 1 inch, of mix with a finger or a wooden stick. If that layer is dry and the pot feels light, water. If the surface is dry but the stick comes out cool and damp lower down, wait and check again instead of following yesterday’s schedule.
Water slowly across the whole surface until the mix is wet from edge to centre and a little excess appears below. A fast splash can run down a gap between the root ball and the pot wall, leaving the middle dry. If the first water disappears immediately, pause for a few minutes and repeat. Empty standing water from the saucer after the pot has finished draining.
In a plastic pot in full sun, I may check daily and water close to daily during hot, windy weather. In a glazed pot in part shade, the same kale may go roughly every third day. Those are starting points for inspection, not a timetable. Pot material, wind exposure, plant size and the amount of leaf surface can change the interval within the same week.
For feeding, choose either controlled-release fertiliser at the label rate or a diluted liquid feed about every 2–3 weeks during active growth. Apply liquid feed to already-moist mix. Feeding dry roots concentrates the solution around them, while feeding a saturated pot adds more water before the root zone has had a chance to breathe.
Repeated drainage carries dissolved nutrients out of the pot. That is why a kale plant can look vigorous at first and then develop pale older leaves after weeks of watering without replenishment. The reverse problem is piling on fertiliser whenever leaves look pale: waterlogged roots can also produce pale foliage because they are not functioning well. Check moisture and drainage before reaching for feed.
My less fashionable rule is to fix the water path before buying a stronger fertiliser. A larger pot with open holes and a consistent check is usually a better upgrade than a small pot with an elaborate feeding schedule.
A diagnostic table for holes, yellow leaves, limp stems and flower stalks
I don’t start with a spray. I start with the pot, the underside of the leaves and the newest growth, because the same limp appearance can come from bone-dry mix or roots sitting in stagnant water.
| What you see | Where I look first | What I do next |
|---|---|---|
| Dry, wilted leaves; mix pulled from the wall | Root ball is shrunken and the pot feels unusually light | Water in two or three slow passes, then check whether the mix is accepting water evenly |
| Limp plant while the mix stays wet | Blocked holes, a full saucer or a compacted lower layer | Clear the base, remove standing water and repot if the mix smells sour or roots are dark and soft |
| Pale older leaves | Long harvesting period without feed, or roots stressed by wetness | Correct moisture first, then use a labelled edible-crop feed if the plant is actively growing |
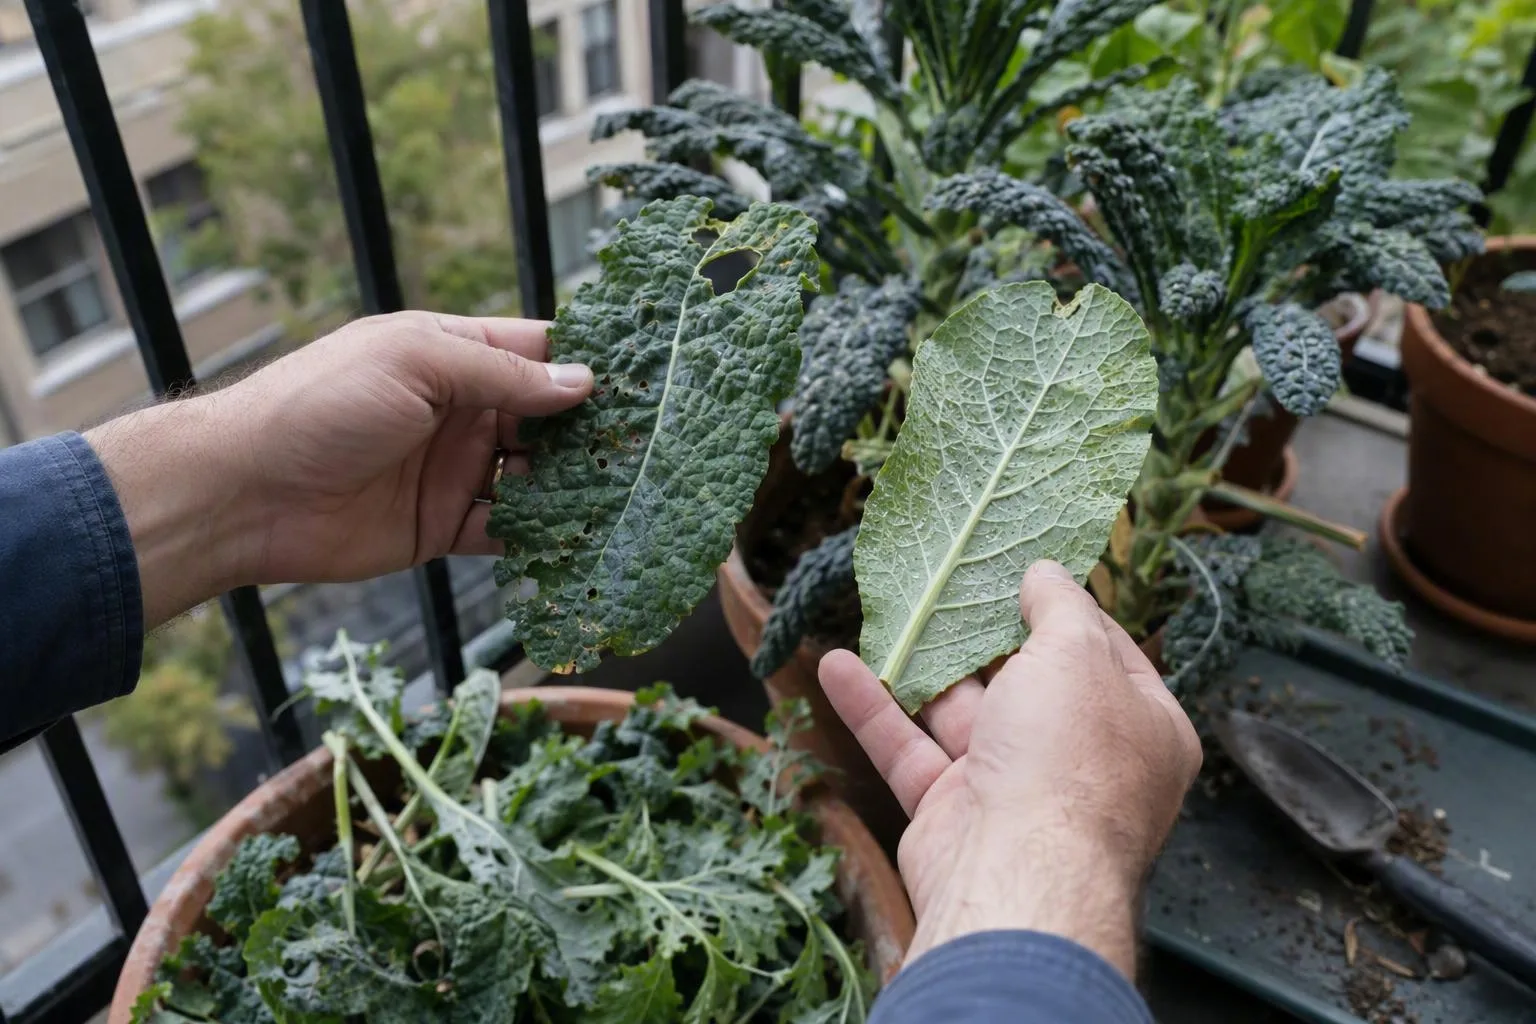
| Tiny round shot holes | Leaf surfaces and undersides for flea beetles | Use insect mesh early, reduce plant stress and follow a control label if treatment is needed |
| Larger ragged holes with dark crumbs | Leaf folds, stems and the mix surface for caterpillars and their droppings, called frass | Pick off visible caterpillars and keep inspecting rather than treating an empty pot |
| Clusters of small insects under leaves | New growth, leaf veins and undersides for aphids | Wash off small clusters with water when practical, then monitor new growth; see aphids on container plants for a broader inspection routine |
| Tall central stalk or flower buds | Heat, plant age and whether the pot has been repeatedly stressed | Harvest usable leaves promptly, give afternoon shade and sow another pot for tender leaves |
Tiny holes that look peppered across young leaves point me toward flea beetles; large torn sections and frass point me toward caterpillars. I inspect the undersides once a week, and more often after seeing the first damaged leaf. Insect mesh works best before pests arrive because it stops adults from reaching the foliage, but it must not press against wet leaves or block all airflow.
For identification and control choices, I’d use integrated pest management guidance for Brassica pests and select only products or methods labelled for edible crops in your area. Follow the label, including any waiting period before harvest. A homemade mixture is not automatically safe for food plants just because its ingredients are familiar.
Harvest outer leaves at 10–20 cm, then re-sow before the pot goes bare
As a working expectation, baby leaves can often begin around 25–35 days after sowing, while larger leaves commonly take about 50–70 days. Variety, temperature, light and whether you count from sowing or transplanting can move those ranges, so I use the packet timing as a starting line and the leaf size as the final decision.
Harvest from the outside of the plant first. Pick 2–4 leaves at a time when they are roughly 10–20 cm (4–8 in) long, cutting cleanly near the stem without gouging the crown. Leave the central growing point and several healthy inner leaves in place. They are the plant’s replacement factory; removing every large leaf at once turns a continuing harvest into a recovery project.
For baby kale, cut leaves at about 5–10 cm (2–4 in), but leave the crown intact if you want another cut. A dense baby-leaf sowing may give a quick bowl of greens, then become crowded and tired. At that point, I harvest the remainder and re-sow rather than trying to force the same patch through hot weather.
One full-size pot is a small, useful crop. Expect repeated handfuls or side servings every several days to a week when the plant is actively growing, not a guaranteed daily supply for a household. Harvest size, pot volume, sunlight and how aggressively you pick all change the result. If continuity matters, sow another pot 2–3 weeks after the first.
A tall flower stalk is the plant’s signal that leaf production is changing. I harvest the good outer leaves before the stalk hardens, then decide whether to keep the plant for flowers and seeds or replace it with a cooler-season sowing. Once heat is persistent, afternoon shade and deeper moisture can buy time, but neither reverses every plant’s response to age or temperature.
Hard freezes deserve a separate pot decision. Garden soil gives roots more surrounding thermal mass; a container has air on most sides and can chill faster. Before a hard freeze, move the pot against a sheltered wall, group it with other containers, and wrap the pot itself with insulating material while keeping drainage open. In a severe cold snap, temporary shelter is more useful than simply watering more.
Your next physical action is simple: measure the pot’s internal width and fill depth, check every drainage hole with your finger, and watch the proposed spot at morning, midday and afternoon. By the end of the week, choose one pot that offers at least 20 L of usable mix for a full plant, or 5–10 L for baby leaves, then sow or transplant only after you’ve decided how you’ll harvest it.