Growing Potatoes in Containers: Pot Size, Hilling and Yield
A potato needs about 30–40 litres (8–10.5 US gallons) of usable mix per planting unit; the small 8-litre pot that looks generous in a shop aisle isn't a realistic potato container. Give it a stable, broad pot, add 5–10 cm (2–4 in) of mix around the stem two or three times, and plan on roughly 0.5–1.5 kg (1–3 lb) from a healthy plant, not a guaranteed haul.
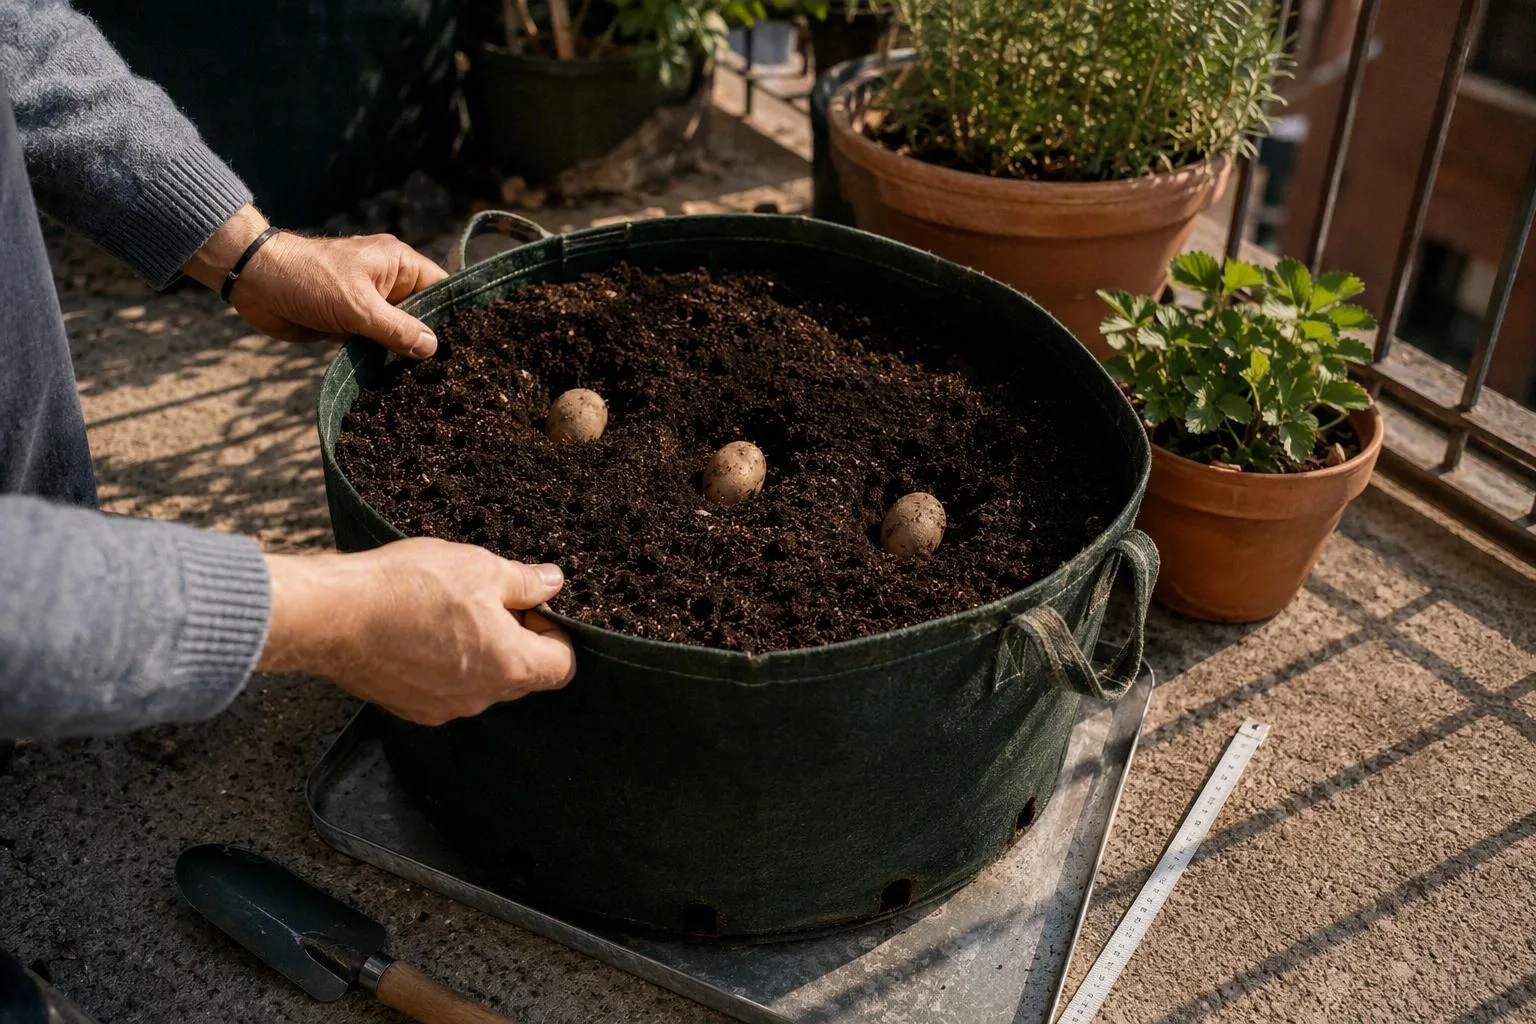
The quick answer: 30–40 litres, 5–10 cm lifts, and 0.5–1.5 kg
When I say one planting unit, I mean one small whole seed potato or one properly cut piece with viable eyes. I wouldn't put several pieces into a 30-litre container and then judge the crop by the total harvest; the plants are sharing the same finite root volume, water supply and light.
Hilling is the process of adding fresh potting mix around the growing stem as the plant gets taller. Start with only part of the container filled, then add 5–10 cm (2–4 in) at a time while keeping the growing tip and upper leaves above the surface. In a pot, I usually plan for two or three lifts, stopping when the mix is close to the final level but still a few centimetres below the rim for watering.
The 0.5–1.5 kg (1–3 lb) figure is a planning estimate for one healthy plant in 30–40 litres (8–10.5 US gallons) of usable mix. Treat it as a projected range: six hours of direct sun, a long enough season and steady moisture can move the harvest toward the upper end, while shade, crowding or a waterlogged pot can pull it below the lower end.
Volume is not the same as height: choose the container you can actually hill
A tall container isn't automatically a good potato container. The plant needs enough depth for its initial root zone, but it also needs spare volume above that starting layer so you can hill without burying the growing tip or making the pot impossible to water.
| Approximate container volume | Usable depth to aim for | Planting units | Hilling room | Main trade-off |
|---|---|---|---|---|
| 20 L (5.3 US gal) | 25–30 cm (10–12 in) | 1, with modest expectations | One or two small lifts | Light and easy to move, but little room for tuber bulking |
| 30–40 L (8–10.5 US gal) | 30–45 cm (12–18 in) | 1 | Two or three 5–10 cm lifts | Best starting compromise between crop room and manageable weight |
| 50–60 L (13–16 US gal) | 35–45 cm (14–18 in) | 1–2, if the container is broad | Good headroom for staged filling | More crop capacity, but heavier, harder to tip and more demanding on a balcony |
Those figures describe usable mix, not the pot's outside dimensions or the volume printed on a grow bag. A tapered pot has sloping sides, so it holds less than a straight-sided box with the same maximum width and height. A quick rectangular estimate is length × width × height in centimetres, divided by 1,000. For example, 40 × 30 × 35 cm gives 42,000 cubic centimetres, or about 42 litres before allowing for the taper and the unfilled space at the rim.
For a round pot, use π × radius × radius × height, again dividing cubic centimetres by 1,000 to get litres. If the pot is 40 cm across and 35 cm high, the simple cylinder calculation gives about 44 litres; a tapered version will give less. In a shop, I trust the measured inside dimensions more than a generous-looking label.
My preference is a broad, stable pot or grow bag rather than a narrow potato tower. A broad container is easier to top up in layers, less likely to tip in wind and simpler to empty onto a tarp at harvest. The trade-off is that its footprint takes more balcony space, so compare it with the figures in best container size for vegetables before you buy several.
Use a container sold for food growing or one whose previous contents are known and harmless. I wouldn't repurpose a bucket that held pesticide, fuel, solvent, oil or an unknown chemical. An old decorative glaze deserves the same caution: if its food-use status is unknown, I use it for flowers rather than edible crops. The separate guide Are 5 gallon buckets safe for growing vegetables? is a useful check before turning a utility bucket into a planter.
Before you fill it, audit the balcony for sun, wind and wet weight
Set about six hours of direct light as the useful target for a worthwhile container potato crop. That means sunlight hitting the leaves, not merely a bright sky or reflected light. One or two hours may keep foliage growing, but I would expect a smaller tuber harvest and would choose herbs or leafy crops for that spot instead.
I use a deliberately boring sunlight test before committing a large pot: put a strip of masking tape where the container will stand, note when direct sun reaches the mark, and check again as the day progresses. Imagine a bright corner where a building shadow reaches the tape at 11:30 a.m. and remains there. It may look sunny from across the room, but the plant has not received a useful six-hour block. Repeat the check near the planting season if the balcony's sun angle changes sharply through the year.
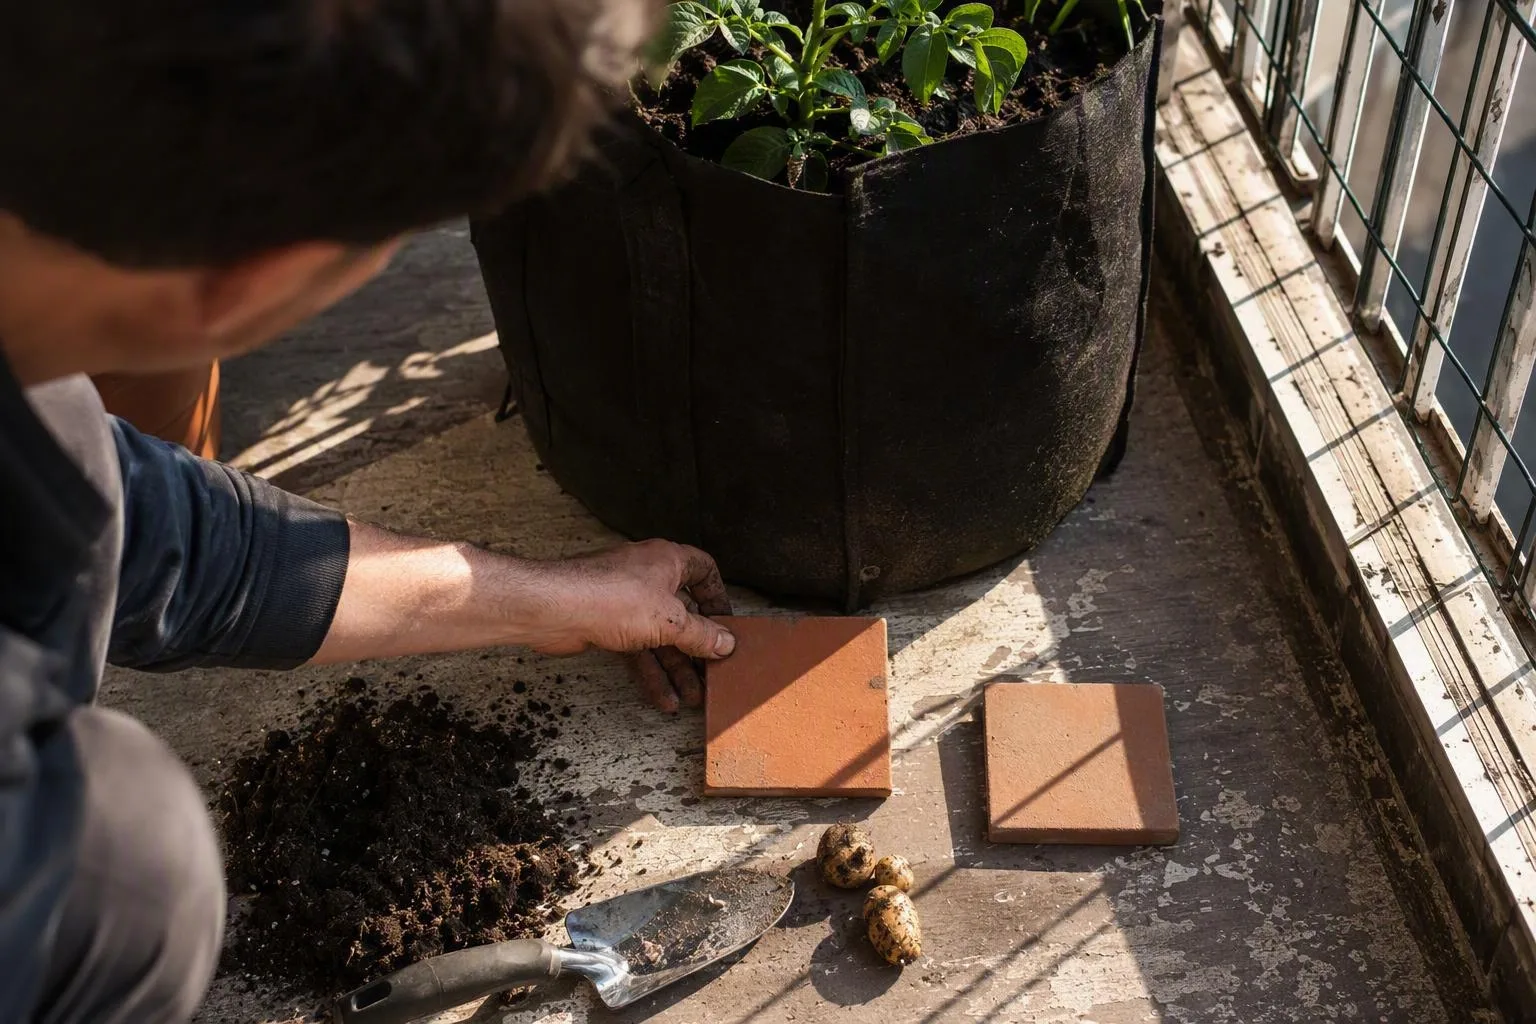
Wind changes the watering equation. It dries leaves and the surface of the mix faster, and a tall plant in a light grow bag can become top-heavy after hilling. Keep the container on a level, stable surface, away from a railing edge, and use a tie or sheltered position if the stems are being pushed sideways. A hot wall or pale paving can also raise the temperature around the pot and shorten the time between watering checks.
Weight needs a real calculation rather than a guess. Forty litres of water alone weigh about 40 kg (88 lb), before you count the pot and wet growing medium. A container that feels manageable when dry can become a substantial load after rain or thorough watering. Check the balcony, rooftop or roof terrace rules, place large containers where the structure and landlord allow them, and make sure runoff cannot stain or drip onto a lower balcony. A saucer can catch a little excess, but it isn't a substitute for a sound placement decision.
Give the tubers air: build a free-draining mix before planting
Use a quality peat- or coir-based potting mix as the main medium. If the bagged mix contains very little organic matter, I would blend in roughly 10–20% mature compost by volume, not fill the container with compost alone. Add perlite or pumice only if the base mix is prone to compacting; a loose mix that already drains well doesn't need a handful of extra ingredients for their own sake.
Garden soil behaves differently in a pot. Its fine particles settle into a dense mass after repeated wetting, drying and handling, leaving less air around the roots and making the container slower to drain. Fresh manure is another poor shortcut for a balcony potato pot: it can be too strong for young roots, contributes more nutrients than the plant needs and may introduce unwanted organisms. Mature compost mixed modestly into a suitable potting medium is the calmer option.
Several open drainage holes matter because excess water needs a route out of the root zone. Raise the pot slightly on feet or thin blocks so the holes aren't sealed against the floor, and check them after every hilling session. If a saucer is permanently full, the plant is sitting in the result rather than draining through it.
Here is the useful plain-language definition. A perched water table is a saturated layer that remains above the drainage holes because the fine mix holds water against gravity. The holes let water escape, but they don't make every centimetre above them instantly dry. Adding gravel to the bottom doesn't pull that wet layer downward; it takes up part of the container while leaving the fine mix above it just as prone to saturation. Put the drainage holes at the bottom, keep them open and use a suitable mix instead. The practical details in container gardening soil are worth checking before you open the bag.
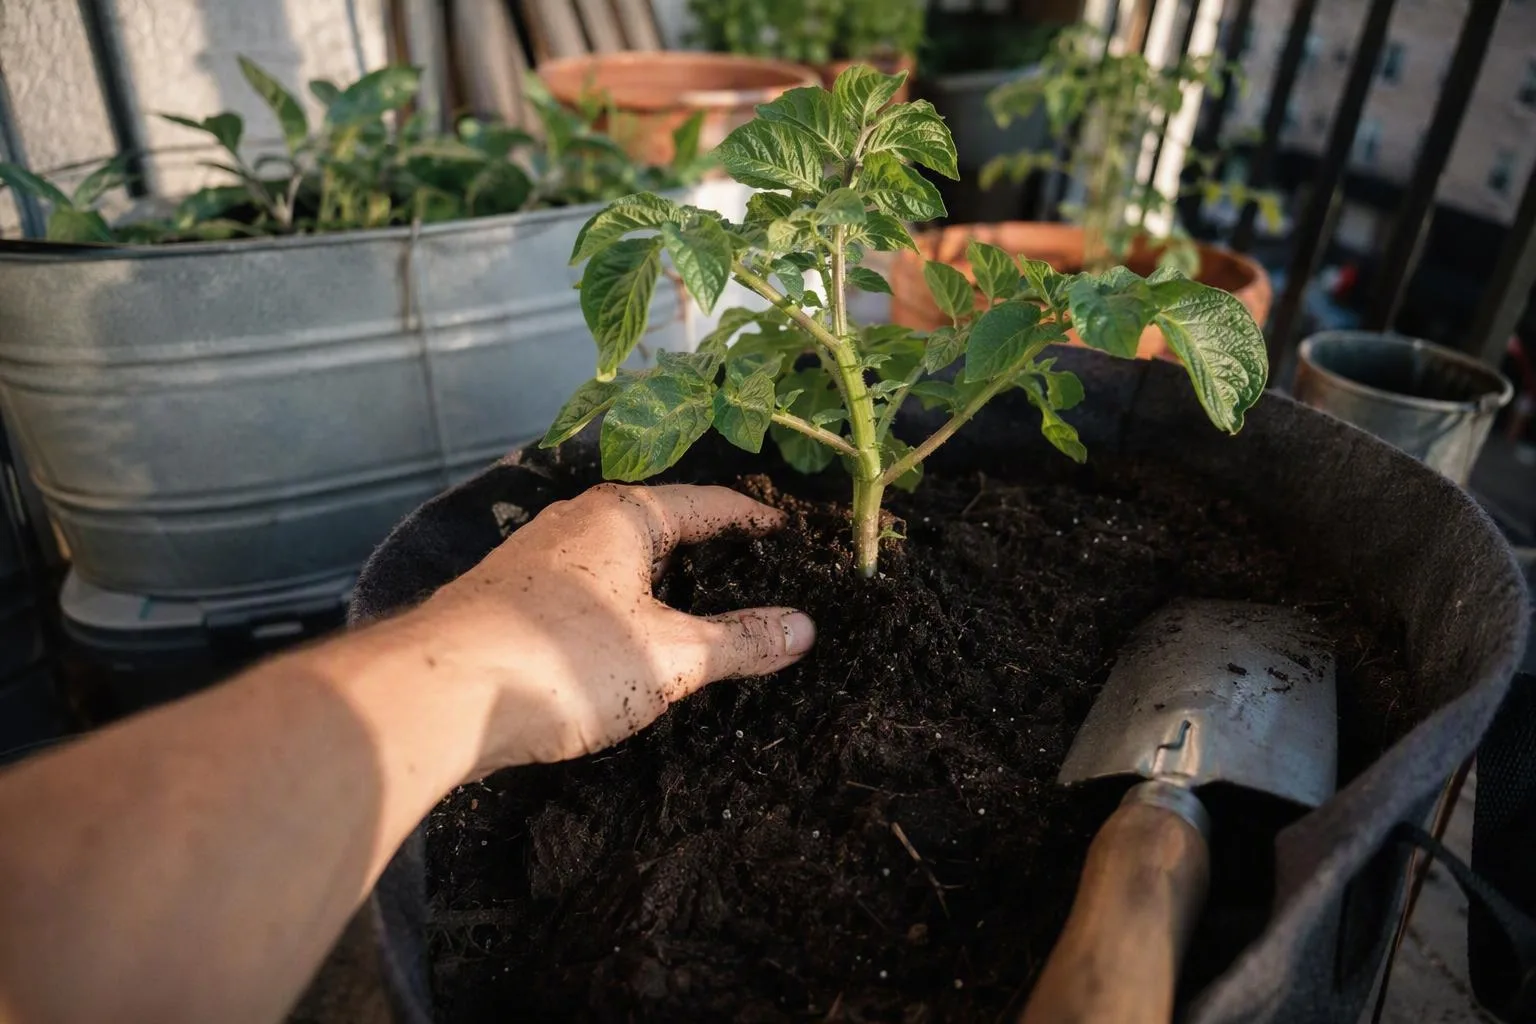
Plant once; hill in measured layers as the stem grows
Choose certified seed potatoes where they are available, and pick an early or relatively quick variety if your container season is short. That is a risk-management choice, not a promise: a plant that starts and finishes within the available warm, bright period has more chance than one that needs a long season you cannot provide.
I don't let determinate and indeterminate labels drive the purchase. Those terms are used inconsistently in potato advice, and container success depends more on the variety's maturity window, the seed quality, the pot volume and the growing conditions than on a label alone.
Plant in this order:
- Put 10–15 cm (4–6 in) of potting mix into the bottom of the container. This is the first root and tuber zone, not the final fill level.
- Set one small whole seed potato, or one viable cut piece, on the mix with the eyes facing upward. Eyes are the small buds that produce shoots.
- Cover it with 8–10 cm (3–4 in) of mix and water gently until the medium is evenly damp. Leave the pot in its final sunny position if moving it later will be awkward.
- Wait for the shoots to reach roughly 15–20 cm (6–8 in). Add 5–10 cm (2–4 in) of mix around the stem, leaving the growing tip and upper leaves exposed.
- Repeat the lift once or twice as the stem extends, stopping when the container is nearly full. Leave a few centimetres below the rim so water doesn't run straight over the side.
The reason for hilling is not that every buried inch turns into a potato. Underground sections of stem can produce extra roots and short runners called stolons, and those runners are where tubers may swell. Hilling therefore gives the plant more dark, moist medium in which to form tubers while supporting the stem. It cannot create more sunlight, repair compacted mix or rescue roots sitting in stagnant water.
Planting is commonly tied to the local last-frost period, but a container loses heat more quickly than a bed because it has less surrounding soil to buffer cold nights. Protect emerging shoots from a hard frost with a temporary cover or by moving the pot to shelter, and don't plant into cold, saturated mix simply to meet a calendar date. The mix should be workable and draining before the seed goes in.
Keep the root zone evenly damp while the tubers bulk up
Don't put container potatoes on a fixed Tuesday-and-Friday watering schedule. Feel 2–5 cm (1–2 in) below the surface with a finger, lift the container if it is safe to do so, and look at whether the previous watering drained freely. The top can look dry while the centre remains wet, particularly in a deep plastic pot.
When watering is needed, apply it slowly across the whole surface until a small amount begins to drain from the holes. That wets the full root zone rather than creating one damp channel. Empty standing water from a saucer. In a plastic pot in full sun and wind, I might check daily and water daily during hot weather; in a glazed pot in part shade, the same plant may go two or three days between checks. Those are conditions, not a calendar.
Pay close attention as the plant begins forming and enlarging tubers, often around flowering. Repeated swings from very dry to completely soaked can interrupt steady bulking and leave the crop smaller or uneven. If the leaves are limp and the mix is dry several centimetres down, water is the first check. If the leaves are limp but the mix is wet, the pot smells sour or the stems are soft, investigate poor drainage before adding more water. Both problems can look like wilting from a distance, which is why touching the mix beats guessing from the leaves.
For a broader maintenance routine, container gardening includes the same useful habit: inspect the root zone and drainage together, rather than treating watering as a number of litres divorced from the pot and weather.
Feed for tubers, not just leaves
Start by finding out what is already in the potting mix. If it contains controlled-release nutrients, wait and follow the bag's directions instead of adding a second fertiliser immediately. If it contains little or no feed, use a complete vegetable fertiliser at its label rate. A liquid feed every two to three weeks during active growth can be reasonable if the label and plant condition call for it, but stacking products is a quick way to create a salt problem.
Excess nitrogen is the classic wrong turn: it encourages a large, soft canopy without necessarily producing a proportionate tuber crop, and it can delay the plant's move toward maturity. I also don't treat a high-potassium product as a magic tuber switch. Potassium cannot compensate for a shaded balcony, cramped volume, missing water or a root zone that stays wet.
Growers commonly describe potatoes as preferring a slightly acidic medium. I treat that as a reason to avoid blind liming, not as permission to chase a pH number without a test. If the mix label or a reliable test indicates a real need, adjust cautiously; otherwise use the bagged medium as supplied.
Before feeding, check the symptoms. Green leaves with few tubers suggest that light, nitrogen and maturity need reviewing before more fertiliser goes in. Pale, evenly weak growth can point toward limited nutrition or insufficient light. Brown leaf edges can follow drought, salt buildup or heat, so flushing a problem pot with water while it is already poorly drained may make matters worse. Diagnose the root zone first.
Flowering is not the finish line: read the plant before you harvest
There are two useful harvests from a potato pot. New potatoes are small, thin-skinned tubers harvested while the plant is still active. You can gently feel for them after flowering or use the variety's stated maturity window, but flowering is only a cue: some varieties flower lightly, and some may not flower in a way you notice.
For mature potatoes, wait for the foliage to yellow and collapse naturally, then check that the skins have firmed and no longer rub off easily. Reduce watering as the plant declines only if the mix is not already bone dry. The aim is to stop keeping a nearly finished crop in saturated compost, not to force a thirsty plant through a sudden drought.
| What you find | Likely place to look first | Next move |
|---|---|---|
| Many small tubers | Limited volume, low light, short season or an early harvest | Keep the plant going if foliage is healthy; next time use more sun or a larger planting unit |
| Abundant foliage and few tubers | Too much nitrogen, insufficient direct light or immature plants | Stop adding nitrogen, improve light if possible and allow more time |
| Green tubers near the surface | Light reached tubers because the mix level was low or cracked | Cover exposed tubers promptly; discard green potatoes rather than treating them as normal food |
| Split or hollow tubers | Uneven moisture or very rapid bulking | Check the moisture deeper in the pot and aim for steadier dampness |
| Mushy stems and sour-smelling mix | Waterlogging, root damage or rot | Stop watering, clear blocked holes and accept that the plant may not recover |
For planning, I would still use 0.5–1.5 kg (1–3 lb) per healthy plant in a 30–40-litre container rather than budgeting for a full grocery bag. The planting-unit count, direct-sun hours, season length and moisture consistency all move that estimate. A larger pot can provide more room, but it doesn't guarantee more potatoes if the balcony is dim or the plant is crowded by a neighbour.
Light-exposed potatoes can turn green. My kitchen rule is simple: don't eat green, bitter or badly damaged tubers, and don't treat potato leaves, stems or sprouts as salad greens. The concern is naturally occurring glycoalkaloids, so for the official wording I point readers to Health Canada's guidance on natural toxins in food; search that title directly rather than relying on a general gardening summary.
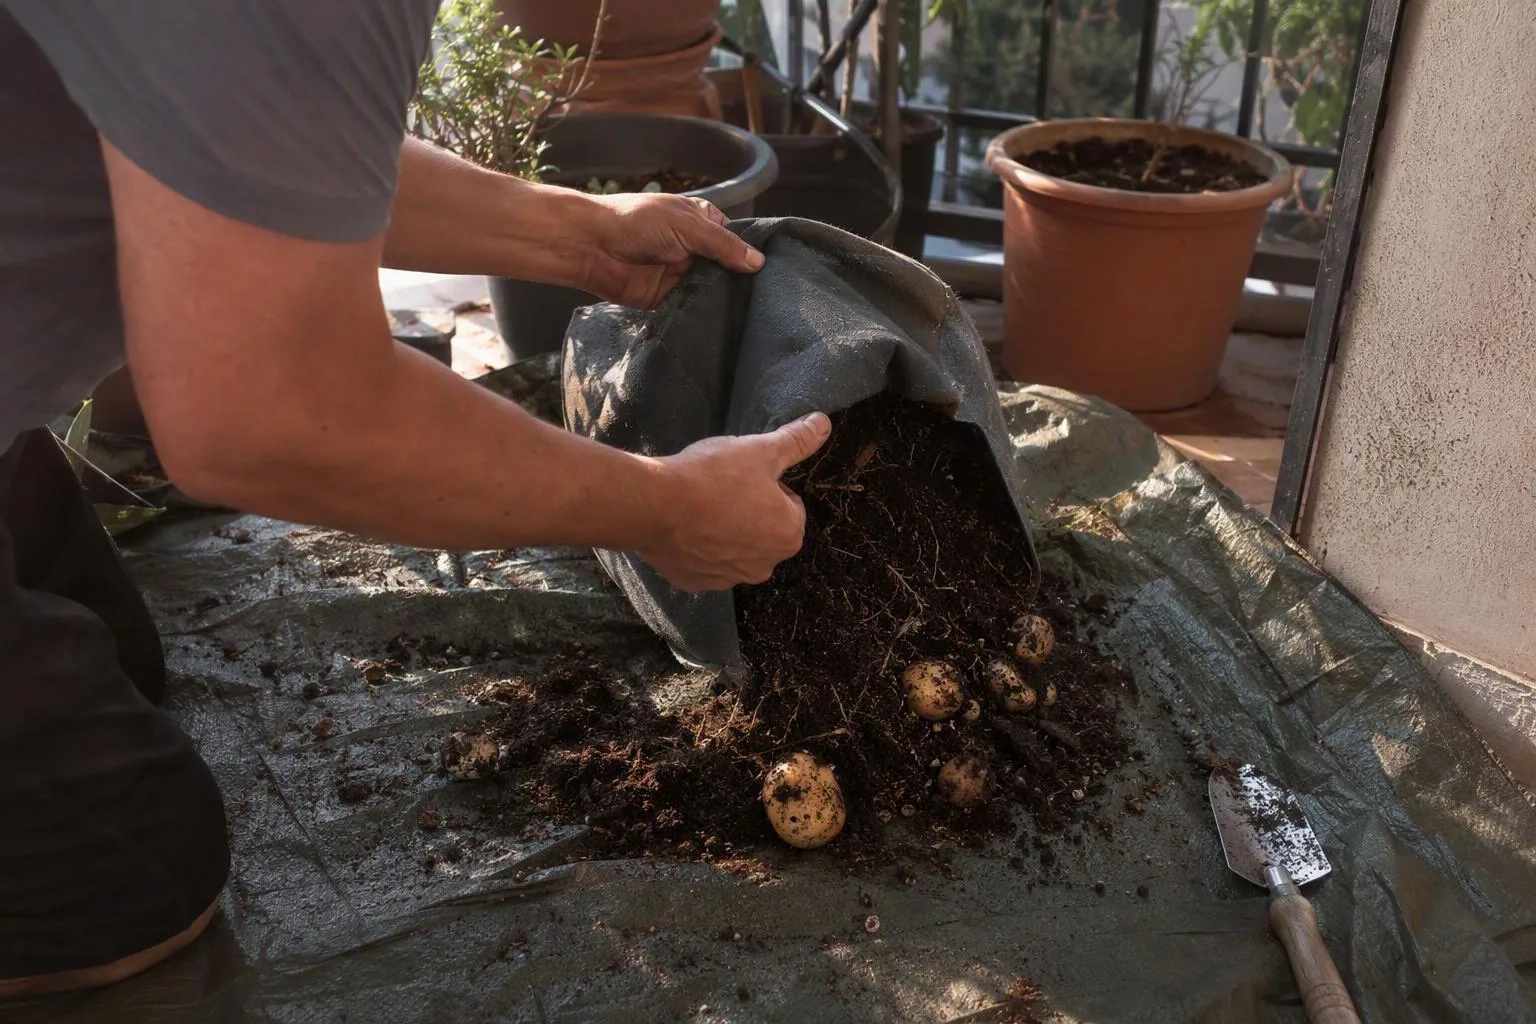
Tip out the container carefully, then reset it for the next crop
For harvest, move a grow bag or light pot onto a tarp and tip it slowly onto its side. Loosen the mix with your hands and pick through it rather than stabbing downward with a trowel. The last potatoes are often hidden near the base, where a tool can damage them without giving you a useful advantage. If the container is rigid, remove the top layer by hand first, then work down in sections.
Thin-skinned new potatoes are best used soon after lifting. Mature tubers commonly get about one to two weeks of curing in a dark, airy, frost-free place before the remaining soil is brushed off. That curing interval is a grower practice and a cautious planning choice, not a universal timer; shorten it if the potatoes are damaged or conditions are damp, and judge readiness by a dry surface and firm skin. I leave soil on until then and avoid washing potatoes before storage because wet surfaces are harder to keep sound.
If the crop was healthy, old mix can be refreshed for an unrelated container crop by removing roots and blending it with new mix or compost. After blight, rot or a serious pest problem, I wouldn't return that mix to potatoes, tomatoes, peppers or aubergines in the next cycle. The related plants share enough growing conditions that reusing a suspect medium is a poor trade for saving a bag of mix.
Can I grow a potato from a supermarket potato?
You can try if it sprouts, but I regard supermarket potatoes as an experiment. The variety may be a poor match for a short container season, sprouting may have been suppressed, and the planting material's disease history is unknown. Certified seed potatoes give you a clearer starting point.
Can I grow potatoes indoors on a windowsill?
Only if the window provides strong direct light for much of the day or you add a suitable grow light. A typical one- or two-hour windowsill may produce leaves while failing to provide enough energy for a worthwhile tuber harvest. If that is the only light available, herbs are a more sensible use of the pot.
Are potato leaves safe to eat?
No. I harvest the tubers and discard potato leaves, stems and sprouts, along with green tubers. If you need the food-safety background, use the Health Canada pointer above and follow local guidance rather than treating an attractive potato plant as an edible leafy green.
Before the weekend, buy one stable 30–40-litre (8–10.5 US-gallon) food-growing container, certified seed potatoes and enough potting mix to fill it in stages. Put masking tape on the chosen spot today, check the direct-sun hours and run water through the empty container to confirm that every drainage hole is open before planting.
Frequently Asked Questions
Can I grow a potato from a supermarket potato?
You can try if it sprouts, but certified seed potatoes are more reliable; grocery potatoes may have sprout-inhibiting treatment and their disease status is unknown.
Can I grow potatoes indoors on a windowsill?
Only with strong direct light or a suitable grow light; a typical one- or two-hour windowsill usually produces foliage rather than a worthwhile tuber crop.
Are potato leaves safe to eat?
No. Potato leaves, stems, sprouts and green tubers can contain glycoalkaloids, so harvest the tubers and discard green or damaged ones rather than eating the foliage.