Watering Plants While on Vacation: 7 Reliable Setups
If you're watering plants while on vacation for a weekend, start with the simplest setup: an established container plant may manage roughly 1–2 days after a slow, thorough soak and a move out of hot afternoon sun. Three days is conditional, not a promise; seedlings, small pots, thirsty crops, heat and balcony wind can shorten that window.
Last August, I left basil in a 15 cm (6 in) plastic pot on my east-facing balcony after watering it at breakfast. A hot, breezy spell followed, and by the next evening the leaves were limp while the mix was dry a couple of finger-widths below the surface. I moved it into bright shade and watered slowly; it recovered, but I no longer treat that pot as a three-day holiday plant.
That experience is why I use one rule for every vacation-watering method: rehearse it for 48 hours before you pack. The seven setups below range from a deep soak to a timer-controlled drip line, but a device is only dependable after you have watched what it does in your own pot, light and weather.
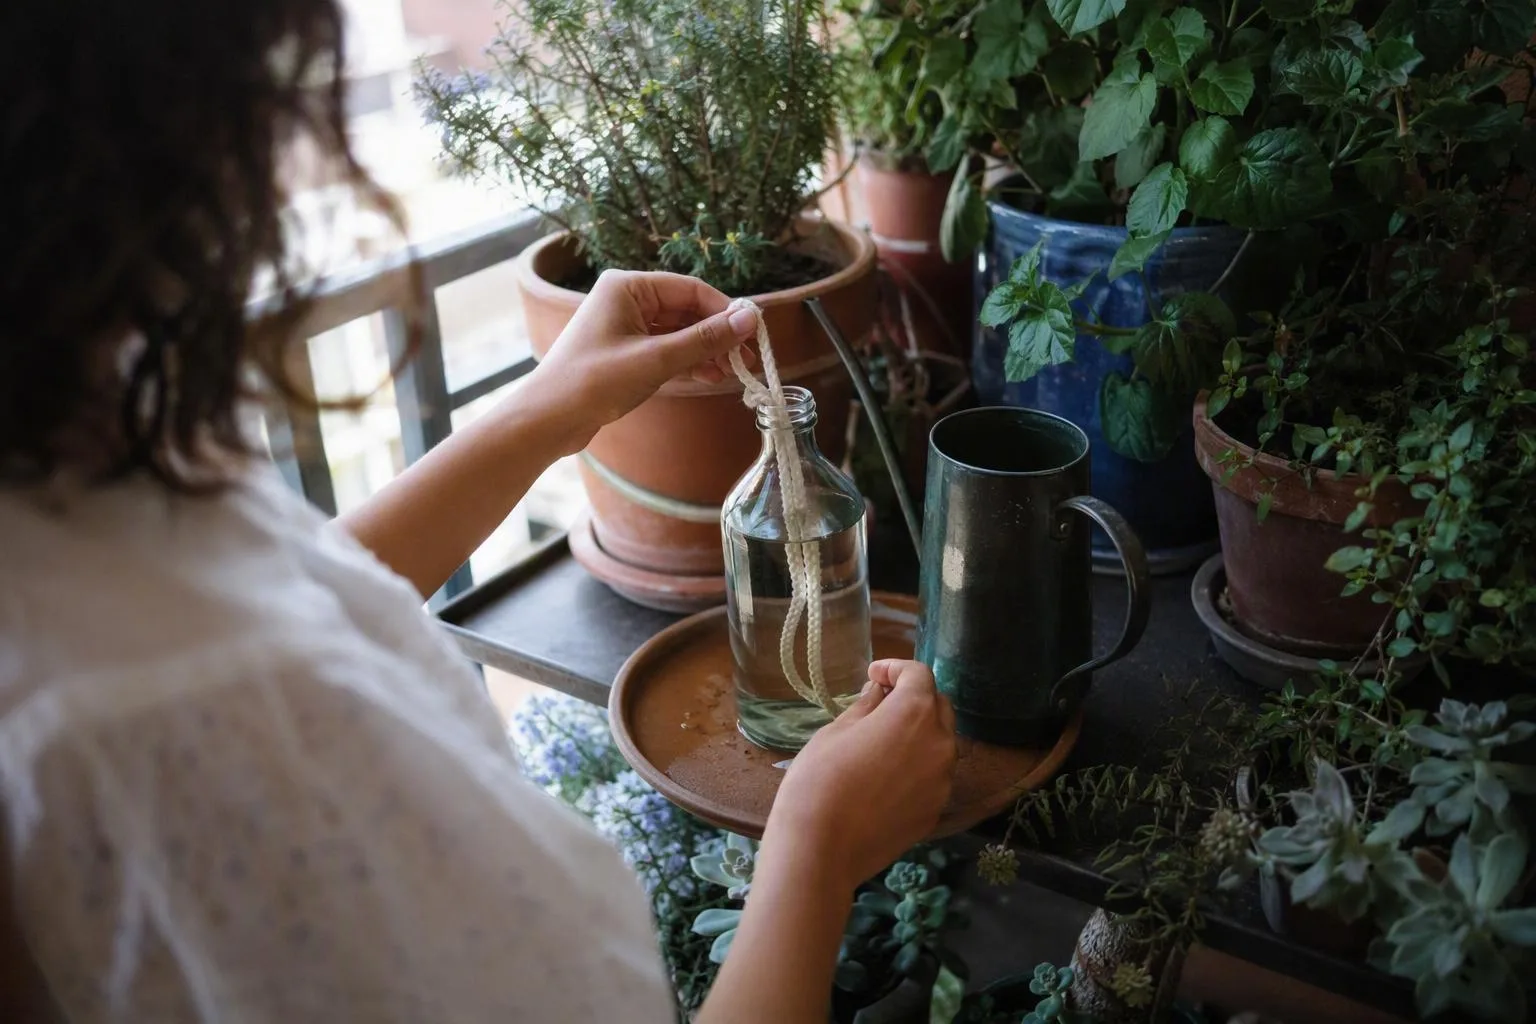
Setup 1 — Deep soak, grouping and shade for a weekend away
For an established plant in a reasonably sized container, a careful soak can cover a day or two away. A 25 cm (10 in) pot of leafy herbs in cool, sheltered conditions has more usable root-zone moisture than a 10 cm (4 in) nursery pot, while a tomato or cucumber in fruit needs more water than a dormant-looking rosemary plant. The pot, plant and weather decide the result.
Do the preparation in this order. First, check the drainage holes in pots and clear roots or compacted mix from them. Water slowly until a little runs from the bottom, wait about 10 minutes, then water again. That pause matters because very dry potting mix can let water run down a gap beside the rootball instead of wetting it evenly. A second pass gives the interior mix time to take up moisture.
- Water the rootball, not just the visible surface.
- Let excess water drain completely.
- Move the pots to bright shade or morning sun, away from hot afternoon glass, reflective walls and the strongest wind.
- Remove saucers that are holding runoff. A saucer can turn a drainage hole into a standing reservoir, leaving the bottom of the mix wet even while the top looks dry.
Keep some airflow around the foliage. I want less heat load, not a sealed, damp cluster of plants. A wet surface with a dry rootball is the first failure to look for. Wilting leaves, a pot that feels unexpectedly light, or mix that is dry 2–5 cm (1–2 in) down are stronger warnings than a dark-looking top layer. At the other extreme, a pot still sitting in water after the soak is not better prepared; it may have too little air around the roots.
| Time away | Low-tech setup | When I would change plans |
|---|---|---|
| Up to 24 hours | Deep soak, group pots, provide bright shade | Small pots, seedlings, full afternoon sun or strong wind |
| About 48 hours | Use the same setup only after a rehearsal | The rootball is dry below the surface before the trial ends |
| About 72 hours | Attempt only in cool, shaded, low-wind conditions | Leaves wilt, pots become light or the mix stays saturated |
If you normally record how much to water container plants, write that amount beside each pot rather than relying on memory. Your notes on how often to water container plants in summer are a starting point, not a vacation guarantee: the same pot can lose moisture faster on a windy roof than on a sheltered patio.
Setup 2 — A plant sitter with measured watering instructions
For a trip of about a week or longer, a person is the setup I trust first. A sitter can respond to a heatwave, a leaking bottle, a fallen pot or a plant that has wilted for a reason no schedule predicted. The advantage is not simply that someone can pour water. It is that they can look, adjust and tell you when the plan has failed.
Make the handover difficult to misread. Put a label on every pot, number the labels, and make a short list showing the plant, its location, the amount of water and the next check date. Use a marked 500 mL or 1 L jug so the instruction is measurable. Write water 600 mL slowly around the mix rather than water well; the first version gives a sitter something they can repeat.
- Ask the sitter to push a finger or a wooden stick 2–5 cm (1–2 in) below the surface.
- If that layer is dry and the pot is light, use the listed amount.
- If the mix is still damp, skip or reduce the watering and send you a photo if the plant looks unhappy.
- Check that runoff can escape and that no saucer or tray is holding water against the pot base.
On a hot or windy balcony, I would ask for visits every 2–3 days. In a cool indoor room, one mid-trip visit may be enough for some established plants, although a small pot beside a sunny window can behave more like an outdoor container. For background, I’d check university extension guidance on watering indoor and container plants while travelling, then adapt the advice to the actual room and pot.
Ask for a message or photo if leaves remain limp after watering, stems are collapsing, the mix smells sour, insects appear in a sudden cloud, water is leaking onto a neighbour’s balcony, or the pot has fallen. Those are intervention points, not instructions to keep adding water.
Setup 3 — Capillary mat irrigation for small indoor pots
A capillary mat works by bringing water through porous fibres and letting the potting mix draw moisture upward through its drainage holes. It suits several lightweight indoor pots with open holes and broadly similar water needs. It is less suitable for a large container, a blocked pot, or a group containing succulents beside thirsty leafy plants.
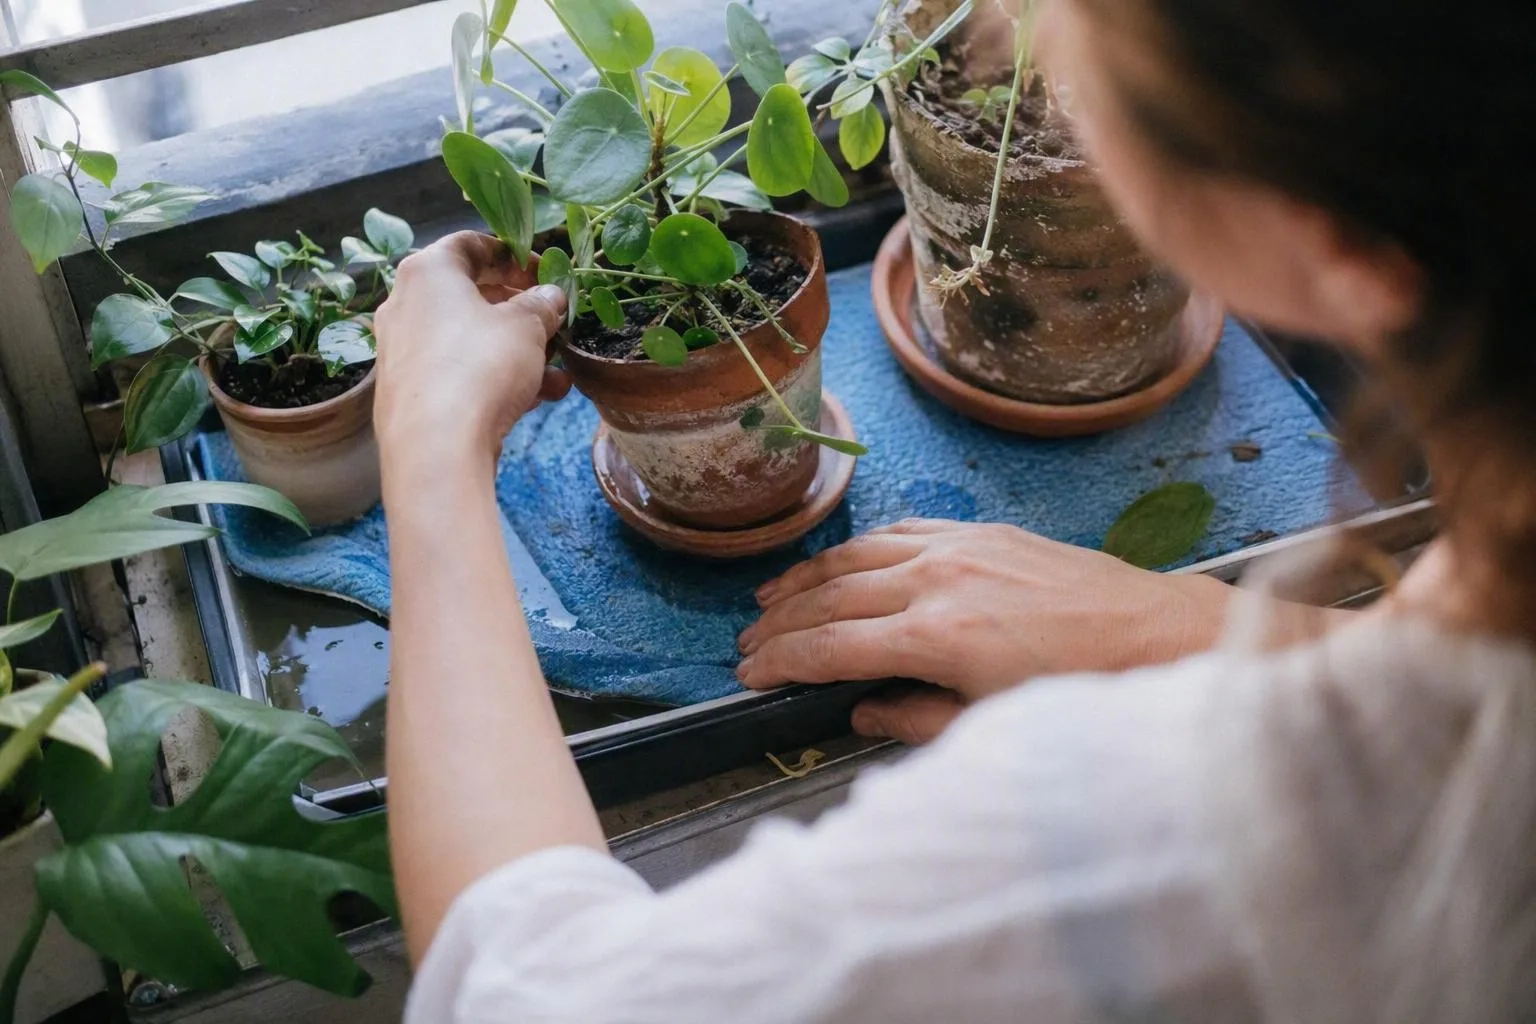
Use a leakproof tray and keep the water shallow. Pre-wet the mat, lay it flat, and rest the pot bases on the damp material rather than placing the containers directly in deep water. Begin with roughly 1–2 cm (3/8–3/4 in) of water beneath the mat. The fibres should be wet enough to make contact with the drainage holes, but the whole pot should not be standing in a deep bath.
Before leaving, run the setup for 48 hours. Look underneath the pots as well as at the leaves. If the mix is permanently saturated, the tray is too full, the mat has dried at one end, mould is forming, or fungus gnats appear around the surface, change the arrangement. A mat can spread water sideways, but it cannot correct a pot whose holes are blocked or a mix that drains poorly.
Group pots with similar needs and similar sizes. A small fern and a small foliage plant may share a mat; a cactus and a thirsty herb should not be treated as one irrigation unit. I prefer a separate tray for anything that needs to dry between waterings, even if that means carrying one extra shallow container to the sink before the trip.
Setup 4 — Wicks from a covered reservoir
A wick is a slow bridge between water and the root zone. Moisture travels along absorbent cord, then the potting mix takes it up around the buried end. The system has no switch to correct a poor fit: a dry cord, a compacted rootball or excessive vertical lift can leave the plant thirsty, while a very fast wick can keep the mix too wet.
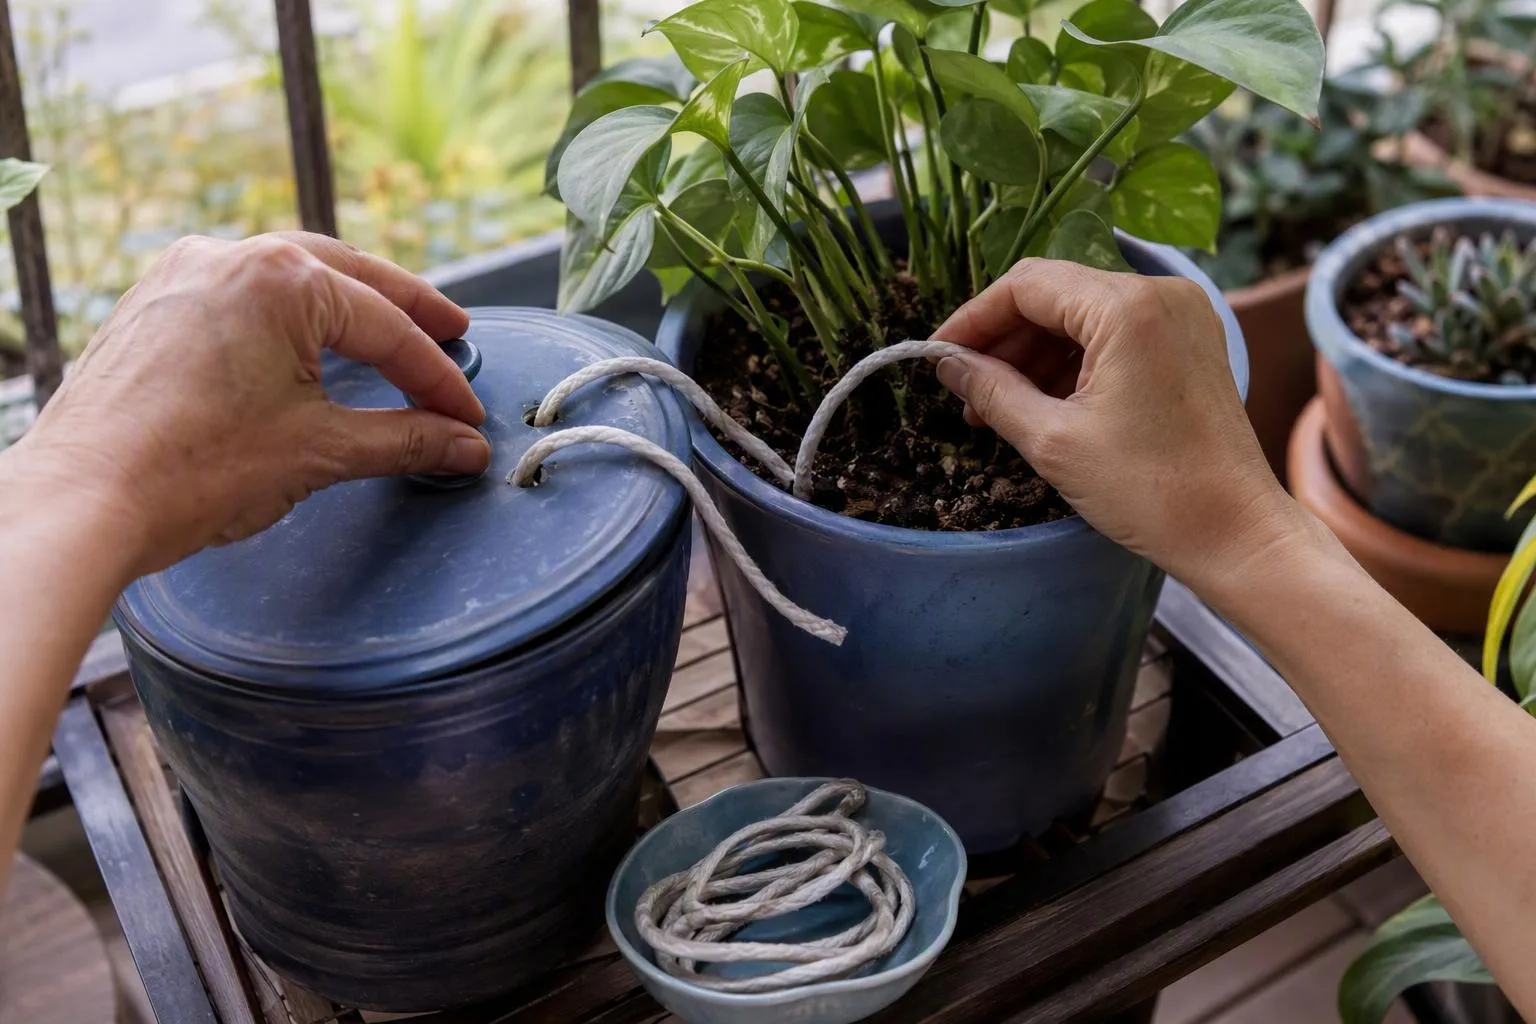
For a 15–20 cm (6–8 in) pot, try one absorbent cord around 4–6 mm (about 3/16–1/4 in) thick. A larger or especially thirsty container may need two cords, but I would add them only after testing one. Cord thickness, fibre, mix texture and the height difference between reservoir and pot all change the delivery rate, so these are starting dimensions rather than universal settings.
- Pre-wet the cord from end to end. A dry wick may resist taking up water during the first hours.
- Place one end 5–8 cm (2–3 in) into the root zone, close enough to reach moist roots but not pressed against the stem.
- Put the other end into a covered reservoir. Start with the reservoir no more than about 30 cm (12 in) below the pot base.
- Water the potting mix from above before the trial so the wick is maintaining moisture rather than trying to revive a dry rootball.
A covered reservoir slows evaporation and keeps dust from entering the cord. Measure the plant’s observed daily use, multiply it by the number of days away, and add a modest weather buffer. A reservoir that holds several times more water than that is not automatically safer; if the wick runs too freely, the excess supply simply gives it more time to keep the mix wet.
During the 48-hour rehearsal, check the cord, the root zone and the reservoir level. If the cord is dry but the reservoir is full, improve contact or shorten the lift. If the mix is glossy, sour-smelling or constantly wet, reduce the wick or move to a slower cord. The useful question is not whether the reservoir is large. It is whether the delivery rate matches the pot’s draw.
Setup 5 — An inverted bottle or watering spike, tested before you trust it
An inverted bottle is a short-trip stopgap, not a dependable two-week solution by default. A 500 mL bottle may suit a small pot, while a larger container might start with 1–2 L, but bottle capacity matters less than the rate at which water leaves the bottle and enters the mix.
There are two common failures. A sealed bottle can form an airlock and stop releasing water. A hole that is too large can empty the bottle in hours, saturate the rootball and leave the plant dry once the supply is gone. A narrow opening may clog with fine mix or algae. Simply swapping in a larger bottle does not fix any of those flow problems.
- Water the rootball normally first.
- Secure the bottle or spike near the pot edge, away from the stem and major roots.
- Make sure the bottle cannot tip and pull the stem or crush nearby foliage.
- Run it for 48 hours in the same light and temperature the plant will experience while you are away.
If the bottle empties in one day, change the outlet or use a wick rather than adding volume. If the mix remains saturated, reduce the flow or abandon the bottle. I use this method for a single forgiving pot when I can test it, not as a collection-wide answer.
Setup 6 — Gravity-fed drip lines controlled by a timer
A gravity-fed line is the option I choose for a balcony collection or a longer absence because each pot can receive a repeatable flow. The basic system has a reservoir or tap, a filter, supply tubing, emitters and a battery timer. A timer can control when water starts, but it cannot tell whether an emitter has clogged, a tube has kinked or the reservoir has run dry.
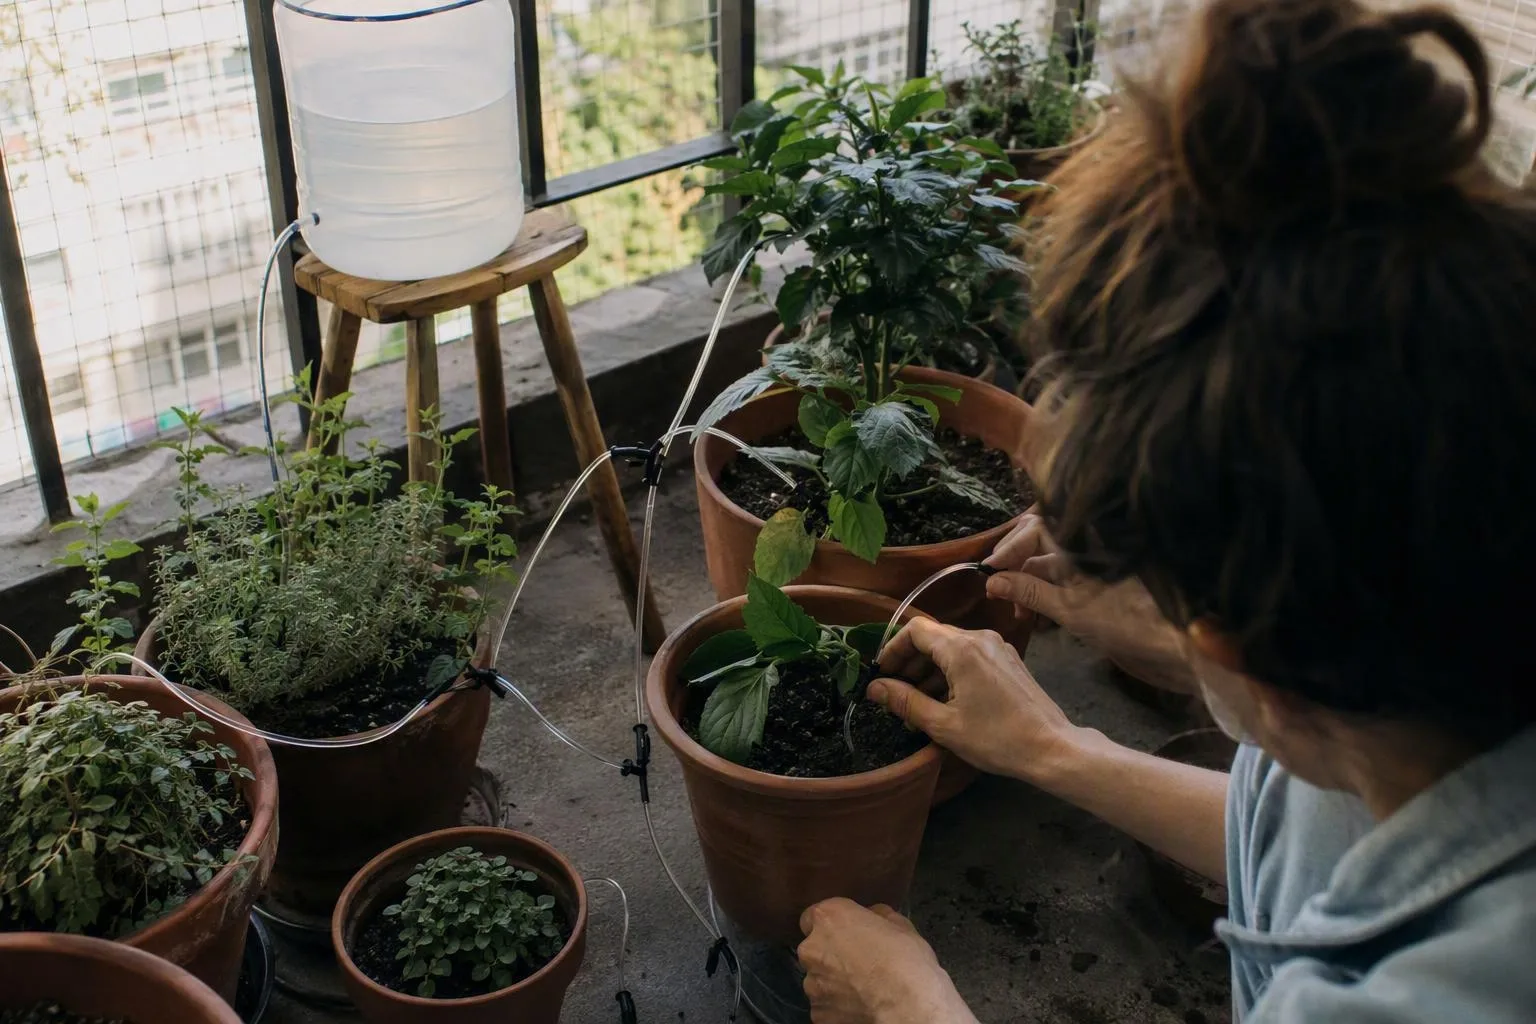
Start by measuring the emitter instead of trusting its printed rating. Put the emitter into a measuring jug for 10 minutes, record the millilitres collected, and multiply by six to estimate litres per hour. If it releases 330 mL in 10 minutes, the working estimate is about 2 L per hour.
Suppose one pot uses about 0.8 L per day and the tested emitter delivers 2 L per hour. The starting runtime is 0.8 divided by 2 hours, or 0.4 hours: about 24 minutes each day. That is a starting calculation, not a final setting. Run the line for at least 48 hours, check the pot 2–5 cm (1–2 in) down, and adjust for sun, wind, runoff and the actual plant.
For a medium container, I would begin with one adjustable emitter in the 1–2 L-per-hour range. A broad or very thirsty pot may need two emitters placed on opposite sides, while a small herb may need a shorter run or a lower-flow outlet. Put the emitter near the pot edge so water spreads through the root zone rather than striking the stem and running down one channel.
Watch for clogged emitters, a reservoir that siphons after the timer stops, low batteries, loose tubing and a reservoir placed too low to maintain flow. A raised reservoir can improve gravity feed, but a tall tank adds weight and may increase pressure. Five litres of water weighs about 5 kg (11 lb), before the container, stand and wet mix are counted. Check local building authority or strata guidance on balcony load limits if the support capacity is uncertain; do not place a heavy tank against a railing just because it is convenient.
The way I set the schedule is tied to the plant’s observed draw, not to a generic vacation setting. Your notes on how often to water container plants in summer can help identify the starting point, but the catch test and the 48-hour rehearsal are what expose a mismatch. A line that delivers steadily to the wrong amount is still a failed setup.
Setup 7 — Self-watering planters and sub-irrigated containers
A proper self-watering planter has two separate compartments: potting mix above, and a lower reservoir below. A false floor or wicking column lets roots and mix draw moisture upward without leaving the entire rootball submerged. A fill tube lets you add water, while an overflow gives excess water somewhere to go.
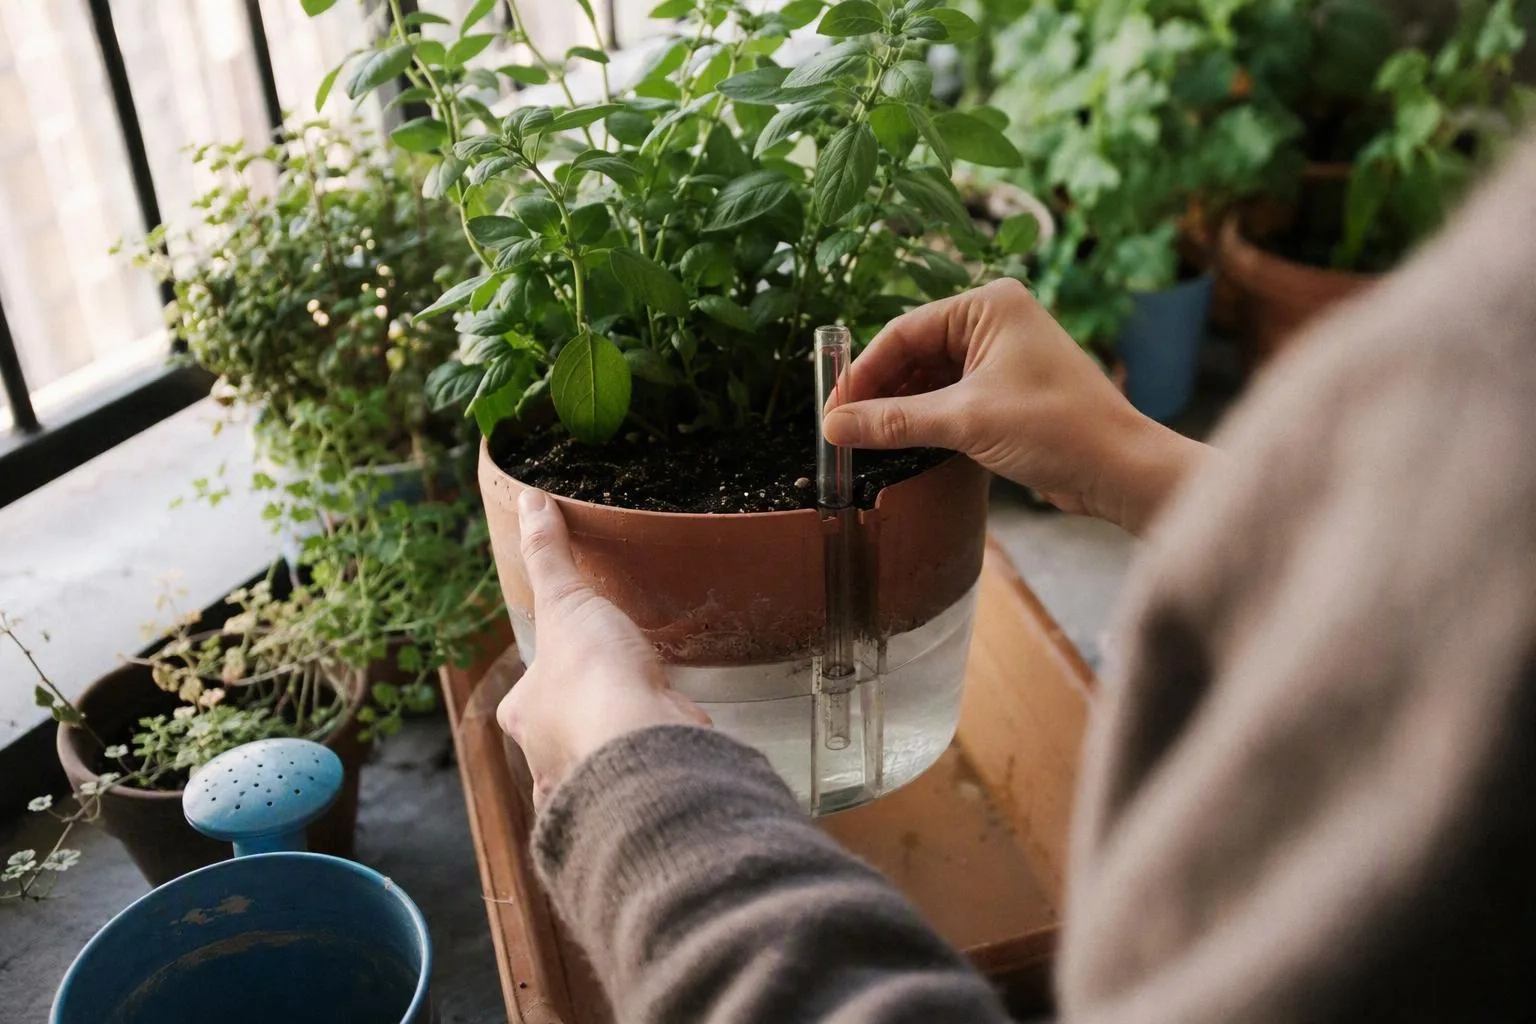
That is different from a decorative pot with no drainage and a saucer permanently filled beneath it. Before your trip, measure or read the reservoir capacity, fill it to the normal mark, pre-moisten dry potting mix from above, and confirm that the water level falls during a 48-hour trial. If the level never moves, the wick may not be contacting the mix. If the mix stays saturated, the planter may be unsuitable for that plant or the overflow may be blocked.
Every additional litre adds about 1 kg (2.2 lb) to the load. That matters on a balcony, particularly if several planters share one narrow section of floor. I fill the reservoir in place rather than carrying a large, heavy planter after watering, and I leave room to inspect the overflow before I go.
The recommendation flips for cacti, succulents and other plants that need rapid drainage between waterings. A constantly available reservoir can keep those mixes wetter than the roots tolerate. For those plants, I prefer a well-timed sitter visit or a tested deep soak with shade rather than a permanent water supply.
Mark the starting water level with a strip of tape and write the date beside it. After two days, record how far the level has fallen and inspect the leaves and mix. That observed daily draw, multiplied by the number of days away, is the useful vacation estimate. On your return, check the reservoir, the overflow and the root-zone moisture before adding more water; a low reservoir does not prove that every potting mix is dry.
Tonight, choose one representative pot and begin the 48-hour rehearsal: water it properly, mark the reservoir or bottle level, and place it where it will spend the trip. By the second morning, you should know whether the water level has moved, whether the mix is merely moist or saturated, and whether the leaves still look normal. If any of those checks fails, change the delivery method before you leave rather than making the container larger and hoping.