Blossom End Rot: Why It Happens and How to Prevent It
A blossom end rot patch begins at the flower end of a developing fruit, opposite the stem, as a pale or water-soaked mark. It then turns tan, brown or nearly black, sinks into the fruit and becomes leathery while the tomato, pepper or squash is still growing.
That pattern points to a water-and-calcium delivery problem rather than a contagious disease. The damaged patch will not heal, but the next fruit may develop normally once the container's root zone stops swinging between drought and saturation.
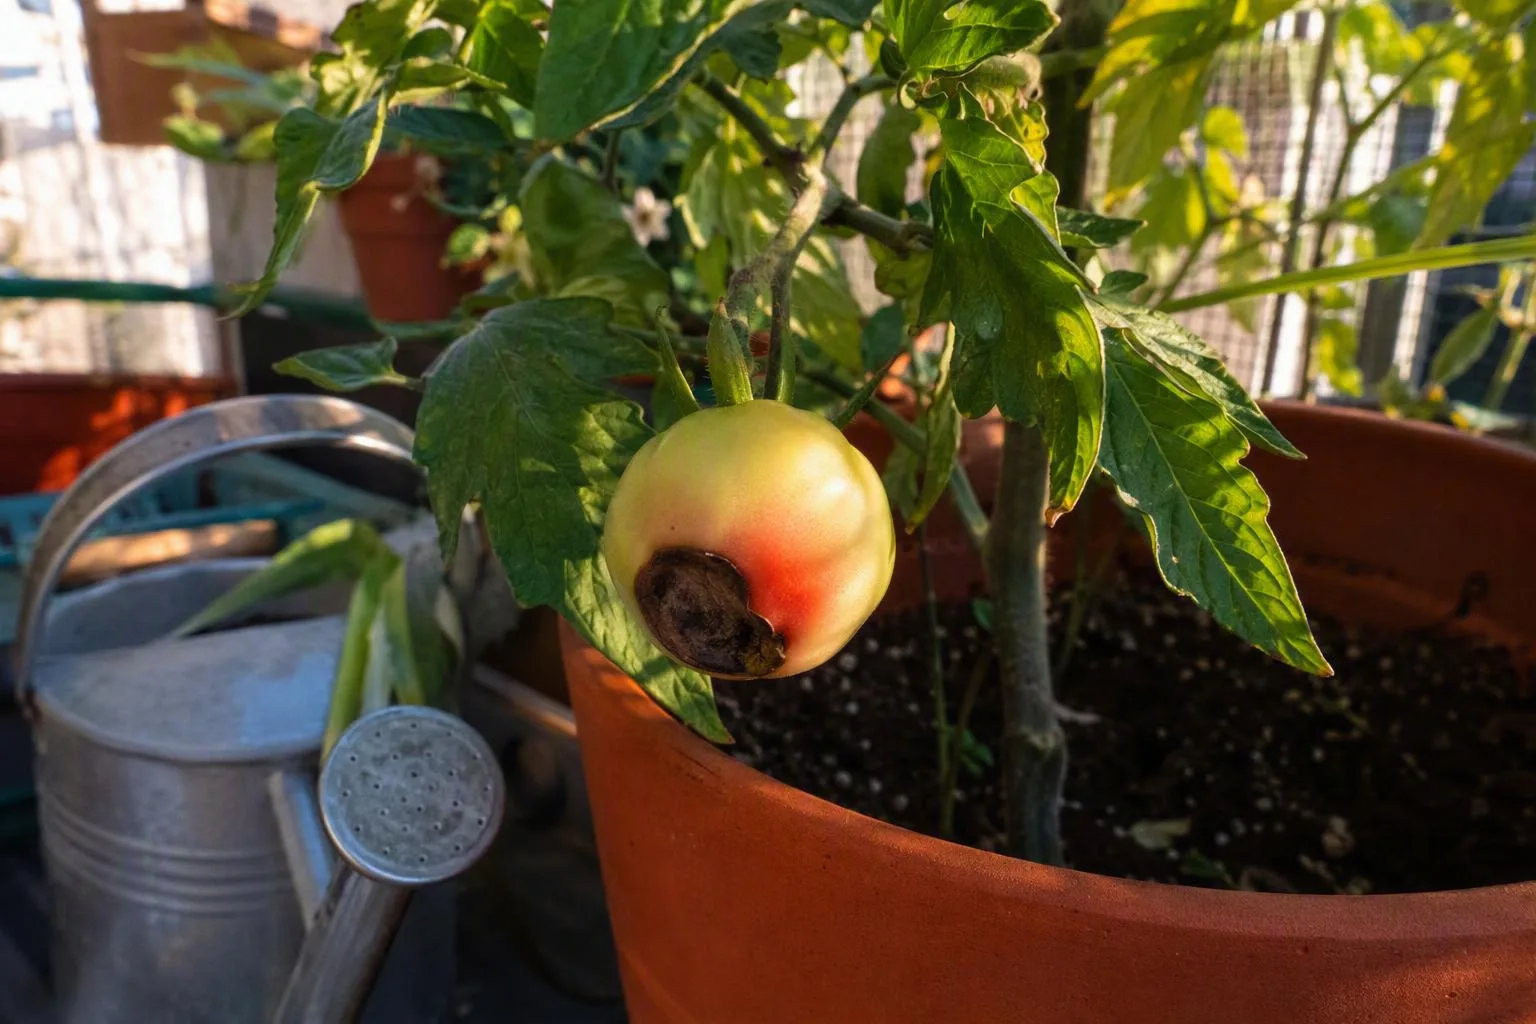
I made the classic balcony mistake with a patio tomato: after finding a black patch on the first fruit, I reached for a calcium amendment while allowing the small plastic pot to swing from dry to drenched. The fruit did not improve. The useful change came only after I treated moisture as the problem to manage, then checked the pot, roots and feeding routine in that order.
Start at the fruit: confirming blossom end rot in tomatoes, peppers and squash
Start with location. Blossom end rot appears at the blossom end, the end that carried the flower, not around the stem. The first patch can look almost translucent or water-soaked. As the fruit enlarges, that area dries into a flat or sunken tan mark, then becomes brown, black or papery. On a tomato, it often forms a fairly clear circular or irregular patch at the base. On a pepper or summer squash, the affected end may collapse more dramatically because the fruit is softer.
This is the question I get asked most about tomatoes, but the checking order should not stop there: peppers, eggplants and summer squash can show the same flower-end damage. The crop changes the shape and speed of the lesion, but the first diagnostic question stays the same: is the damage at the blossom end and is the tissue becoming sunken and dry rather than spreading as wet decay?
I use these contrasts before I buy anything:
- Blossom end rot: begins at the flower end and usually becomes dry, sunken and leathery as the fruit grows.
- Sunscald: tends to appear on the side or shoulder exposed to strong sun. The patch is often bleached, pale and papery rather than centred at the flower end.
- Cracking: follows a split in the skin, commonly around the stem or in lines radiating across the fruit. It is an opening, not a flat internal-looking scar.
- Anthracnose: can produce small, sunken spots that enlarge and may show darker rings or multiple lesions. Its distribution does not follow the blossom end as neatly.
- Soft fungal or bacterial decay: tends to stay wet, slimy or foul-smelling. Mould or other organisms may colonise a blossom end rot lesion after the original tissue has been damaged, so a secondary rot can obscure the first symptom.
The scar itself does not travel from one fruit to another like an infection. My explanation is that blossom end rot is a physiological disorder tied to calcium delivery and root-zone conditions, not a communicable pathogen moving through a crop. Several fruits can show it at once because they share the same pot, weather and watering pattern; that does not mean one fruit passed it to the next.
The hidden mechanism is water movement, not simply an empty calcium supply
Here is the water route I use to explain blossom end rot: calcium must be dissolved in water at the root surface, taken up by the roots, and carried through the plant's xylem. Xylem is the plant's water-conducting tissue, rather like a set of narrow internal pipes. The developing fruit needs a continuing supply as its cells expand, especially at the blossom end where the tissue is vulnerable.
- Root zone: calcium in the mix becomes available only when there is water around the roots and the roots are healthy enough to absorb it.
- Roots: roots take up water and dissolved minerals. A dry root ball, damaged roots or roots sitting in airless saturated mix can interrupt that uptake.
- Stem and leaves: water movement through the plant is influenced by transpiration, the loss of water from leaves. Hot sun and wind increase demand, while root stress limits supply.
- Fruit: if the fruit is enlarging faster than calcium-containing water reaches its far end, the blossom-end tissue can fail even though the potting mix contains some calcium.
That is why a container can contain calcium and still produce blossom end rot. A pot that dries hard, a root ball that stays saturated, roots damaged during transplanting, high soluble-salt levels or a sudden burst of growth can all disturb the supply-and-demand balance. A windy balcony can create the same problem without the mix looking dramatically dry because leaves may lose water faster than the roots can replace it.
Genuinely low calcium or an unsuitable pH can contribute, but they are not the only explanation. If the mix is already within a sensible range and the plant is alternating between drought and heavy watering, adding more calcium may change nothing. It may simply leave the real trigger untouched.
That is the useful distinction: calcium in the soil is not the same as calcium arriving at the fruit. A calcium spray or amendment cannot repair tissue that has already collapsed, and it cannot compensate for a root ball that is repeatedly drying to the pot wall and then being flooded.
If you want a second explanation before changing the mix, compare your symptoms with University extension guidance on blossom end rot physiology and management. I use outside guidance for the broad mechanism, then apply the practical test to the particular container in front of me.
A moisture routine that keeps the container root ball steady
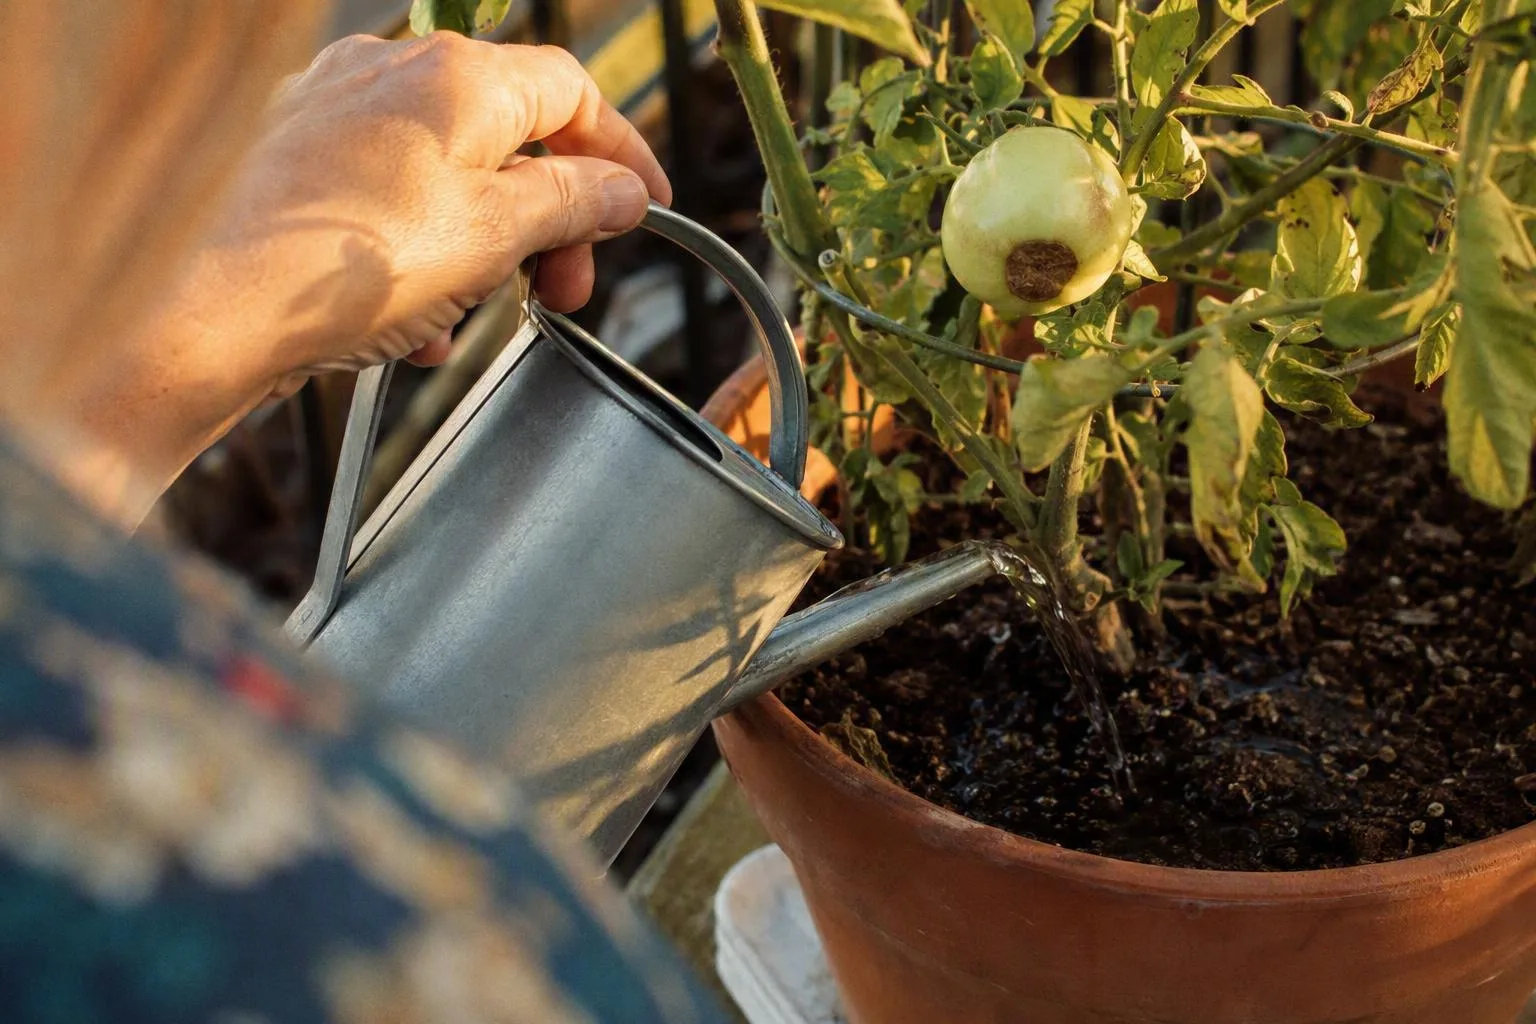
A fixed watering calendar sounds tidy on a balcony, but the pot does not lose water at a fixed rate. I check the plant and the mix instead. A black plastic container in full sun and wind may need a daily moisture check, while a glazed pot in part shade may go two or three days between checks. Those are checking intervals, not promises about how often you will water.
Use this sequence:
- Look at the plant and pot. Limp leaves, a very light pot, mix pulling away from the sides or a dry crust are clues. They are not enough on their own; a wilted plant can also have wet, damaged roots.
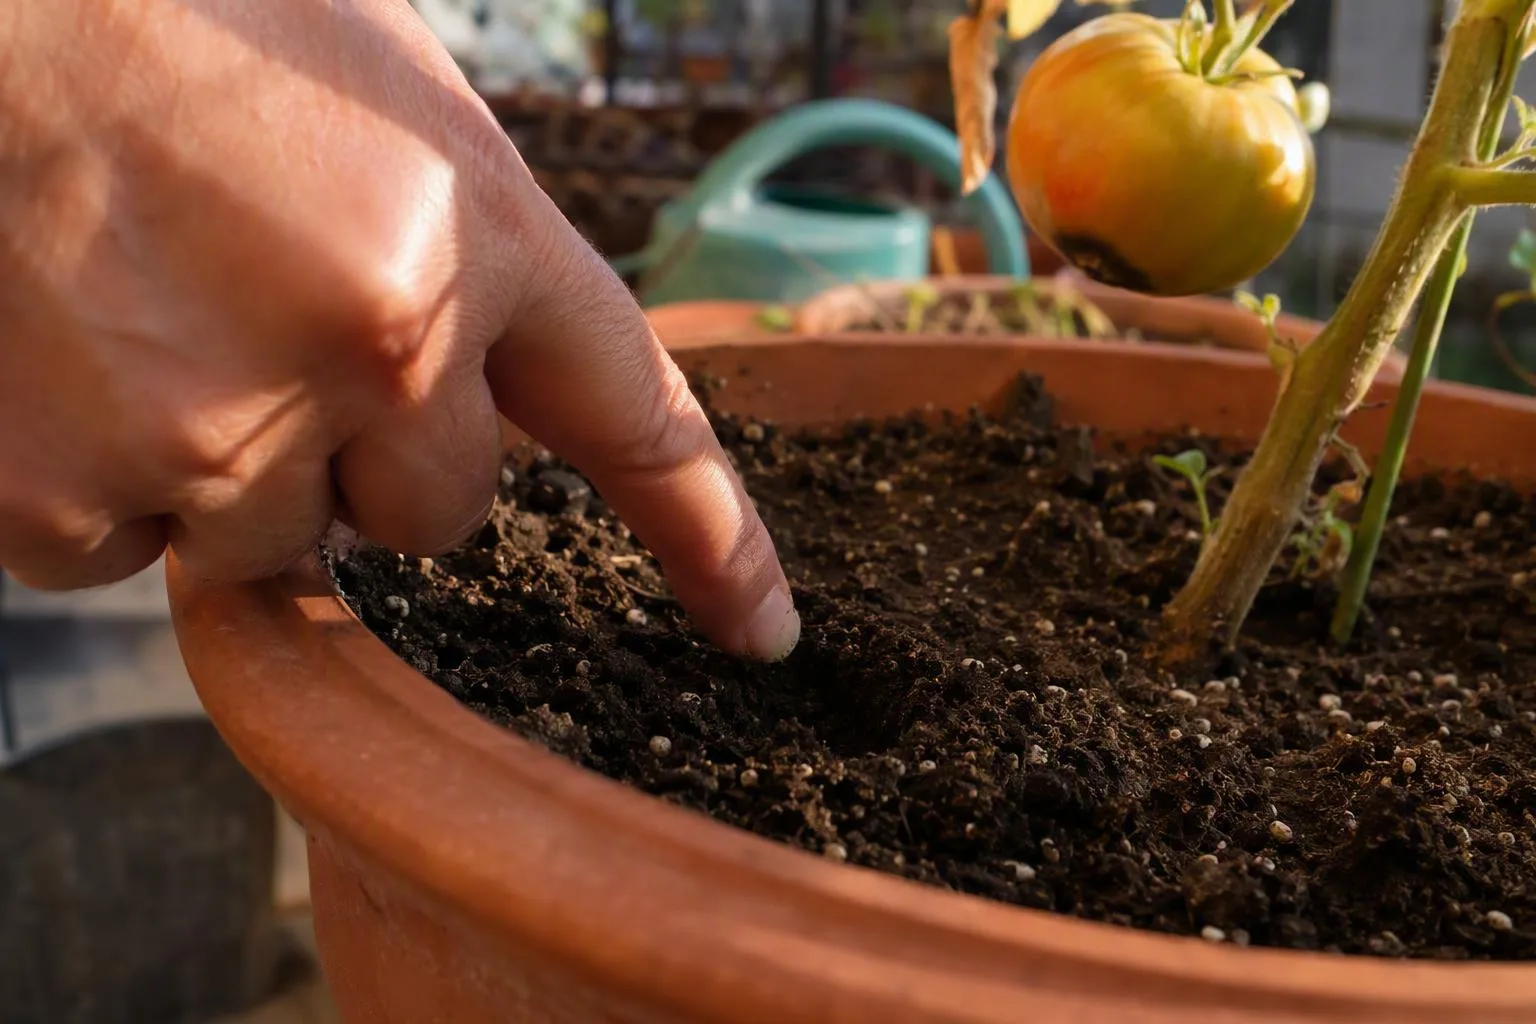
- Check the top 2-5 cm (1-2 in) of mix. Push a finger into the surface near the edge of the pot. If that zone is dry, check whether the pot feels unusually light and whether the lower drainage holes are producing any moisture. In a large container, the surface can dry while the lower root zone remains wet, so do not treat one dry fingertip as a complete diagnosis.
- Water across the whole surface. Pour slowly around the stem rather than dumping one stream in one place. Stop when a little water exits the drainage holes. That runoff tells me water has travelled through the root ball, although a very dry mix may need a pause and a second, slower pass before it wets evenly.
- Let the pot drain. Empty a saucer after drainage has slowed. The plant needs moisture in the mix, not a permanent bowl of water beneath it.
- Protect the surface once it is moist. Add a 2-5 cm (1-2 in) layer of mulch, leaving a clear gap around the stem. Mulch slows evaporation from the surface; it does not make a poorly draining pot safe.
The failure pattern I am trying to avoid is not one missed watering. It is the repeated sequence of bone-dry mix, a sudden flood, temporary recovery and another dry-out. Small sips can make this worse: they wet the upper layer while leaving the inner root ball dry, then encourage the grower to water again when the surface looks thirsty.
In a black plastic pot on a hot, exposed balcony, I would check every morning and again in the afternoon during a heatwave. I would water when the root zone meets the dry-and-light test, not merely because the calendar says so. In a glazed pot in part shade, I would begin with a check every two or three days and adjust after feeling the mix. If the lower part remains wet for several days while the plant wilts, stop adding water and inspect the drainage holes and roots instead.
My broader guide to how often to water container plants starts with the same rule: frequency follows pot material, wind, sun, plant size and root volume. For blossom end rot, consistency matters more than finding a magic number. I would rather see a reader water thoroughly when needed than sprinkle the same small amount every evening.
Calcium, pH and fertilizer: test before reaching for an amendment
Once moisture is under control, look at calcium and pH. I do not add three different products at once. If the fruit improves, I then have no idea which change mattered; if it does not, I have made the root zone harder to interpret.
| Product or practice | What it supplies or changes | My decision rule |
|---|---|---|
| Epsom salt | Magnesium sulfate, not calcium | It is not a blossom end rot cure. Use it only for a supported magnesium need, not as a general calcium remedy. |
| Garden lime | Calcium compounds that can also raise pH | Consider it only when a test and the mix label suggest low pH or a calcium need. Do not add it blindly to an already suitable mix. |
| Gypsum | Calcium with much less pH-raising effect than lime | It may fit a confirmed calcium need where pH should not rise, but it still does not repair erratic watering or damaged roots. |
| Complete fertilizer | A blend of nutrients, often including nitrogen | Follow the product label and avoid repeated heavy applications. Excess soluble salts can add root stress, while excessive nitrogen can push fast leafy growth. |
For most container tomatoes, I use roughly pH 6.0-6.8 as a working target, while allowing the crop and the potting-mix label to shift that range. The point of the range is not to chase a decimal. It is to identify whether the root zone is broadly suitable for nutrient uptake. A test from a mixed sample of the potting medium is more useful than guessing from the colour of a leaf or the presence of a single damaged fruit.
Epsom salt for plants is often recommended because it dissolves easily and sounds like a nutrient fix. It supplies magnesium, though, not calcium. Repeated applications can add salts without addressing the delivery problem, so I would set it aside unless a test or a clear pattern points to magnesium deficiency.
Lime and gypsum are not interchangeable. Lime can move pH upward as it supplies calcium. Gypsum is the more restrained option for supplying calcium without the same pH-raising effect, but neither product is a substitute for a stable root zone. Use the amount and method on the product label, keep fresh amendment away from direct contact with the stem and avoid building a concentrated pile at the surface.
Feeding follows the same restraint. Container plants lose nutrients whenever water drains through the pot, so they need replenishment, but a stronger dose is not automatically better. My rule is to follow the label, apply to already-moist mix when the instructions allow it, and use how often to fertilize container plants as a schedule to adapt to plant size and weather rather than a reason to feed a stressed plant immediately.
Build prevention into the pot: root volume, drainage and fruit-set timing
The pot is part of the treatment, not a neutral holder. A compact determinate tomato needs about 20 L (5 gal) of potting mix as a practical minimum in my balcony setup. A larger plant or an indeterminate variety is more forgiving in roughly 30-40 L (8-10 gal). These are working specifications, not guarantees: a small plant in a hot, windy position can still struggle, and a larger pot can still fail if the mix stays wet.
If I were buying for one tomato this weekend, I would choose the larger volume if I had a safe place for it. The extra mix acts as a moisture buffer, so the plant has more time between a hot afternoon and the next check. The trade-off is weight, cost and the effort of moving a wet container. A large pot on a balcony also needs a sensible position and, where relevant, a check of building rules or load guidance before it is filled.
My practical container specification is:
- Volume: about 20 L (5 gal) for a compact determinate tomato; about 30-40 L (8-10 gal) for a larger or indeterminate plant.
- Mix: a purpose-made, free-draining container mix rather than dense garden soil. Garden soil can settle and leave less air around the roots in a pot.
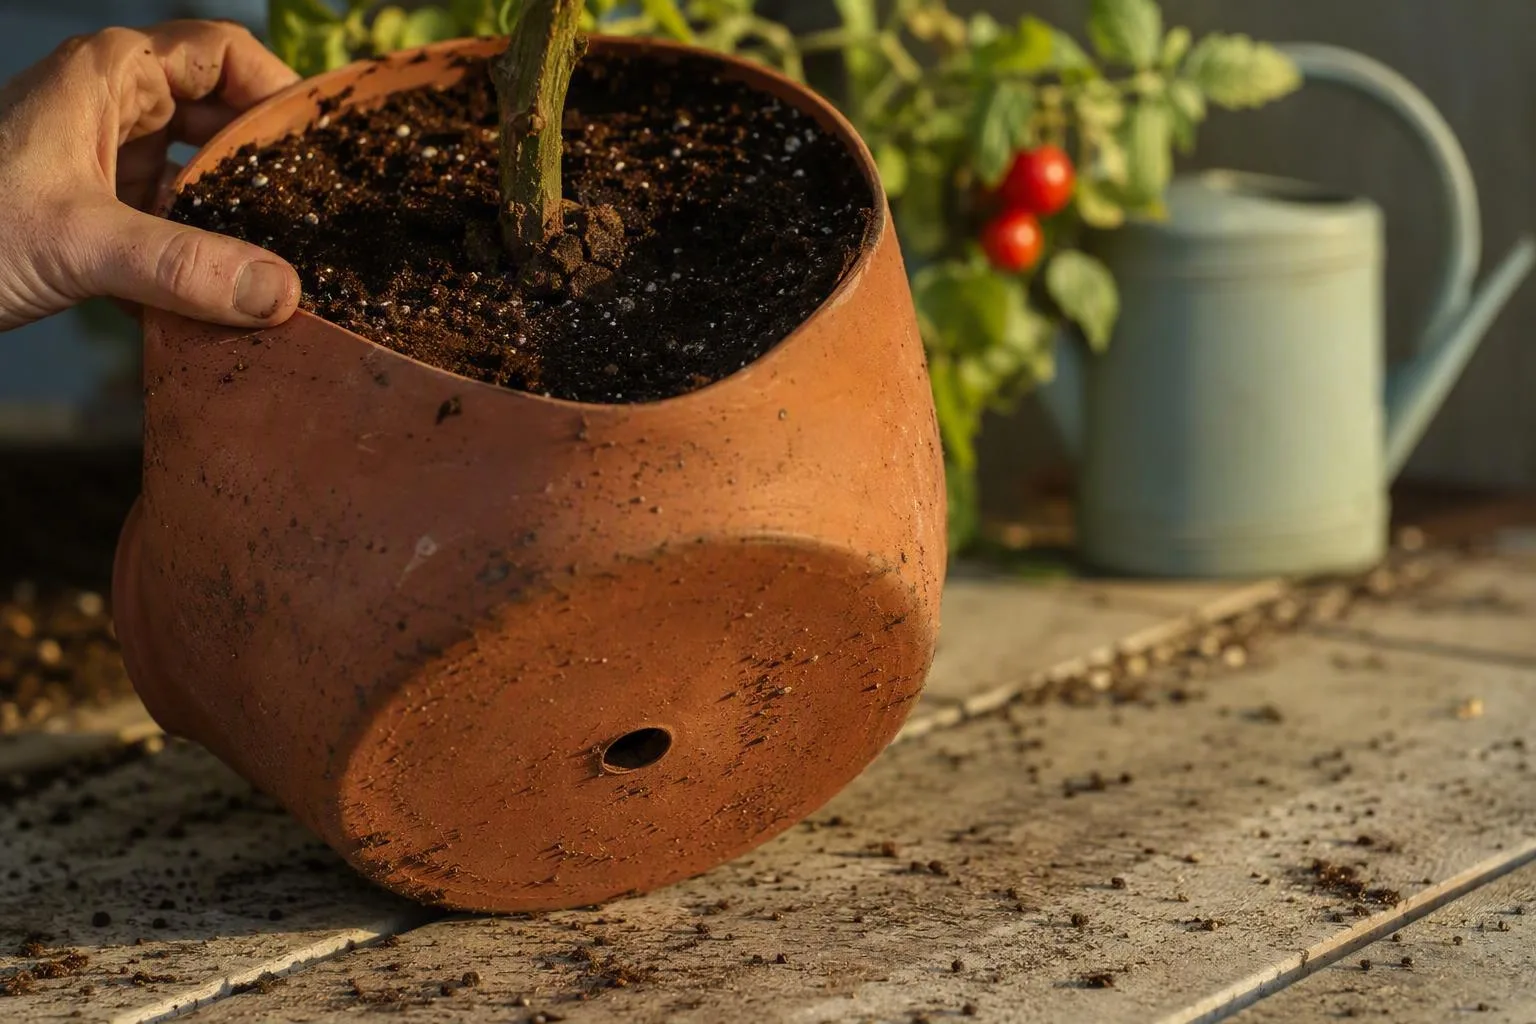
- Drainage: open drainage holes at the bottom, with no saucer left full after watering.
- Position: enough light for the chosen variety, but protection from a constant drying wind where possible.
- Surface: mulch added after planting and watering have settled the mix, with space kept around the stem.
Skip the gravel layer. A gravel-filled base does not create a magic drain beneath fine potting mix. Water can remain perched above the change from fine mix to coarse stones; a perched water table is simply a band of wetter mix held above that boundary. The gravel also occupies volume that roots could have used. Put the drainage holes at the bottom, fill the pot with a suitable mix and keep the holes open instead.
Cramped roots, a pot that dries within hours, wind exposure and rough transplanting can all create the moisture swings associated with blossom end rot. Before moving a young plant outdoors, harden it off by gradually increasing its exposure to outdoor light and wind rather than placing tender growth straight into a harsh position. After planting, water the entire root ball thoroughly. Add mulch only after the mix is moist; mulch over dry mix can slow evaporation without solving the dry root zone underneath.
The first fruit-setting period deserves particular attention. This is when the plant is shifting from leafy growth to filling fruit, while a small container may still be warming and drying quickly. I would not respond by piling on calcium. I would check the pot volume, drainage, moisture depth and wind exposure, then keep those conditions steady while the next flowers set.
For a broader comparison of root volume before you shop, the guide to best container size for vegetables is the useful place to start. For this problem, the key insight is that pot size is a watering tool: it changes how quickly conditions move from adequate to stressful.
The damaged fruit will not heal: use the next 2-3 weeks to reset the plant
There is no treatment that fills the sunken scar back in. I use the affected fruit as a record of what happened, then work on the fruit that has not finished developing.
- Remove fruit with a large, soft or expanding lesion. Bag it rather than leaving a collapsing fruit pressed against leaves or neighbouring fruit. If the patch is small and dry, you can choose to leave the fruit while you correct the plant, but do not expect the scar to disappear.
- Check the container before changing the feed. Look for blocked holes, a constantly wet saucer, mix pulling away from the sides, or roots circling densely at the drainage openings. If the plant was recently transplanted, consider whether roots were torn or left exposed to drying air.
- Reset watering. Re-wet a dry root ball gradually, then water deeply enough for a little runoff. If the mix is staying wet and the plant is wilting, improve drainage or inspect the roots instead of increasing the watering frequency.
- Inspect new fruit every 2-3 days as it enlarges. Note whether the blossom end stays firm and green or begins to show a new pale, sunken patch. A simple photograph and date make the direction easier to judge than memory.
Later fruit can develop normally if the root-zone conditions improve, but I treat that as a reasonable prospect rather than a promise. If two or more newly enlarging fruits continue to form fresh lesions after the watering pattern is stable, test the mix or ask a garden centre about a suitable soil test. At that point, a calcium or pH issue deserves more attention than another blind amendment.
Blossom end rot itself is not a mould diagnosis. Still, the damaged tissue is an opening for secondary decay, so I discard produce that is mouldy, foul-smelling, slimy or extensively soft. With a small, dry lesion, some growers trim away the damaged area generously and use the firm portion promptly; if the sound portion is doubtful, discarding the fruit is the simpler choice.
Three quick questions I hear about blossom end rot
Does Epsom salt cure blossom end rot?
No. Epsom salt is magnesium sulfate and does not supply calcium. Correct the root-zone moisture first, then test before adding either magnesium or calcium amendments.
Can I eat a tomato with blossom end rot?
The disorder is a physiological defect rather than a contagious infection, but that does not make mouldy or decaying tissue suitable to eat. Cut away a small, dry damaged area generously only if the remaining fruit is firm, clean and free from off odours. Discard fruit that is slimy, mouldy, foul-smelling or extensively soft.
Will blossom end rot spread from one plant to another?
The scar itself does not spread between plants. If several containers show the same symptom, I first look for a shared condition such as irregular watering, a drying balcony position, damaged roots or a common potting mix problem.
Today, photograph the newest fruit, check the top 2-5 cm (1-2 in) of mix and write down whether the pot is plastic in full sun or glazed in part shade. Check again tomorrow if the position is hot or windy, otherwise in two days; that small record will tell you more about the cause than another handful of calcium.
Frequently Asked Questions
Does Epsom salt cure blossom end rot?
No. Epsom salt is magnesium sulfate and does not supply calcium; repeated use can add unnecessary salts or upset the nutrient balance. Correct root-zone moisture first and test before adding amendments.
Can I eat a tomato with blossom end rot?
Blossom end rot itself is a physiological defect, but the affected tissue should be cut away. Discard the fruit if the area is mouldy, foul-smelling, slimy or extensively soft.
Will blossom end rot spread from one plant to another?
No, it is not contagious. Several plants showing it at once usually share a cause such as irregular watering, damaged roots, a drying balcony position or a common potting mix problem.