What Does Root Rot Look Like? Check Roots Before You Water
If you’ve typed what does root rot look like because a potted plant is suddenly limp, don’t water it yet. Check 2–5 cm (1–2 in) below the surface and lift the pot: wet mix in a heavy pot points in a very different direction from dry mix in a light one.
The leaves can tell you that something is wrong, but they rarely tell you why. Root rot is confirmed below the mix, where healthy roots feel firm and damaged roots lose their structure. I use the moisture check first, then the root check, because watering a plant that is already sitting wet can make the diagnosis harder.
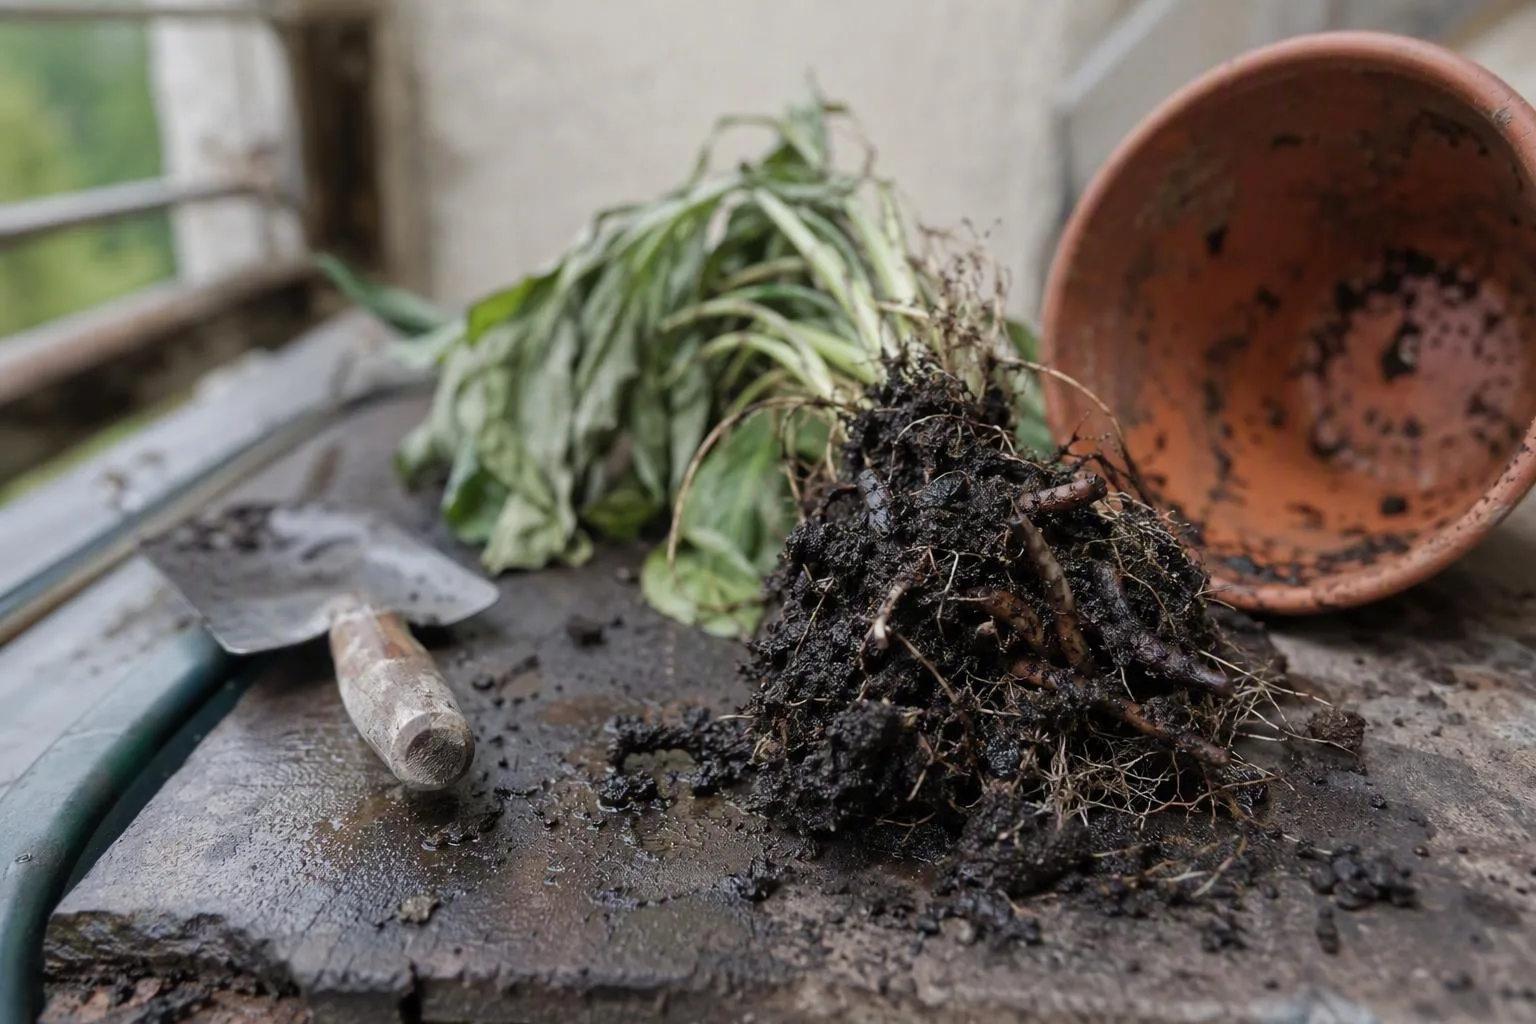
Before the next watering: a 60-second moisture-and-pot check
Wilting is a water-loss symptom, not a watering instruction. A plant can wilt because its mix is dry, but it can also wilt because damaged roots cannot move water into the stems. The leaves look thirsty in both cases.
Here is the balcony check I use. Keep a bamboo skewer, wooden chopstick or your finger beside the pot and work through these three observations:
- Check below the surface. Push your finger or skewer 2–5 cm (1–2 in) into the mix, near the edge rather than directly against the stem. The surface can look dry while the root zone remains saturated. In a small herb pot, check closer to 2 cm (1 in); in a larger container, use the deeper end of the range.
- Compare the pot’s weight. Lift it with both hands, or tilt it just enough to feel the difference. A recently watered pot gives you a useful reference. If the pot feels almost as heavy as it did after watering several days ago, the mix has not released much water.
- Look underneath. Check that the drainage hole is open and that the saucer is not holding old runoff. A blocked hole, a pot sitting flat against a balcony surface, or a permanently full saucer can keep the lower root zone wet even when the top looks reasonable.
Take a simple example: a 15-cm (6-in) plastic pot of basil has limp leaves. The skewer comes out cool and damp at 3 cm (1¼ in), the pot feels heavy, and the saucer contains yesterday’s runoff. I would not add water. I would move the plant out of the hot sun temporarily and inspect the roots if the leaves stay limp.
Mix that remains wet for roughly 5–7 days in warm, actively growing conditions is a warning that the pot, mix or watering routine is not balancing evaporation and drainage. It is not proof of root rot. A moisture-loving plant, cool weather or a large container can explain slow drying. The concern is that water is occupying the small air spaces in the mix. Roots need oxygen in those spaces for normal respiration; saturated mix leaves less air available.
I’d unpot for confirmation when the plant is declining, the mix is persistently wet, and the moisture check does not match the apparent thirst. I would also inspect sooner if the stem base feels soft, the mix smells sour, or the plant collapses after repeated watering. That small disturbance is more useful than adding another drink and waiting for a clearer leaf symptom.
The root test: firm, pale roots versus tissue that collapses
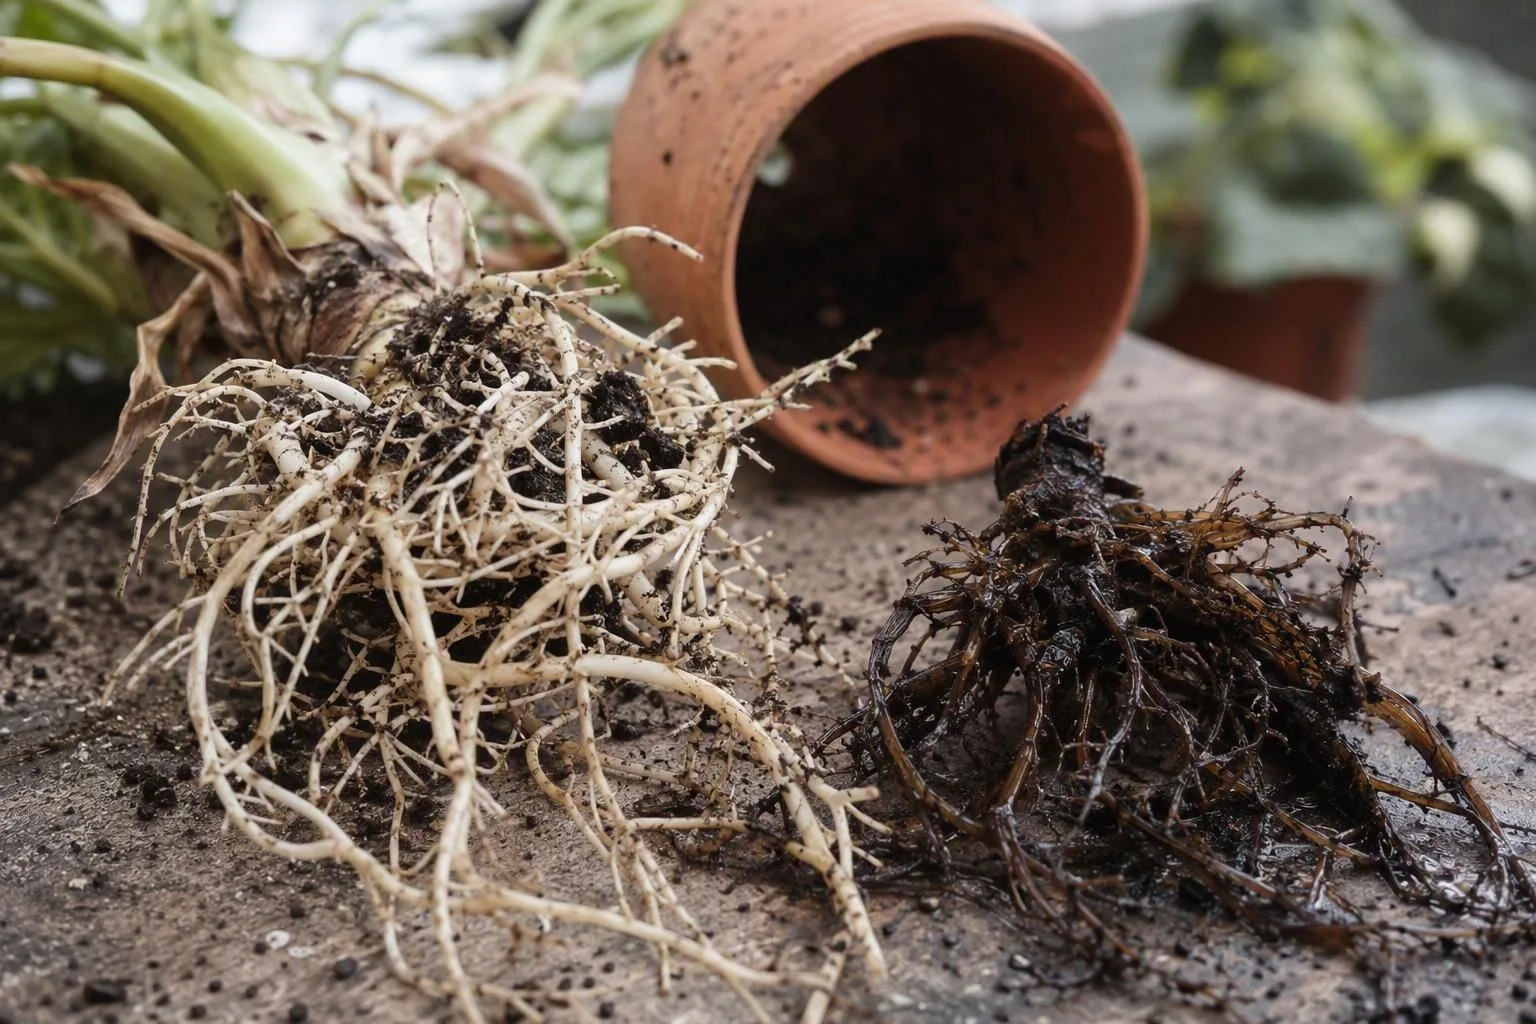
Root rot usually looks like roots that have lost their firmness: brown to black tissue that is soft, slimy, hollow or easy to pull apart. Healthy roots are generally pale cream, white or light tan and resist gentle pulling. The texture matters more than the colour.
When I inspect a root ball, I look for several roots rather than judging the first one I see. A healthy feeder root has a little spring to it. A rotted root may feel like wet thread, collapse between two fingers, or shed its outer layer so that a thin inner strand remains. Some damaged roots have an unpleasant sour or stagnant smell, although a smell-free root ball can still contain rot.
Colour by itself is a poor diagnosis. Older roots can be tan or brown, roots can be stained by compost or fertiliser, and some plant species naturally produce darker roots. A firm, intact dark root deserves a closer texture check, not automatic removal. Conversely, a pale root that is hollow or mushy is not healthy simply because it is light-coloured.
To inspect without tearing everything, squeeze a flexible plastic pot to loosen the sides and support the plant at the base of its stems. Tip the root ball out rather than pulling the plant upward. Remove loose, wet mix with your fingers or a gentle stream of water. Don’t scrub every fine root clean; the goal is to expose enough of the root system to compare texture while leaving firm roots attached.
Inspect the junction where the roots meet the stems. This is the crown. Crown rot can leave some outer roots firm while the central stem base is soft, dark, waterlogged or collapsing. Press very gently. If the crown gives way under light pressure, the problem is more serious than a few damaged feeder roots.
The clearest confirmation is a pattern: persistent wetness, a plant that cannot recover, and roots that collapse or shed their outer layer. A single tan root, a few dropped leaves or a damp surface is not enough on its own.
Yellow leaves are a clue, not a diagnosis
Root trouble often announces itself above the mix through a combination of signs: wilting while the pot is still wet, yellowing lower leaves, premature leaf drop, weak new growth and foliage that looks dull rather than crisp. These clues deserve a root check, but they don’t identify root rot by themselves.
The confusing part is the mechanism. Damaged roots may leave the plant unable to move enough water upward, even though there is plenty of water around the roots. The plant can therefore look drought-stressed in saturated mix. Adding water increases the wet period without repairing the damaged tissue.
Timing helps. If a plant with dry mix becomes noticeably firmer and less limp within a few hours of thorough watering, thirst becomes more plausible. If it remains limp in wet mix, or briefly improves and then declines again, I move root damage higher on my list. That is a checking order, not a guarantee; heat, root-binding, transplant shock and pests can produce overlapping symptoms.
Fungus gnats and mould on the mix surface tell you that the surface has stayed moist long enough to support them. They are moisture clues, not proof that roots are rotting. I still check the root texture and crown before cutting anything.
Use three checks to separate root rot from thirst, salts and pests
I make the diagnosis from three evidence streams: moisture 2–5 cm (1–2 in) down, root texture, and the condition of the stem base. The table is a practical sorting tool, not a substitute for looking at the plant.
| What you find | What it suggests | Check next |
|---|---|---|
| Mix is dry below the surface, pot is light, leaf edges are crisp | Underwatering is plausible | Water thoroughly, let it drain, then watch the response |
| Mix is wet, roots are soft or hollow, and the crown may smell sour or feel soft | Root or crown rot is plausible | Unpot and inspect several roots before watering again |
| Roots are firm, yellowing follows a gradual pattern, and moisture is moderate | Nutrition, light or normal leaf ageing may be involved | Check the crop’s feeding and light needs before adding fertiliser |
| White crust sits on the mix or pot rim, with scorched leaf margins | Fertiliser salts may be concentrating | Inspect the root system and consider a clean-water flush if drainage is good |
| Visible insects, stippling, webbing or distorted new growth | Pests deserve priority | Inspect leaf undersides and growing tips |
Two details carry particular weight together. Wet mix plus limp leaves tells me to inspect roots before I increase watering. Dry mix plus a light pot tells me to water before I start cutting roots. The roots can settle the question when the leaves cannot.
Yellowing alone never justifies more water or more fertiliser. Extra fertiliser raises the salt concentration around already stressed roots, while extra water extends the saturated period. I want to know which resource is actually missing before I add either one.
The rescue order: unpot, trim, wash and repot without overcorrecting
Root-rot rescue works best as an order of operations, not as a search for a special additive. Prepare the destination before you disturb the plant. I set out fresh container mix, a clean pot, clean scissors or pruners, and a surface that can be washed. If several potted plants are involved, university extension guidance on root rot and crown rot is a useful qualitative reference for the sanitation side of the job.
- Choose the new pot first. Use a pot with open drainage and choose one only 2–5 cm (1–2 in) wider than the surviving root ball. If substantial root mass is gone, a smaller clean pot may be the better choice. An oversized pot leaves more wet mix around fewer roots.
- Unpot gently. Support the crown and slide the root ball out. Remove loose saturated mix with your fingers. Don’t yank the stem, and don’t keep a heavy, muddy plug around the roots while you decide what to do.
- Expose and assess. Rinse gently if the mix is hiding the roots. Compare several roots. Keep tissue that is firm and attached, even if it is stained. Focus on the parts that collapse, feel hollow, smell sour or pull away from the centre.
- Trim back to firm tissue. Use a disinfected blade and make a clean cut through soft material. Wipe or disinfect the tool between plants. Don’t keep shortening a root merely because its colour is not perfect; stop when the remaining tissue has structure.
- Check the crown. If the stem base is firm, continue. If the crown is dark and collapsing, trimming outer roots will not solve the central failure. Set aside a healthy cutting, offset or division if that species can be propagated that way.
- Repot at the old depth. Put the plant into fresh, open mix with the roots spread naturally. Keep the crown at the same level it occupied before. Do not bury a soft stem base in an attempt to support it.
- Settle once, then pause. For ordinary leafy container plants, water enough to settle the mix and allow the excess to run out. Empty the saucer. Put the plant in bright, gentle light while it recovers rather than exposing a freshly trimmed root system to the hottest balcony position.
Gravel, broken pottery or coarse stones in the bottom do not repair a waterlogged pot. The fine mix above the coarse layer can hold a perched water table, which is a zone where water remains suspended above the lower layer instead of moving freely into the air below. Adding gravel uses root volume and can leave the wet zone higher in the pot. A real drainage hole and a suitable container mix address the cause more directly.
After repotting, hold fertiliser for about 2–4 weeks or until new growth appears, whichever fits the plant’s recovery better. Newly cut roots have less capacity to take up nutrients, and feeding a plant that is not growing adds salts without giving it much useful leaf production.
Succulents and cacti need a different pause. Where the species tolerates it, allow damaged cut surfaces to dry and form a callus before replanting in dry, gritty mix. Don’t copy that treatment onto a soft-stemmed tropical plant that needs its roots kept from drying out completely. The useful rule is to match the waiting period to the plant’s tissue and the size of the cuts, not to force every root-rot rescue into one schedule.
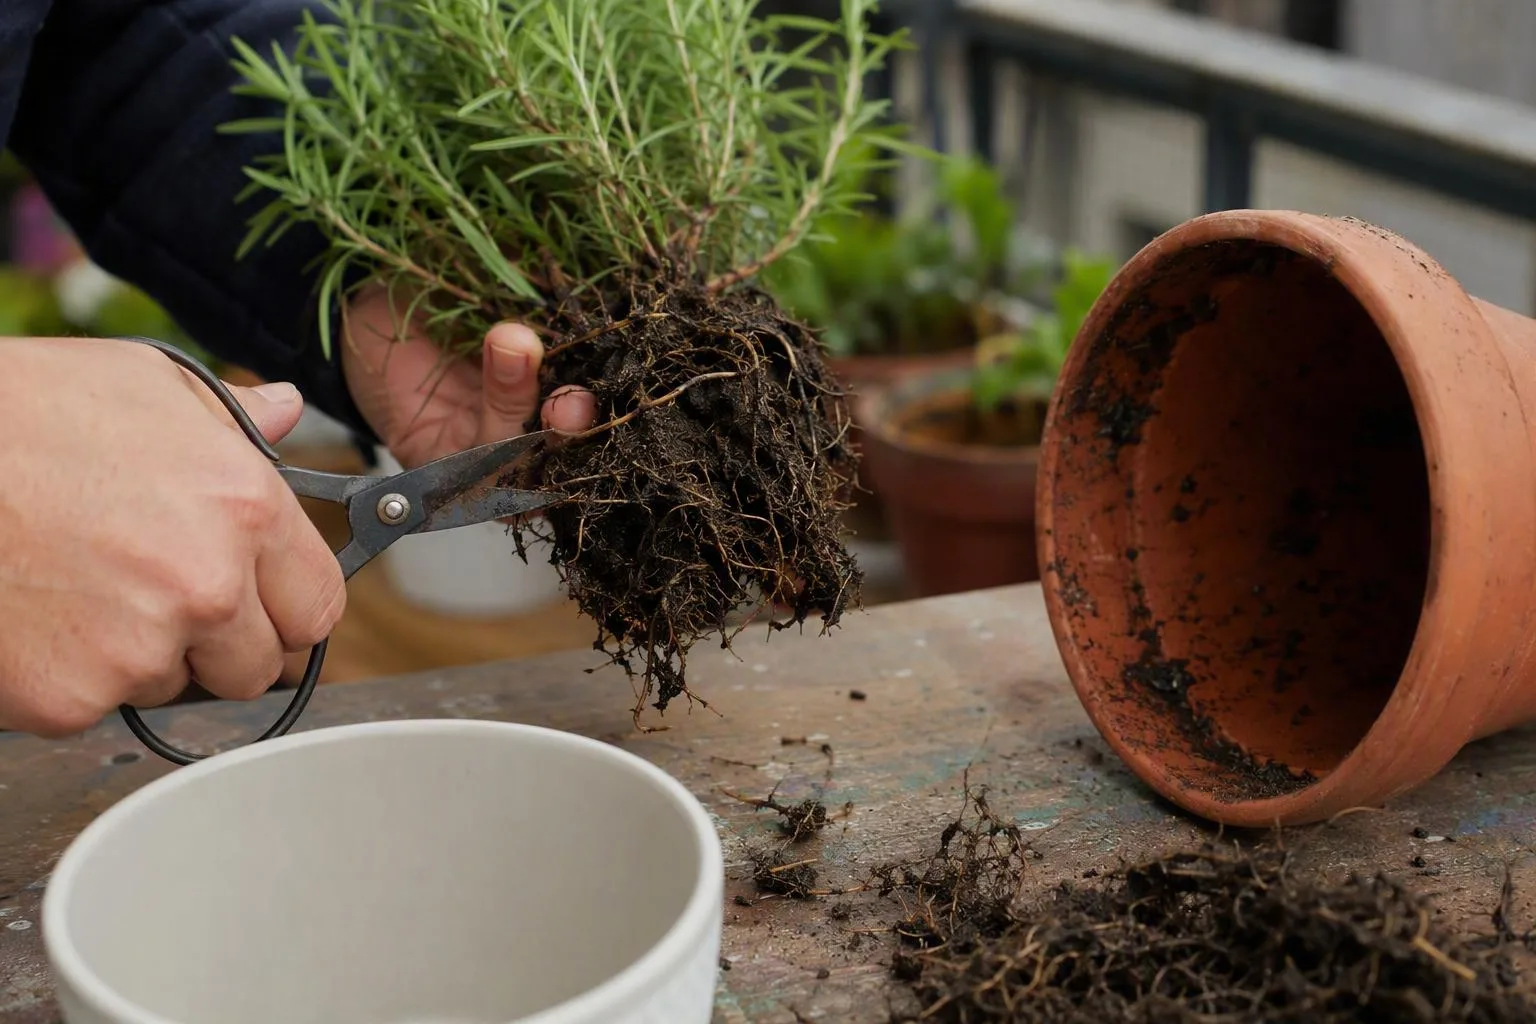
Firm crown, no firm roots: decide whether to recover or propagate
A plant with a firm crown or stem base and at least some firm roots has something to monitor after repotting. It may lose more leaves before it stabilises because the reduced root system cannot support the old amount of foliage. I remove only leaves that are fully dead or touching wet mix; stripping every leaf adds another stress at the same time the plant needs to rebuild roots.
A crown that is black, hollow, soft inside or visibly collapsing gives the plant a poor recovery outlook, even if a few roots at the edge still look sound. That is the point where a species-appropriate cutting, offset or division is often a more sensible use of healthy tissue than waiting for a rootless crown to regrow. A cutting bypasses the damaged root system, but it still needs suitable tissue and the right propagation method.
Lack of new growth for 1–3 weeks is not automatically failure, particularly after heavy root loss or a change in light. Spreading softness, a darkening stem, a worsening smell or continued collapse is different: those observations mean the rot may still be advancing. Check the crown again rather than compensating with more water.
If several containers share tools, a sink or work surface, isolate the affected pot while you work and clean the tools before touching another plant. That won’t reverse damage already present, but it reduces the chance of carrying wet, contaminated debris from one container to the next.
Keep the new roots oxygenated: pot size, drying threshold and runoff routine
After a rescue, I return to a routine that responds to the pot rather than the calendar. For most leafy container plants, the trigger is a dry upper 2–5 cm (1–2 in), not a perfectly dry root ball. Moisture-loving crops can need a shallower drying threshold, while drought-adapted succulents need a much longer dry period. The crop changes the trigger.
Pot material changes the speed of that cycle. Plastic loses little water through its walls, so a plastic pot in full sun may need checking daily in hot, windy weather. Glazed ceramic behaves similarly, though its weight makes the moisture change harder to feel. Unglazed terracotta can lose water through its porous sides and may dry faster, especially on an exposed balcony. These are reasons to check more often, not reasons to assign a fixed watering day.
Pot size matters too. A container that is much wider than the surviving root ball holds a larger volume of wet mix than the plant can use. The lower portion may stay damp while the top finally dries, which is why a small plant in a huge decorative pot can develop trouble even when it has drainage holes. If you’re unsure how to replace a damaged plant in a smaller container, compare the sizing logic with root bound plants repotting rather than automatically moving up several pot sizes.
Drainage holes are an exit route, not a pump. They cannot compensate for compact garden soil, a blocked opening, a pot pressed flat against a surface, or a saucer that stays full. The site’s guide to drainage holes in pots is useful for checking the hardware; container-media guidance on drainage and aeration explains why an open, container-made mix matters as much as the hole itself. For the mix itself, use the principles in container gardening soil rather than filling a balcony pot with soil dug from outdoors.
My repeatable watering sequence is short:
- Check the moisture 2–5 cm (1–2 in) down and lift the pot.
- If the crop has reached its drying threshold, water the mix thoroughly rather than sprinkling only the surface.
- Watch for excess to leave the drainage hole, then empty the saucer after about 10–15 minutes.
- If the pot is still heavy and wet after a week in warm active conditions, stop adding water and investigate the hole, mix, pot size and exposure.
Once a week, run a finger around the drainage opening, move the pot slightly so it is not sealed to the balcony surface, and check whether the mix has shrunk from the pot walls. Shrinkage can create channels that send water down one side while the centre remains dry. Re-moisten slowly when that happens, then return to a thorough watering pattern once the mix is accepting water evenly.
Before your next watering, put the plant where you can inspect it easily. Check the depth, lift the pot, and look underneath. If the mix is still wet and the leaves are still limp, unpot for evidence instead of giving the roots another drink.