Cabbage Worms: 7 Fixes for Potted Cabbage and Kale
A 15 L (4 gal) pot of kale can look healthy on Monday and lacy by the weekend once cabbage worms settle in. On a balcony, I get better results by breaking the cycle in order—find the pest, remove what is already there, then block new eggs—rather than spraying the first green thing I see.
The useful distinction is simple: a treatment aimed at caterpillars cannot remove eggs, and netting cannot rescue larvae already hidden under leaves. Work through the seven fixes in that order, and you can usually decide within a week whether the plant has a growing point worth saving.
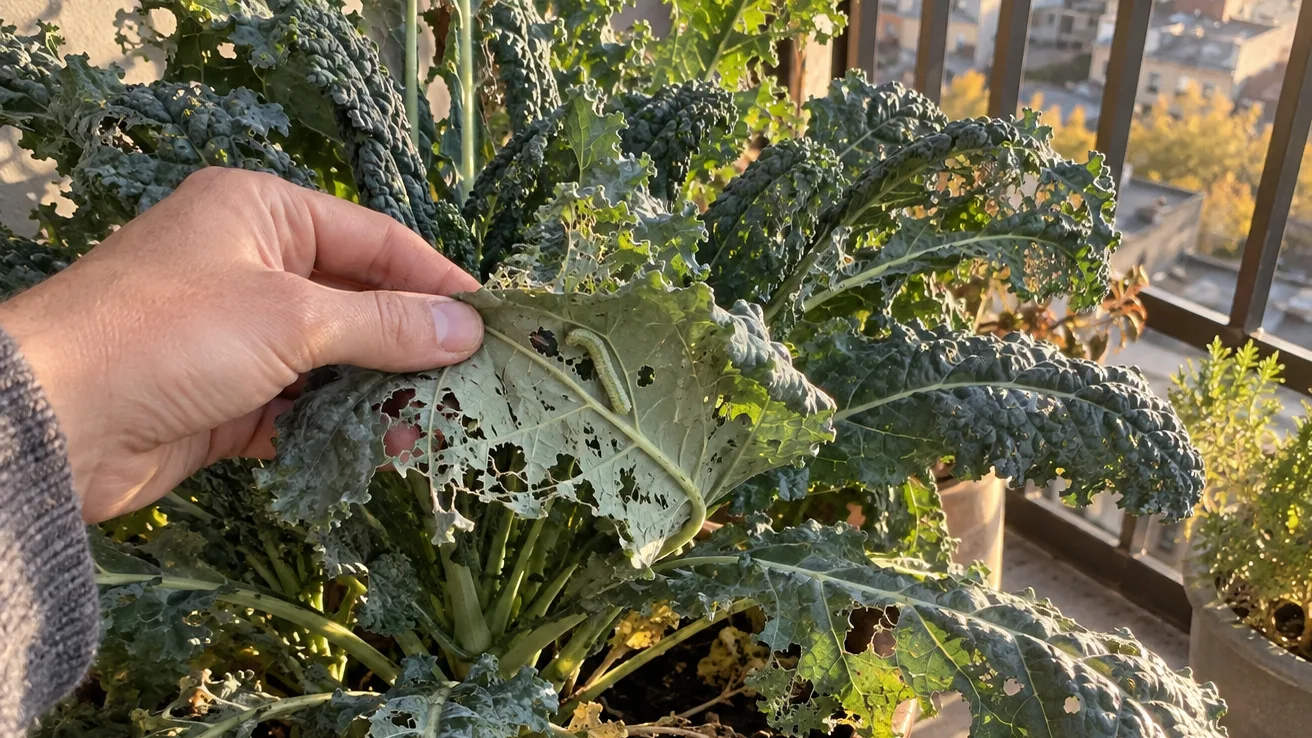
Fix 1 — Confirm the culprit before you spray: the two-minute underside check
Before I treat anything, I turn over leaves on every cabbage-family plant on the balcony. Cabbage worms hide along the midrib, under the crown, and where a lower leaf meets the stem, so looking only at the upper surface gives a false all-clear.
Look for irregular, ragged holes rather than neat round pinpricks. Dark green or black crumbs of frass—the insect equivalent of droppings—often sit in the crown or on the leaf below. The caterpillar may be green and fairly smooth, or it may move in a looping inchworm gait. Those are useful clues for the cabbage looper versus cabbage worm question, but the treatment sequence is still inspection first.
The imported cabbageworm is the larva associated with the familiar cabbage white butterfly, which lays eggs during daylight. Cabbage loopers and diamondback caterpillars come from moths, so I keep a cover on continuously rather than assuming a night-only barrier is enough. Fresh eggs look like tiny pale dots on the underside; as they approach hatching, a darker centre can become visible. In warm weather, I use a few days—roughly three to seven—as my working inspection window, not as a guaranteed timetable.
Flea beetles make a different signature: many tiny shot holes that pepper the leaf. Slugs tend to leave ragged bites close to the rim or damp hiding places, sometimes with slime. Take a phone photograph of one damaged leaf, then check that same leaf again after 24 hours. New holes or fresh frass tell you the problem is active; old damage alone does not.
Fix 2 — Remove the easy targets: eggs and larvae every 2–3 days
For one or two containers, hand-picking is not a token gesture. It is a complete first response if you are willing to repeat it. Turn over each leaf, inspect the central rosette, run your fingers along the stems, and wipe away pale eggs before they hatch. Drop live larvae into a small cup of soapy water rather than flicking them onto the balcony floor or back into the pot.
In June, I found the underside of a 15 L plastic pot of kale dotted with pale yellow specks. One lower leaf had a green caterpillar tucked beside the midrib, and dark frass had collected in the centre of the plant. I picked the visible larvae, wiped away the eggs, and checked again two days later. There were smaller larvae under the newest leaves, so I hand-picked those and put fine netting over the pot that evening. The old holes stayed, but the next centre leaves opened without the fresh crumbs I had been seeing. I did not treat that as a measured trial; it was simply the result of checking the plant closely instead of assuming one pass had solved it.
Repeat the underside check every two or three days for one to two weeks. One visit fails because eggs that were invisible or overlooked can hatch after the large, obvious worms are gone. If you find only an occasional larva and no new damage after two checks, hand-picking may be enough. If fresh holes keep appearing between checks, combine it with exclusion netting or a properly labelled Btk product.
Keep a small inspection routine beside the pot: lift the leaves, look at the crown, check the rim, and remove what you find. The routine matters more than the tool.
Fix 3 — Stop new eggs with 0.8–1 mm insect netting over the pot
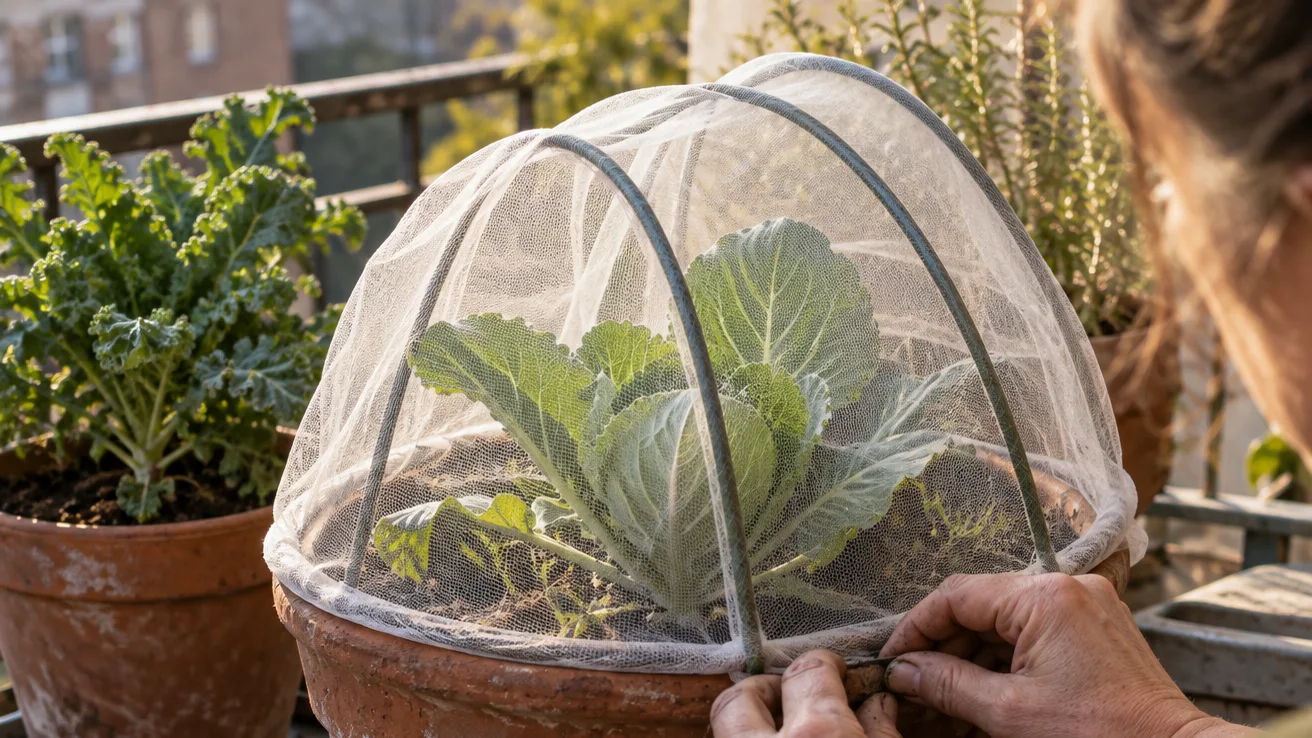
My rule of thumb for a potted cabbage or kale plant is fine insect netting around 0.8–1 mm, held above the leaves and sealed around the pot. That mesh size is my practical balcony choice, not a universal guarantee. The mechanism is straightforward: if an adult cannot reach the leaf surface, it has fewer opportunities to place eggs there. The lower edge is just as important as the fabric. A butterfly that can slip beneath the rim has found the only opening it needs.
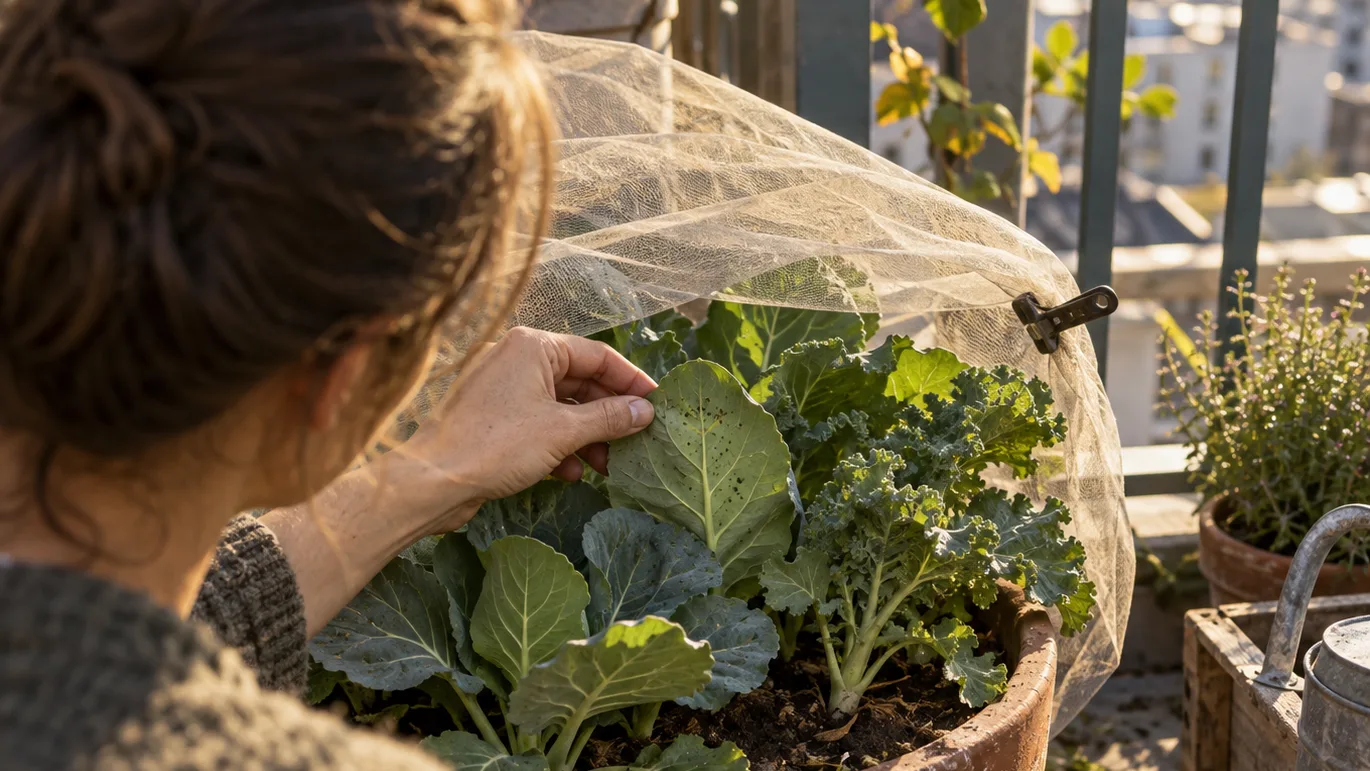
Use hoops, flexible cane, or a simple wire frame to keep the netting about 10–15 cm above the tallest leaves. Clip the fabric to the pot rim, tuck the lower edge beneath a saucer lip, or weigh it down all the way around. Leave enough slack for new leaves to expand. Fine mesh touching the plant makes inspection awkward and can press wet leaves together after watering.
Coarse bird netting is not the same thing. Its large openings can let small flying pests through, and it does nothing about a gap at the base. A failing cover often looks deceptively tidy from above: the fabric is in place, but fresh pale eggs appear on the underside of the centre leaves. Check the corners, the point where the stems emerge, and the gap between pot and saucer.
Put the cover on before adults have reached the plant. If eggs or larvae are already inside, exclusion only keeps the problem under the cover, so inspect and remove them first. Leafy cabbage and kale do not need insect pollination while you are growing them for leaves. If you intend to let either plant flower and set seed, you will need to uncover it during the pollination period.
Does 0.8–1 mm netting stop flea beetles? A completely sealed cover can reduce outside access, but I do not count it as a full flea-beetle fix. Any beetles already on the plant remain inside, and a loose edge can undo the barrier. Netting is excellent for stopping new cabbage-worm eggs; it is not a substitute for diagnosing every type of hole.
Fix 4 — For an active outbreak, use Btk while larvae are under 1 cm
Bacillus thuringiensis var. kurstaki, usually shortened to Btk, is a biological insecticide for caterpillars. It is not a contact knockdown. The larva has to eat treated residue from the leaf, so the useful application is the one that puts product on the places a small caterpillar is feeding: fresh leaves, undersides, leaf folds, and the new central growth.
I use under about 1 cm (3/8 in) as a practical timing cutoff. That is my working judgment, not a promise that a larger caterpillar will ignore the treatment. Small larvae are easier to catch before they have removed much leaf area, and they are still feeding actively across the treated surface. I hand-pick anything obvious first, then apply Btk to the remaining fresh growth according to the product label.
Do not guess the dose from a different crop or a different bottle. Check that the product is registered for the edible crop where you live, then follow its directions for dilution, reapplication, rain exposure, protective equipment, and harvest interval. If you are in the United States, EPA's registered pesticide database is a useful place to check the product record, but the label on the container is the instruction that governs your application.
Expect old holes to remain. A better sign of success is that frass stops appearing and no new holes open over the next several days. Btk will not remove eggs, and it will not make a skeletonized leaf green again. If you still find fresh larvae after the label allows reapplication, check coverage before increasing anything: the missed area is often the underside or the folded centre leaf.
I would not substitute kitchen dish soap for a labelled caterpillar treatment on edible leaves. Its concentration and additives are not designed for your crop, and soapy water on the outside of a larva does not solve eggs hidden under the plant.
Fix 5 — Prune the damage, not the growing point
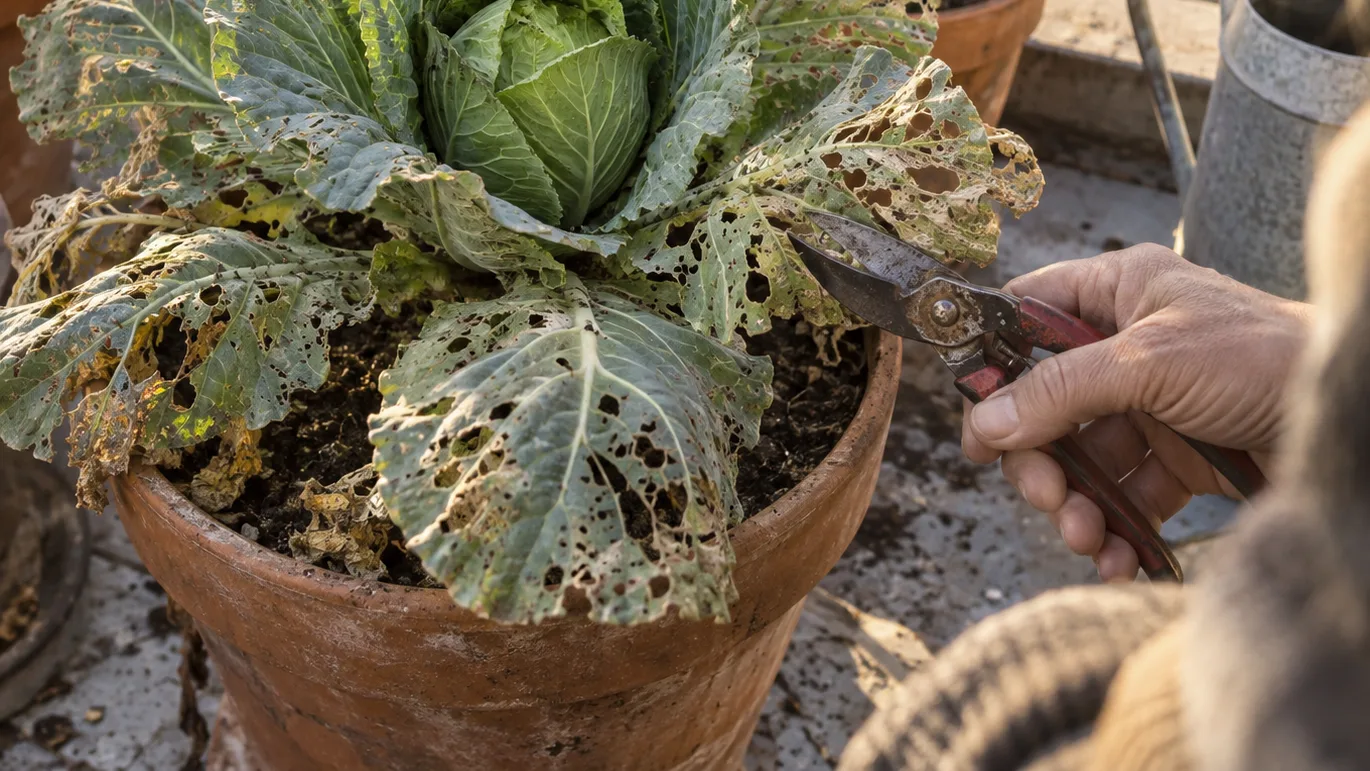
My pruning threshold is practical rather than botanical: I remove a leaf when more than half of its surface is skeletonized, when it has collapsed, or when it is lying against the potting mix. A leaf with a few holes is still a working solar panel. Removing every marked leaf can leave a recovering plant with no energy source.
Keep mostly green leaves and protect the central rosette. For heading cabbage, the outer leaves help power the developing head, so I am conservative even when they look untidy. Kale is more forgiving: you can remove badly damaged lower leaves and leave the centre to produce new ones. In both cases, avoid cutting the central growing point unless it is brown, hollow, or physically gone.
Carry damaged leaves away from the container. Pick off any larvae or eggs before bagging them, wipe frass from the pot rim, and clean the netting where debris has collected. On a balcony, I do not drop suspect leaves into an open compost tub beside the brassicas. The point of pruning is to reduce damaged tissue and remove pests, not to redistribute both around the growing area.
Fix 6 — Give the survivors enough root volume to regrow
A plant that has lost half its leaf area still needs a steady root environment while it rebuilds. A small pot has little buffer against a hot wall, drying wind, or one missed watering, so I use the following as working volumes rather than treating pot size as an afterthought.
| Crop | Potting mix I use | Container decision |
|---|---|---|
| Heading cabbage | 20–30 L (5–8 gal) | One plant per container; use the larger end in a hot, windy position. |
| Kale | 10–15 L (2.5–4 gal) | One plant per container; allow more room for a long season or repeated harvest. |
Those volumes are my balcony starting points, not guaranteed yield specifications. A tapered decorative pot can look large at the rim while holding much less mix at the base, so litres on the pot label are more useful than diameter alone. Fill with a quality container mix to a couple of fingers below the rim, leaving room for water to soak in rather than run straight over the edge.
For moisture, check the top 2.5–5 cm (1–2 in) with a finger. If that layer is dry and the pot is light, water slowly over the surface until a little drains from the holes. The practical details are covered in how much to water container plants, but the decision here is the same: inspect the mix instead of following a fixed calendar.
If the leaves are limp while the mix is still wet, do not automatically add more water. Compare the situation with overwatered plant symptoms, check whether the pot can drain freely, and look at the roots only if the problem continues. A damaged plant needs moisture, but waterlogged roots do not give it a faster route back to healthy leaves.
During active growth, I use a leafy-vegetable fertiliser at the label rate on a roughly two- to four-week rhythm. That interval is my working routine, not a rule that overrides the product directions or the plant's condition. Water and nutrients support replacement growth; neither one kills cabbage worms. If fresh frass is still appearing, return to inspection and exclusion instead of feeding harder.
Fix 7 — Break the reinfestation loop, then decide whether to keep the plant
Use a one-week reset rather than making a final decision while the plant is still under attack.
- Day 0: Inspect every cabbage, kale, broccoli, or other brassica on the balcony. Remove eggs, larvae, fallen leaves, and dead material. Clean the pot rim and the inside of the netting, then cover the plant after checking that no live caterpillars remain inside.
- Day 2 or 3: Turn over the newest leaves and inspect the crown again. Fresh eggs under the cover point to a sealing problem or an overlooked adult already inside. Fresh frass without visible larvae usually means you need to look deeper into folds and along the midrib.
- Day 5: If small larvae are present, use Btk only if the product label permits that crop and timing. Do not increase the concentration because old holes still look bad; the leaves cannot repair that tissue.
- Day 7: Check for new eggs, fresh frass, and a moving central growing point. Clean, expanding centre leaves matter more than the appearance of the old outer leaves.
My practical forecast is that a viable, protected plant in mild growing weather should show an unfolding central leaf at least 2 cm (about 3/4 in) long by day 7. If the centre remains unchanged and no new leaf tip appears after seven to ten protected days, especially in otherwise suitable weather, I would stop spending space and water on it. That forecast is falsified if the plant produces a clearly expanding centre leaf despite looking static at the earlier check.
Keep the plant when the growing point is intact and new leaves are opening. Harvest sound tissue and replace the plant when the crown is gone, rotting, or still completely inactive after the protected recovery window. Cool weather can slow that decision, so give a cold-stressed plant more time than a warm, actively growing one.
Three questions usually come up after the reset.
Can I eat cabbage or kale leaves with cabbage worm holes?
Holes alone are not my automatic discard rule. I remove the worm, eggs, frass, and heavily damaged tissue, then wash the remaining sound leaves thoroughly. I discard anything with rot, mould, slime, or an off smell. For country-specific handling advice, check USDA food-safety guidance for leafy greens or your local food-safety authority rather than assuming that every home-grown leaf should be handled identically.
Do coffee grounds, eggshells or companion plants keep cabbage worms off potted brassicas?
I would not use coffee grounds for plants or crushed eggshells as a cabbage-worm barrier. Neither creates the physical exclusion that stops an adult from reaching a leaf, and neither replaces an underside inspection. Check the netting seal first, then hand-pick or use a properly labelled caterpillar treatment if the larvae are still active.
Do I need to replace all the potting mix after cabbage worms?
Not as my first response. I remove larvae, eggs, fallen leaves, and plant debris, then clean the pot rim and cover. I replace the mix when I am discarding the plant, dealing with a separate root or disease problem, or have another contamination reason—not simply because a caterpillar chewed the leaves.
Tonight, turn over every leaf, clean the pot rim, and cover the healthiest brassica before the next daytime butterfly visit. Set a seven-day reminder on your phone; the check that decides whether the plant is recovering is the one you actually remember to make.
Frequently Asked Questions
Can I eat cabbage or kale leaves with cabbage worm holes?
Usually, sound leaves can still be harvested after removing worms, eggs, frass and heavily damaged tissue, then washing the leaves thoroughly; discard leaves with rot, mould or other spoilage and follow local food-safety guidance.
Do coffee grounds, eggshells or companion plants keep cabbage worms off potted brassicas?
There is no dependable exclusion from these methods; they should not replace 0.8–1 mm insect netting, regular inspection, hand-picking or a properly labelled caterpillar treatment.
Do I need to replace all the potting mix after cabbage worms?
Usually not. The first response is to remove larvae, eggs, fallen leaves and plant debris and clean the cover and pot; replace the mix only when discarding the plant or dealing with a separate disease, root-pest or contamination problem.