Coffee Grounds for Plants—Good Fertilizer or Bad Idea?
My short answer: used coffee grounds can add a little slow nitrogen and organic matter, but they aren’t a complete fertilizer. For a container, I’d compost most of them; if I use any directly, it’s a thin, mixed-in amount on an established outdoor plant, never a dark blanket over the root zone.
The phrase coffee grounds fertilizer creates the wrong expectation. Grounds are better treated as an ingredient than as a finished plant food, and that distinction matters even more in a pot, where a small change to the surface can affect the whole root zone.
A rough orientation I use for coffee grounds is about 1–2% nitrogen by dry mass. That figure is not the same as saying a plant receives a quick 1–2% nitrogen feed: the nitrogen is tied up in organic material, and microbes have to process it before much becomes available to roots.
In my own balcony setup, I once treated a wet filter’s grounds like mulch around a tomato in a 25 cm (10 in) pot. After watering, the surface dried into a dark skin and water ran toward the edge instead of soaking evenly. I scraped away the crust, loosened the top layer, and the pot behaved normally again. I don’t use that as a controlled result; it’s simply the mistake that set my rule. Coffee grounds belong in the compost first, and direct use has to stay thin.
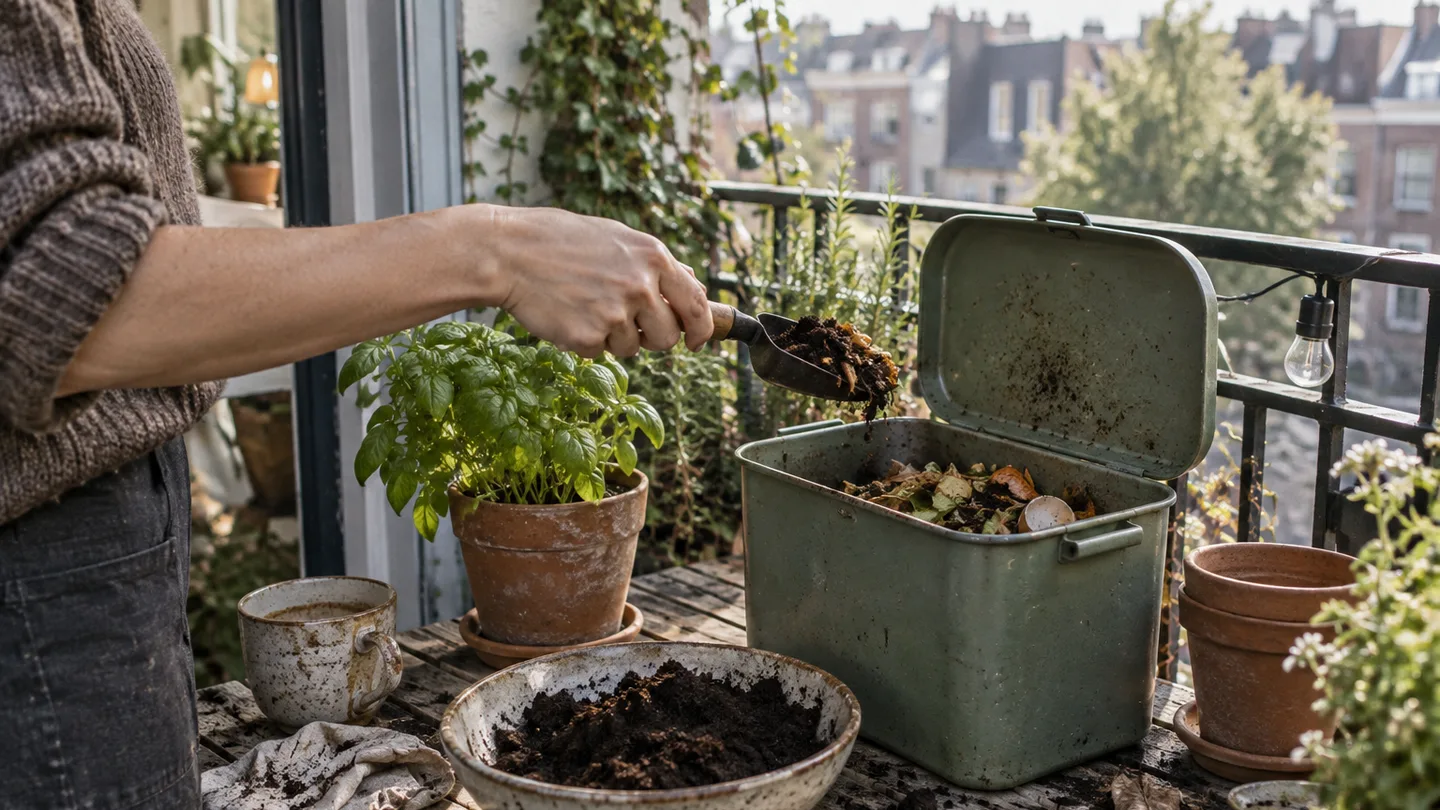
The verdict in one sentence: used grounds are a minor nitrogen source, not a complete fertilizer
Spent grounds still contain organic material after brewing, so they can contribute a small amount of nitrogen as they decompose. They can also become part of the organic matter in finished compost. Neither point makes them a balanced food for a hungry container crop.
A complete fertilizer is predictable because its label gives you a nutrient analysis, usually expressed as N-P-K: nitrogen, phosphorus, and potassium. Coffee grounds arrive without a guaranteed analysis, and their composition varies with the coffee, grind, brewing method, and what else is mixed into the material. I wouldn’t use them to correct pale leaves, support a fruit-heavy tomato, or replace a regular feeding plan.
The practical difference is timing. Organic nitrogen is held inside the grounds. Microbes need suitable moisture, air, and temperature to break that material down, so release is gradual and uneven. That makes grounds a poor tool for quick green-up. If a plant needs food now, a suitable complete fertilizer is the more direct choice; grounds are the slower background ingredient.
That’s the useful answer to “are coffee grounds good for plants?” Sometimes, in a limited role. They can be useful in a compost stream or as a cautious amendment around the right established plant. They are a bad substitute for potting mix, drainage, or a measured fertilizer.
Fresh, spent, espresso, and filter grounds: four forms, four different risks
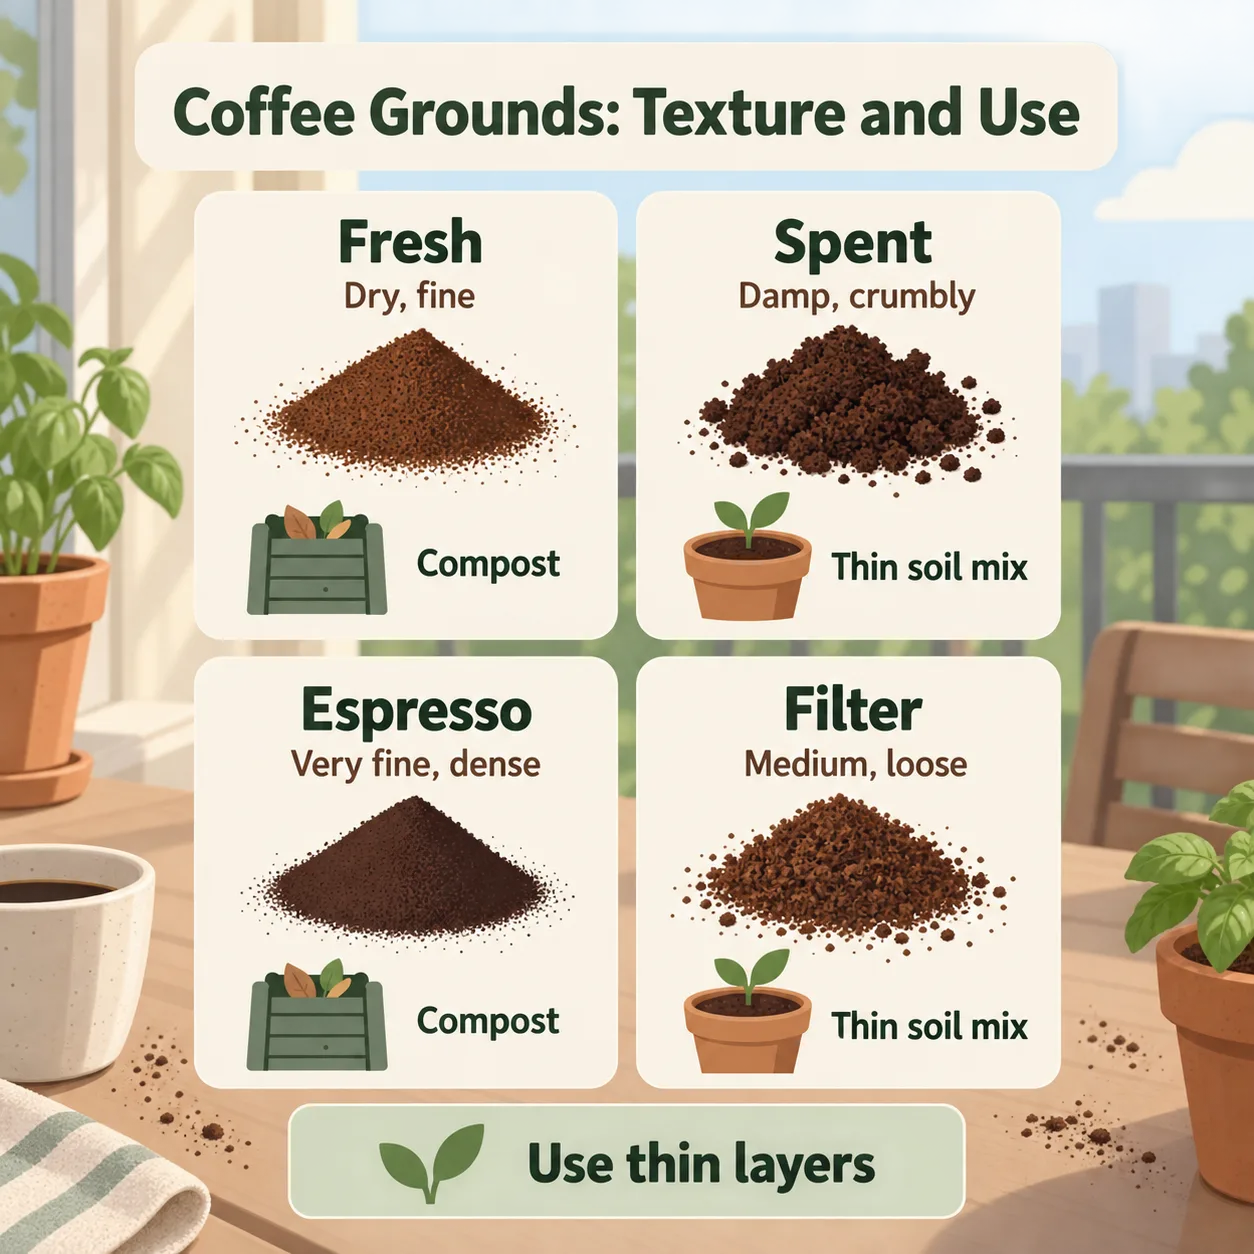
Fresh grounds are dry and fine, while spent filter grounds usually arrive wet and clumped. Espresso pucks are spent grounds too, but they are often packed into a dense, damp disk. Dried spent grounds are easier to measure and scatter, yet drying only changes how they handle; it doesn’t turn them into finished compost.
| Form | What I watch for | My default destination |
|---|---|---|
| Fresh, unused grounds | Fine particles and less predictable direct use in a pot | Compost rather than a surface layer |
| Wet filter grounds | Clumping, moisture, and the temptation to spread too thickly | Compost; only a cautious trial on a suitable established plant |
| Espresso puck | Dense, damp material that needs breaking apart | Compost, mixed with coarser material |
| Dried spent grounds | Easier to distribute but still made of fine particles | Compost or a very small mixed-in trial |
Brewing removes some soluble material from the original coffee grounds, but it leaves a fine organic residue behind. Used grounds are therefore gentler in some respects than fresh grounds, not inert. A thick layer can still pack together, shed water from its surface, and dry into a crust.
Fresh grounds tend to be more acidic than spent grounds, while spent grounds are often roughly pH 6–7. I treat those figures as orientation, not a promise. Coffee variety, water, grind size, and brewing method can shift the result, so I don’t use the smell or colour of a coffee puck as a substitute for testing the potting mix.
My destination order is simple: spent grounds and espresso pucks go to compost whenever I have that route available. Fresh grounds also belong in a managed compost mix rather than directly against roots. If I’m standing beside a small indoor pot with a handful of wet grounds, I usually put the grounds aside instead of trying to find a place for them in the pot.
The 20% compost ceiling—and why a potting mix needs a stricter answer
The ratio belongs to the compost pile
Compost feedstock means the materials going into a compost pile before they have finished breaking down. For that material, I keep spent grounds to roughly 10–20% of the total feedstock by volume, with 20% treated as an upper limit rather than a target.
For a 10-litre total batch of kitchen scraps, leaves, shredded cardboard, and other ingredients, that means roughly 1–2 litres of spent grounds. I’d mix them through the batch instead of tipping them into one dense pocket. Shredded cardboard, dry leaves, or another coarse carbon material gives the wet grounds somewhere to separate, which is more useful than adding a larger heap of grounds on its own.
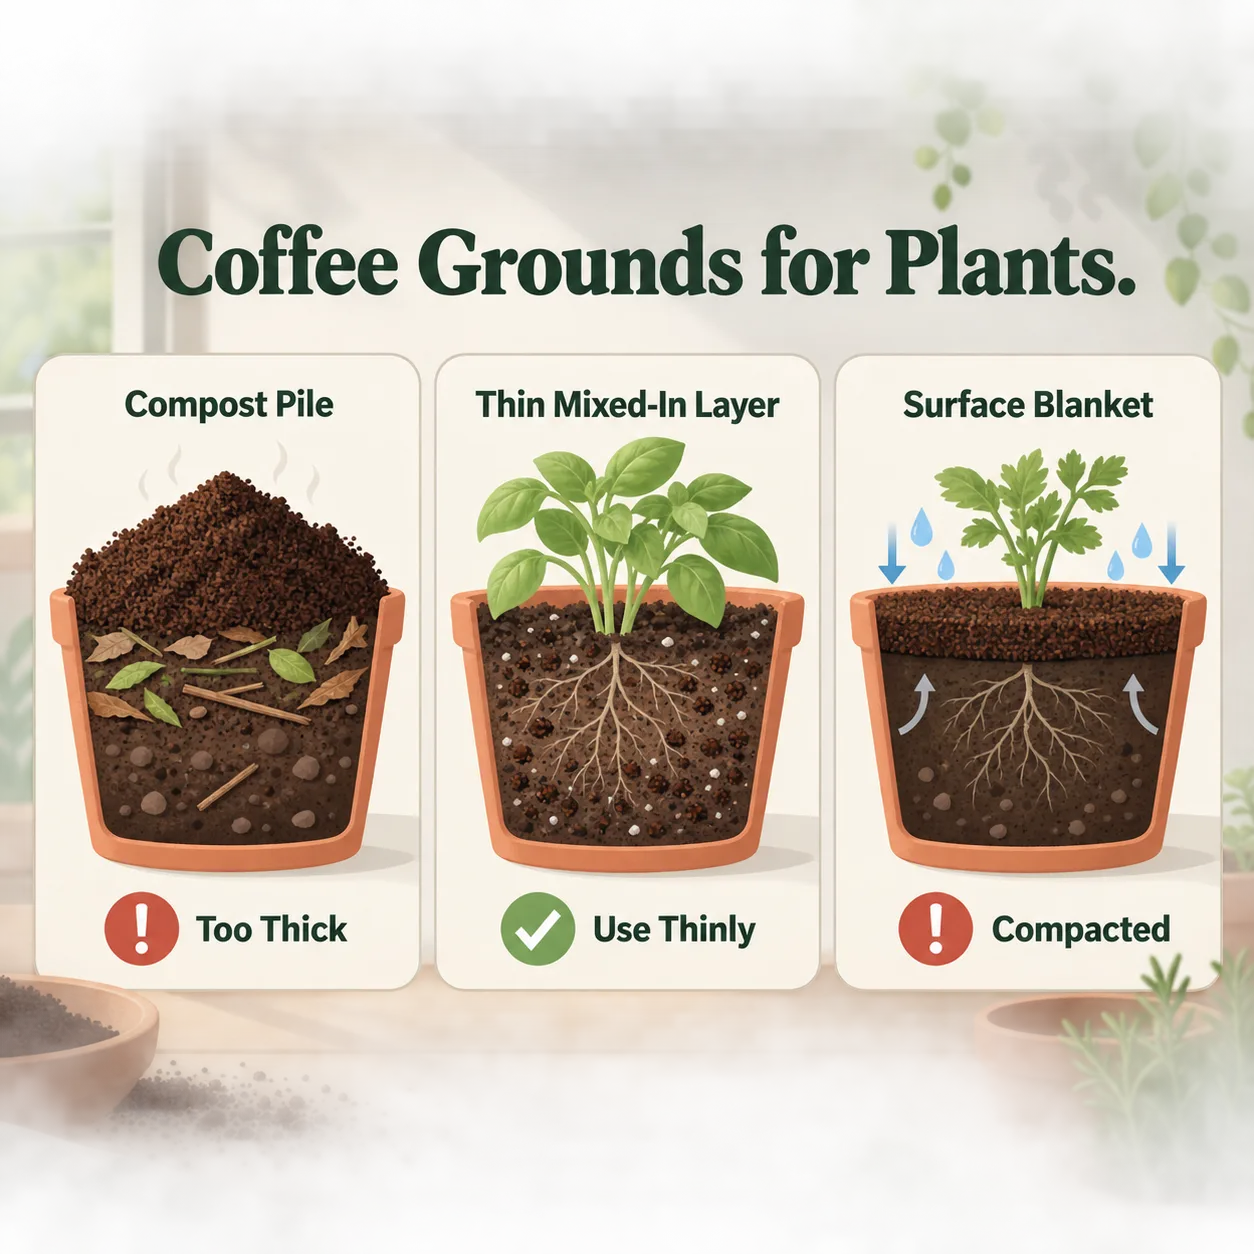
The compost pile has room for dilution, airflow, and gradual mixing. That ratio does not give you permission to replace the same percentage of a container’s potting mix with coffee grounds. Finished compost is a crumbly, decomposed material; raw grounds are still fine particles that can occupy the small air spaces a container root system needs.
For a container, think in spoonfuls, not percentages
For an established outdoor plant in a free-draining 20–30 cm (8–12 in) pot, my conservative optional starting point is 1–2 tablespoons of spent grounds mixed into the top 2–3 cm (about 1 in) of the potting mix. I’d water normally, then wait three to four weeks before deciding whether the plant and surface show any reason to repeat it.
- Check that the plant is established and the pot drains freely.
- Scatter the small amount across the surface instead of placing it against the stem.
- Scratch it lightly into the top layer; don’t press it into a smooth mat.
- Water over the whole surface and observe the next few waterings before adding anything else.
If the pot is undersized, fix that first. A container with too little root volume is already difficult to keep evenly watered and fed, so adding a kitchen by-product won’t solve the underlying problem. I’d settle the pot question with best container size for vegetables before experimenting with amendments.
The place where people get into trouble is the jump from “a little mixed in” to “a blanket on top.” Fine grounds can fill the gaps between larger particles. As the surface dries, they may crust. Water then beads on the crust or finds a channel around the root ball instead of moving evenly through the mix. The plant may look thirsty even though water was just added, while the centre of the pot remains wetter than expected.
What the grounds actually change: nitrogen, structure, pH, and the missing nutrients
Nitrogen is present, but release is the slow part
The nitrogen benefit comes through decomposition, not through the grounds acting like a soluble feed. Microbes first use the material as food, then gradually transform part of it into forms plants can access. That process depends on conditions in the pot, so a dry balcony container and a damp, shaded container won’t behave the same way.
This is why I don’t expect a reliable flush of green leaves after adding grounds. If the plant is hungry, feed it according to the crop and the product label. You can use how often to fertilize container plants as a separate planning question; coffee grounds shouldn’t be the only answer to it.
Raw grounds and finished compost do different jobs
After proper decomposition, grounds can be one ingredient in a more open, organic-rich compost. Before decomposition, their fine texture can work against the air and water movement a pot needs. That is the counter-intuitive part: an organic material can be useful in compost while being unhelpful as a thick layer around living roots.
pH is a separate problem
Used grounds are not a dependable acidifier. Even if one batch is mildly acidic, another may be closer to neutral, and the amount is difficult to control once it is mixed into a pot. I wouldn’t use coffee grounds to chase a target pH.
For blueberries, I aim for an acidic root zone around pH 4.5–5.5. That is a crop-specific requirement, not a reason to sprinkle grounds around the plant and hope the number moves in the right direction. Blueberries are better served by an acidic potting mix selected for the crop, plus a soil or potting-mix test when the plant is struggling. I’d trust soil-testing guidance and target pH ranges for acid-loving container crops such as blueberries more than a coffee myth.
A pH test is more useful than judging acidity by smell, colour, or the type of coffee used. If a test shows that the mix is already in the right range, adding more acidic material is not automatically an improvement. If the pH is wrong, use an amendment or replacement mix suited to the crop rather than relying on an imprecise kitchen waste stream.
For a broader reference before you build a routine, I’d also read university extension guidance on spent coffee grounds in compost and garden soil. Use it to understand the general material, then make the final decision from your container’s size, drainage, plant age, and moisture pattern.
A balcony-safe decision tree: compost them, use a little, or leave them out
I use a simple balcony decision before I put coffee grounds anywhere near a root ball.
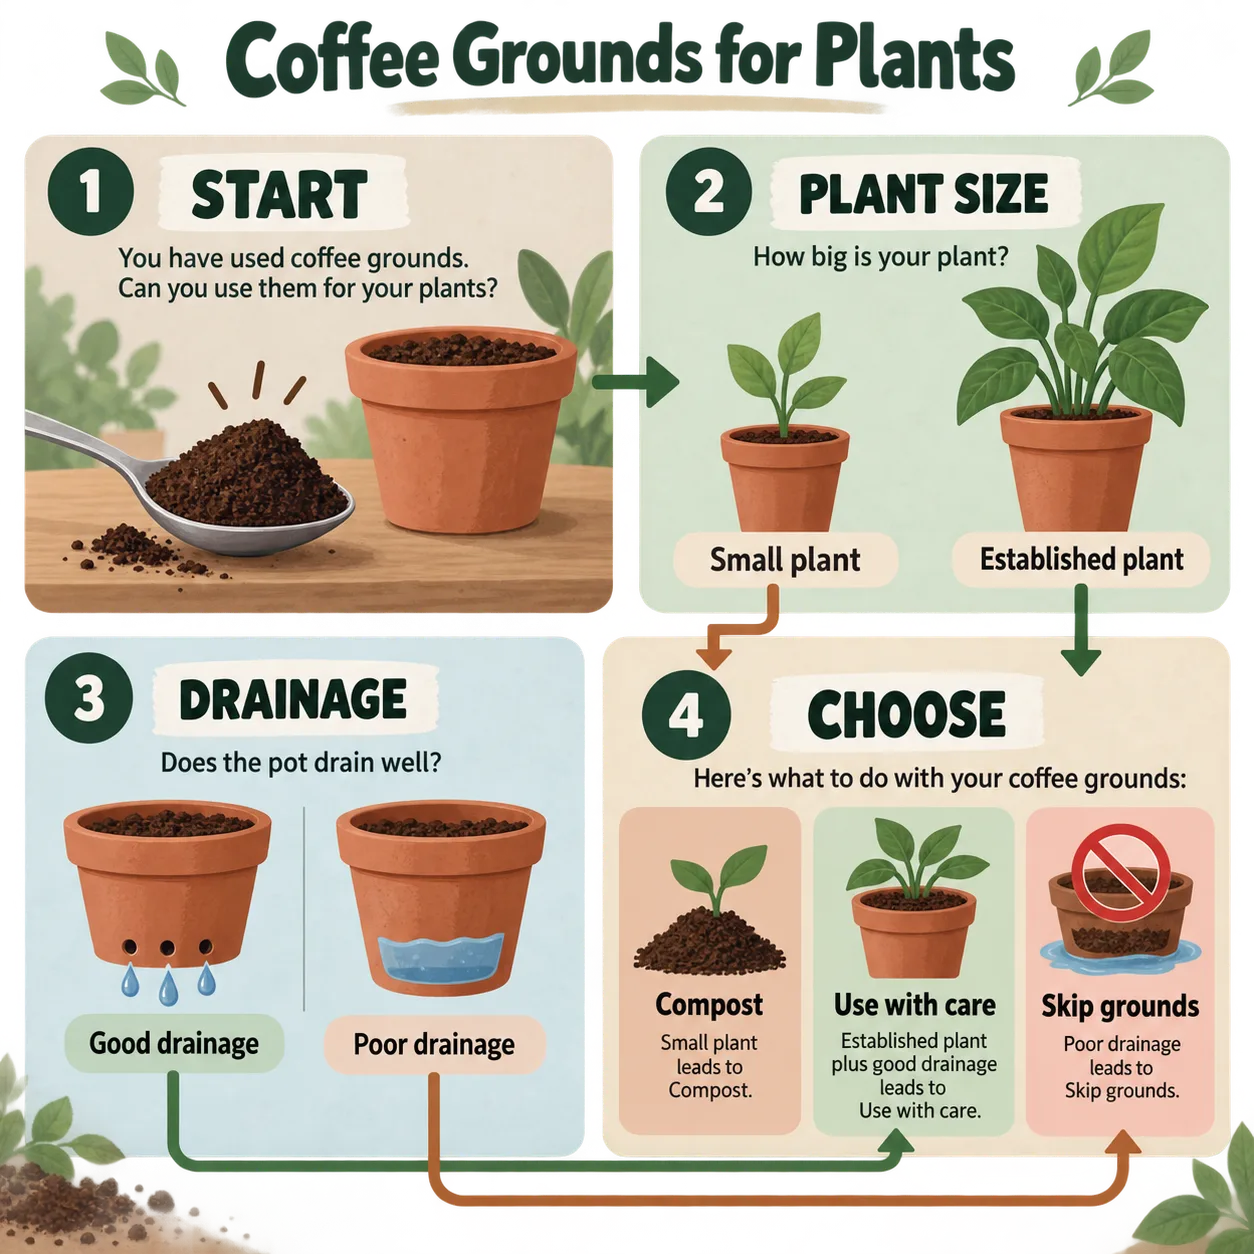
- Is it a seedling, cutting, or small indoor pot? Leave raw grounds out. These plants have little spare root volume, and a fine organic layer can stay damp or compact before the plant has enough roots to use the space.
- Does the container drain poorly? Leave the grounds out. Grounds won’t repair blocked holes, a water-retentive mix, or a saucer that stays full.
- Is it an established outdoor plant in a free-draining 20–30 cm (8–12 in) pot? A cautious trial is possible: use the small spoonful amount, mix it into the top layer, and observe rather than repeating automatically.
- Do you have a compost route? Send most grounds there. That gives the material time to become part of a broader mix instead of asking a small pot to process a concentrated layer.
- Is the plant a blueberry? Choose the acidic root-zone mix first. Don’t use coffee grounds as your pH-control plan.
Stop the direct-use experiment if the surface turns into a hard skin, water beads or runs around the root ball, the pot develops a sour stagnant smell, or new growth stalls soon after application. None of those signs proves that grounds are the only problem, so check drainage and moisture as well, but they are enough reason to remove the material rather than add more.
To recover, scrape away roughly 1–2 cm (about ½–¾ in) of affected surface and replace it with a loose, open potting mix. Don’t bury the scraped material in another nearby pot. Water slowly over the replacement mix, and if the root ball is still wet, compare the pattern with overwatered plant symptoms before feeding again.
Can coffee grounds go in a worm bin?
Yes, but I’d keep them as a minor part of the feed and mix them with plenty of bedding. A worm bin needs air, moisture balance, and varied material; a dense layer of coffee grounds is a poor substitute for bedding. If the bin smells sour or the contents become slick, add dry bedding and stop adding grounds until the texture improves.
Do coffee grounds repel slugs?
I treat that claim as unreliable. Grounds are not a dependable slug barrier, so I’d use a physical barrier, hand-picking, or a pest-control method suitable for edible plants rather than depending on a ring of coffee waste.
Can I put coffee grounds directly into a houseplant pot?
Usually, I’d skip raw grounds in a small indoor pot. Indoor containers often dry more slowly, and the root zone has little spare volume for a crusted or compacted surface. A complete houseplant fertilizer used at the label rate is more predictable than trying to feed the plant with kitchen leftovers.
Before the weekend, choose the destination first. If you have compost, mix a small amount of spent grounds with dry leaves or shredded cardboard. If you’re testing direct use, choose one established plant in a free-draining pot, add only 1–2 tablespoons, work it into the top 2–3 cm, and check the surface after the next watering. After a week, it should still break apart and accept water evenly; if it crusts, beads water, or smells stale, scrape it away. At three to four weeks, decide whether the plant has stayed stable before you even consider another application.
Frequently Asked Questions
Can coffee grounds go in a worm bin?
Yes, but only as a minor part of the feed mixed with plenty of bedding; do not let coffee grounds become the dominant material, and monitor moisture and smell.
Do coffee grounds repel slugs?
Treat the claim as unreliable. Grounds are not a dependable slug barrier, so use physical barriers or hand-picking instead of relying on them as pest control.
Can I put coffee grounds directly into a houseplant pot?
Usually skip raw grounds in a small indoor pot. The limited root volume and slower drying make compaction, stagnant moisture, and surface mould more likely; a complete houseplant fertilizer is more predictable.