Growing Beets in Containers: Pot Depth, Spacing and Yield
By Balcony Harvest
>Container growing for small spaces
If your beet pot holds less than 20 cm (8 in) of usable mix, I’d treat it as a greens pot rather than a reliable full-root pot. Round beets can work at that floor; 25 cm (10 in) is more forgiving, while long cylindrical types such as ‘Cylindra’ deserve about 30 cm (12 in). The other number that decides the harvest is width: once the roots have enough depth, pot diameter sets how many can swell without crowding.
By usable mix, I mean the soil depth after you leave about 5 cm (2 in) below the rim. A container sold as 20 cm (8 in) deep may offer only 15 cm (6 in) of actual root space once you leave room for watering, so measure from the surface of the mix to the bottom rather than trusting the outside height.
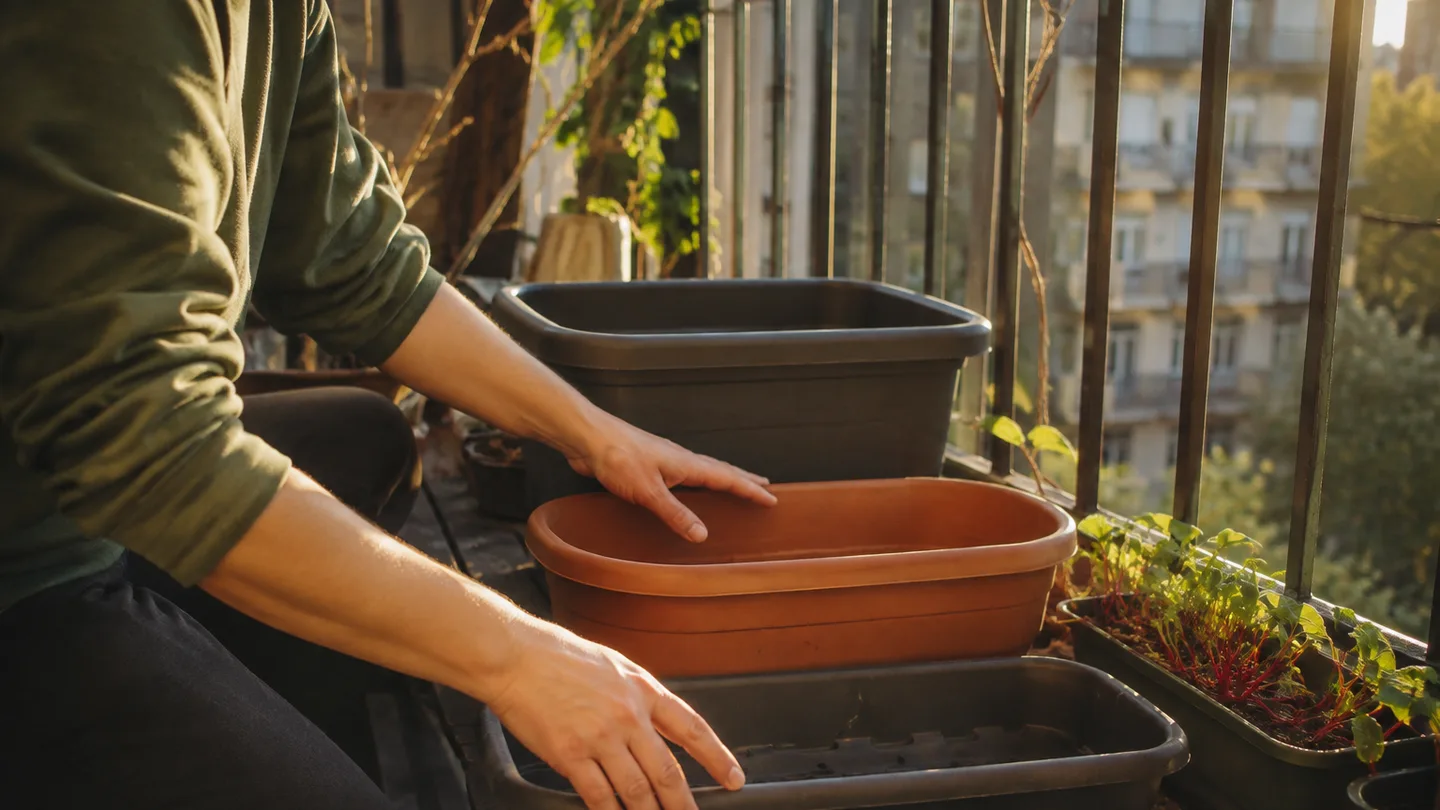
First choose the root shape: 20 cm (8 in) is the floor for round beets
The 20 cm (8 in) figure is a practical floor for small, round-rooted beets, not a promise that every variety will produce a perfect crop in a shallow pot. It gives the swollen root room to develop, leaves a little moisture-holding mix beneath it and avoids asking the plant to form a full root in a thin, rapidly drying layer.
Short, round, or baby-beet types fit this situation better than long cylindrical types because they reach their mature diameter within less vertical clearance. That is why I’d choose a globe beet for a first 20 cm container and reserve the deeper pot for Cylindra or another elongated variety.
| Target usable root depth | Representative container | Approximate usable mix | Best fit |
|---|---|---|---|
| 20 cm (8 in) | About 25 cm (10 in) tall, 20–22 cm (8–9 in) wide | About 5–8 L (1.3–2.1 gal) | Round beets, baby beets and beet greens |
| 25 cm (10 in) | About 30 cm (12 in) tall, 30 cm (12 in) wide | About 14–16 L (3.7–4.2 gal) | Most round varieties with a better moisture buffer |
| 30 cm (12 in) | About 35 cm (14 in) tall, 38 cm (15 in) wide | About 27–30 L (7.1–7.9 gal) | Elongated varieties, larger roots and wider spacing |
Those volume figures are representative rather than a standard pot-sizing chart. A tapered pot holds less than a straight-sided cylinder, and thick walls reduce the internal width. The useful shop-aisle rule is simple: if the pot is only 20 cm tall, it is probably short of the full-root target once you leave headspace. If it is 25–30 cm tall, check the inside diameter next.
Width is the part that controls plant count after the depth gate is open. A 30 cm (12 in) pot with enough depth can hold several beets, but it cannot turn into a miniature field simply because it is tall. The same distinction matters in growing carrots in containers: depth determines whether the root has somewhere to go, while diameter determines how many roots can occupy the available surface.
A potting mix that drains still holds water: the 5–18 litre volume decision
A pot can have a drainage hole and still leave its bottom layer too wet for a small root crop. The issue is not just whether water can escape; it is how water moves through the pore spaces before it reaches the hole.
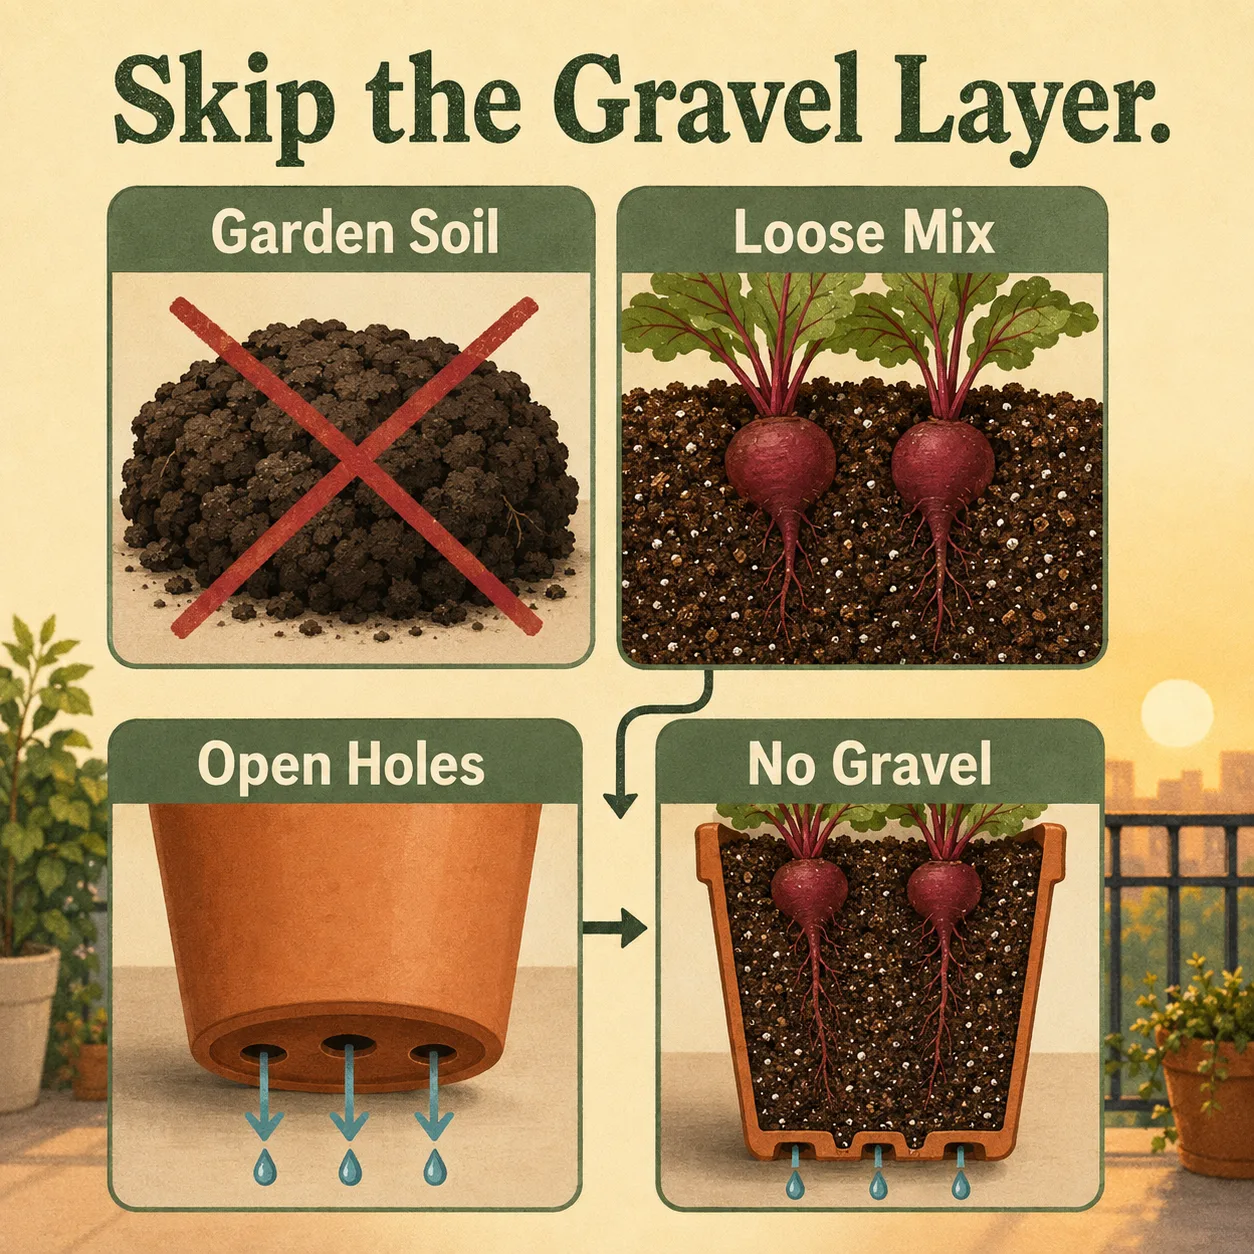
Garden soil is the tempting shortcut, but it tends to settle and compact inside a container. As the fine particles press together, they leave fewer large air spaces around the developing root. Beets need a mix that stays open enough for air and water to move, so I’d start with a bagged potting mix labelled for vegetables, preferably one that feels loose and contains coarse material such as perlite, pumice, bark fibre or coir.
A perched water table is the wet layer that can remain above the drainage holes when water reaches the bottom of a container. It sounds as if a layer of gravel should give that water somewhere to go, but gravel at the bottom usually does not improve the situation. The change from fine potting mix to coarse stones can hold the wet boundary higher rather than lowering it, leaving less usable root space. Fill the container with the same free-draining mix from top to bottom instead.
For planning purposes, a small 20 cm (8 in) pot may take roughly 5 L (1.3 gal) of usable mix. A 30 cm (12 in) pot that is about 25 cm (10 in) deep may take around 14–16 L (3.7–4.2 gal), depending on its taper. A larger tub can easily need 27–30 L (7.1–7.9 gal). Buy a little more than the calculated volume because mix settles after the first watering.
I set the pot on a saucer or stand so runoff does not stain the balcony or sit against the base. The saucer catches excess water; it should not become a permanent reservoir. On an elevated space, check the weight before planting. Dry potting mix is only part of the load: a saturated 20–30 L container, plus the pot itself, is substantially heavier, and several containers grouped together can matter to a balcony or rooftop.
Use a container made for edible plants or one that previously held food, and avoid buckets with an unknown chemical history. Treated timber, old containers that held pesticides or solvents, and decorative pots with unknown glaze finishes are not worth the uncertainty for a crop you plan to eat. If you are new to growing vegetables in pots, spend the money on a sound container and fresh mix before buying a specialised beet variety.
Sow at 1–2 cm, then give each beet 8–10 cm
Beet sowing is straightforward, but the order matters. I use this sequence:
- Moisten the mix first. Fill the pot to about 5 cm (2 in) below the rim, water it slowly until excess drains, and let the surface stop shining before sowing. This gives the seed a damp bed without forcing you to blast the seed into a corner with the first watering.
- Sow 1–2 cm (½–¾ in) deep. Press the seedball into a shallow furrow, cover it lightly and firm the surface with your fingertips. Beet seed is not so large that it needs a deep trench, but it does need contact with moist mix.
- Keep the surface evenly moist during germination. In a cool, suitable setup, plan around 5–14 days rather than expecting every seedling on one morning. A soil temperature around 7°C (45°F) or warmer gives me a more even starting point than cold, saturated mix, though warm weather can dry the surface quickly.
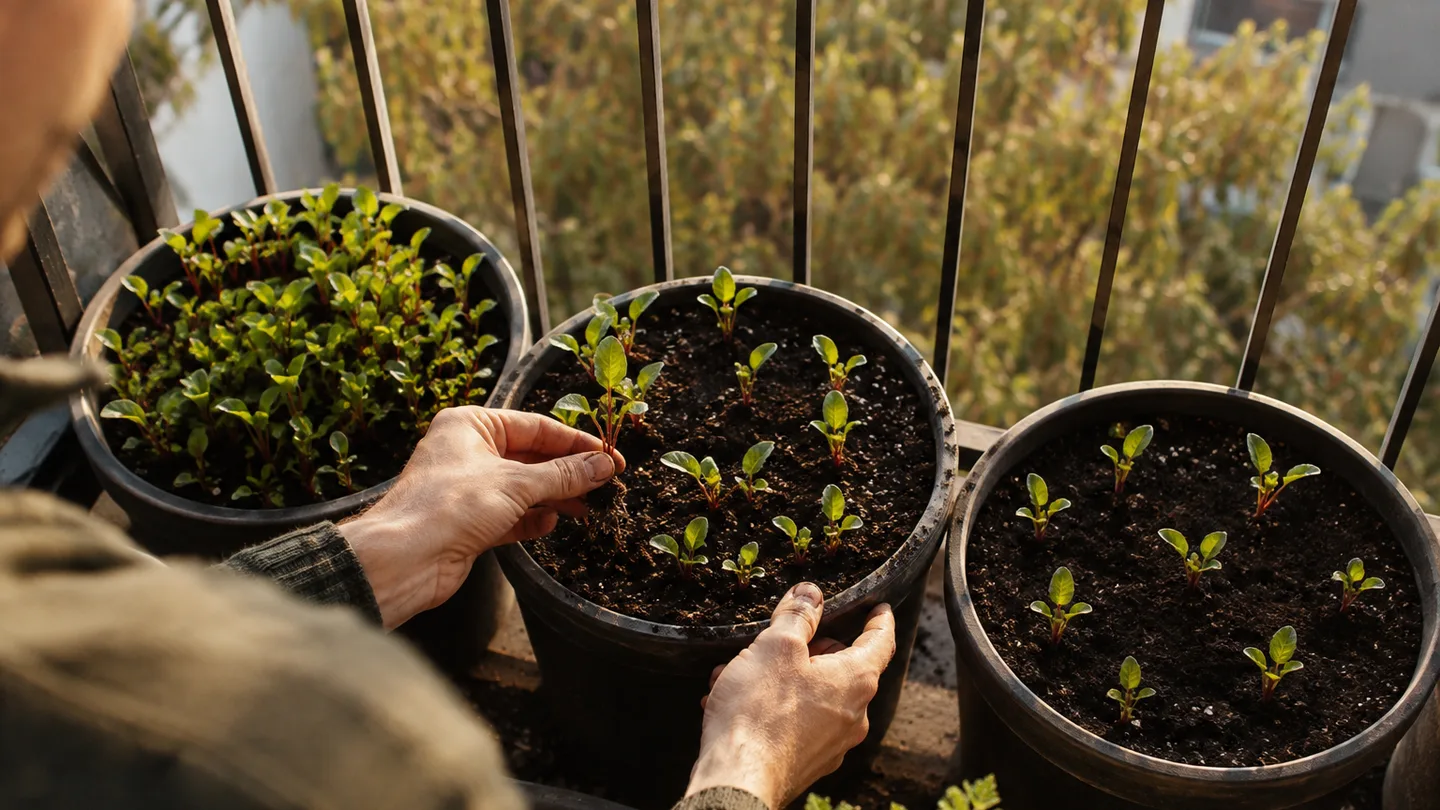
- Thin after the first true leaves appear. The first pair of seed leaves is not the spacing signal. Wait for the next leaves, which look more like the plant you recognise as a beet, then remove extras carefully.
Many beet seedballs contain more than one embryo. That means two or three seedlings emerging from one spot can be normal rather than evidence of bad seed. Some packets are sold as monogerm seed, meaning the seedball has been selected to produce one main seedling, but ordinary multigerm seed is perfectly usable if you plan to thin.
For full-size roots, leave about 8–10 cm (3–4 in) between plants. For baby beets or a crop grown partly for leaves, 5–7 cm (2–3 in) works because you harvest before the roots need their full mature diameter. In a round pot, an offset arrangement uses the space better than one crowded ring: staggering the plants lets each root claim clear space on several sides instead of forcing every root to share the same narrow circle.
In my own balcony setup, I once treated a 20 cm pot as if every sprout deserved to stay because the surface looked reassuringly full. Once the first true leaves opened, the seedlings were packed shoulder to shoulder. I pulled the extras, and the remaining plants began making visible shoulders instead of a thicket of leaves. I now sow more lightly and mark the intended spacing before the seedlings emerge.
Beets prefer the cooler part of the growing season. Rather than sowing one large batch and hoping the harvest arrives at the right moment, I make smaller sowings about 2–3 weeks apart while conditions remain suitable. That spreads the root sizes and gives me another chance if the first pot is hit by a hot spell, poor germination or an overenthusiastic watering.
For another description of the basic sowing sequence, see University of Minnesota Extension guidance on growing beets. I use it as a cross-check for the broad sowing and thinning order, not as a substitute for measuring the conditions in a small pot.
The maintenance rule is steady moisture, not a fixed watering day
I check beet pots with a finger rather than a calendar. Push a finger or a thin wooden label 2–3 cm (¾–1¼ in) below the surface near, but not directly against, a seedling. If that layer feels dry and the pot is light, water slowly over the whole surface. If it still feels cool and damp, wait and check again rather than adding water because it happens to be Tuesday.
The interval changes with the container and the balcony. A plastic pot in full sun may need a daily check and, in hot or windy weather, daily watering. A heavier glazed ceramic pot in part shade may remain usable for 2–3 days between checks. Those are starting points, not a timetable: the test is whether the mix is drying at root level before the plant wilts.
Uneven moisture is a common route to cracked roots. A pot that swings from very dry to heavily watered can push the root through a sudden growth phase while the outer tissue is less flexible. I’d rather water deeply when the check says the mix is drying, then let excess drain, than give a small splash every day that wets only the top layer.
I use morning watering as my safer routine when I can, because it gives the foliage and surface time to dry before the cooler night period. If the pot is dry in late afternoon, though, I water it then rather than leaving a young crop thirsty just to obey a schedule. In my experience, moving black plastic pots into a little afternoon shade also takes the edge off the hottest part of the day; the change is most useful when the mix is drying faster than the seedlings can establish.
Light affects the trade-off. Around 4–6 hours of direct sun gives me a better chance of compact tops and useful roots. With only 1–2 hours, beets can still produce leaves, but I’d expect slower and smaller roots and would choose baby harvests rather than wait indefinitely for full size.
Hold off on feeding for the first few weeks if the potting mix already contains a base fertiliser. Around week 3 or 4, check the mix label and the plant colour. If the mix is lean and growth has slowed, use a vegetable fertiliser according to its label. Excess nitrogen can push lush leaf growth without solving a spacing, light or depth problem, so feeding is not my first response to a small root.
Yield from one pot: use the top diameter to count 3–16 roots
Yield estimates become more useful when they start with spacing instead of a promised weight. Measure the inside diameter, allow a few centimetres around the edge, then place plants at their intended centre-to-centre distance. The result is a planning range, not a guarantee: cultivar, weather, light, thinning and harvest size all change the final count.
| Container | Full-size roots at 8–10 cm spacing | Baby roots at 5–7 cm spacing | Planning note |
|---|---|---|---|
| 20 cm (8 in) pot | About 3–4 | About 5–7 | Choose round varieties; depth and drying are the limiting factors |
| 30 cm (12 in) pot | About 6–9 | About 9–13 | A useful all-round size if it provides about 25 cm of mix |
| 5-gallon (19 L) bucket, 28–30 cm (11–12 in) inside diameter | About 6–9 | About 9–13 | Check that the bucket is food-safe and has open drainage holes |
| 40 cm (16 in) tub | About 12–16 | About 20–25 | Better for a batch harvest, provided the mix does not dry unevenly |
Here is the calculation behind the 30 cm pot estimate. Subtract a little space around the edge, then imagine an 8–10 cm grid across the remaining circle. The outer positions are lost to the curved wall, so the pot does not hold as many plants as a square tray of the same width. That is why I’d plan on 6–9 full-size roots rather than announce a single exact number.
For weight, a 30 cm pot can be presented as an illustrative range of about 0.5–1.5 kg (1–3.3 lb), but only if you show the assumption. Six to nine roots averaging an assumed 80–170 g each produce roughly 0.48–1.53 kg by simple multiplication. That is a planning calculation, not a measured balcony trial and not a harvest promise. A small cultivar pulled young may weigh much less; a large root left longer may weigh more but become coarser.
My judgement is that beets are not the best crop for maximising kilograms from a tiny container. They earn their space in a different way: one sowing can give you edible leaves first and roots later, and a 30 cm pot offers a satisfying harvest without demanding a deep bed. If you want pure output per litre, leafy crops may beat them; if you want a crop with a clear root-size payoff, beets are worth the deeper pot.
Harvest at 2.5–8 cm and read the failure before re-sowing
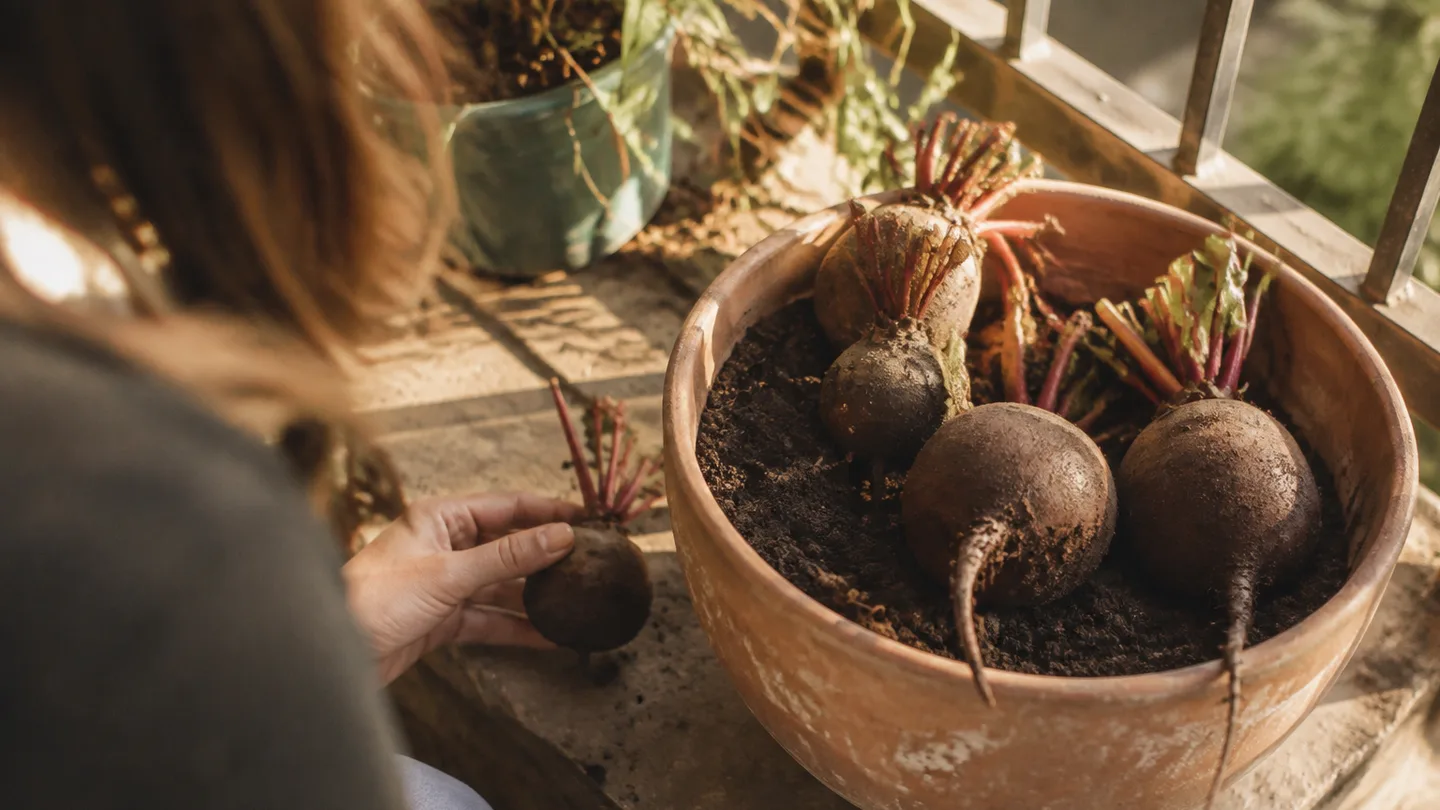
Harvest by the exposed shoulder rather than by the calendar alone. Baby beets are usually worth testing at about 2.5–5 cm (1–2 in) across. For a mature but still tender root, look around 5–8 cm (2–3 in). Brush away a little mix or pull one test plant, measure the root at its widest point and decide whether the remaining plants should stay longer.
Harvest outer leaves sparingly if you want the roots to continue swelling. Removing every leaf at once reduces the plant’s working surface, while taking a few outside leaves lets you use the crop before the root is ready.
Leafy tops with tiny roots: Look first at spacing, light and nitrogen. Crowded plants spend their limited root volume competing with neighbours; low light limits the energy available for swelling; excess nitrogen can keep the tops lush. Thin to the chosen spacing, move the pot to a brighter position if practical and do not add more fertiliser until you know the mix is actually lean.
Cracked roots: Check the watering pattern before blaming the seed. A dry pot followed by a heavy soak can produce a rapid change in root growth and pressure. Keep the mix more evenly moist, improve the drainage path and use a larger pot if the current one dries within hours of watering.
Woody or fibrous roots: The plant may have been left too long, grown through a hot period or selected for a larger root than the pot can comfortably support. Pull the next crop younger, sow during cooler weather and choose a round or baby-beet variety.
Roots that never swell: Check actual depth, not the label on the container. A shallow pot with a gravel layer, compacted garden soil or a dense root mat may leave very little usable mix. Correct the container and mix before reaching for more feed.
A flower stalk appears early: This is bolting, meaning the plant has shifted toward flowering and seed production. Temperature stress can contribute, especially when a cool spell is followed by warming, although individual plants vary. Harvest the usable roots and leaves, then re-sow in a cooler window rather than waiting for a reluctant root to become tender again.
Before the weekend, measure the actual depth from the surface of the mix to the bottom, leaving your 5 cm (2 in) watering gap out of the calculation. Mark an 8–10 cm spacing grid for full roots, or a 5–7 cm grid for baby beets. If seedlings are already up, wait for the first true leaves and thin; if the plants are established, check one shoulder when it reaches your chosen harvest diameter.