Growing Onions in Containers: Pot Size, Timing and Yield
For growing onions in containers, choose at least 20 cm (8 in) of usable mix for dry bulb onions; 20–25 cm (8–10 in) is the safer target. A 30 cm (12 in) pot gives you room to plan for roughly 4–6 bulb onions or 8–12 green onions, while a balcony with only 1–2 hours of direct sun is better used for green tops than for large bulbs.
That is the useful answer before you buy anything: decide which harvest you want, then buy the depth and daylight that harvest needs. Onions are not difficult in pots, but they are poor candidates for guessing. The bulb is a storage organ made from the plant’s leaf bases, so a crowded, shaded plant can look healthy while producing very little underground.
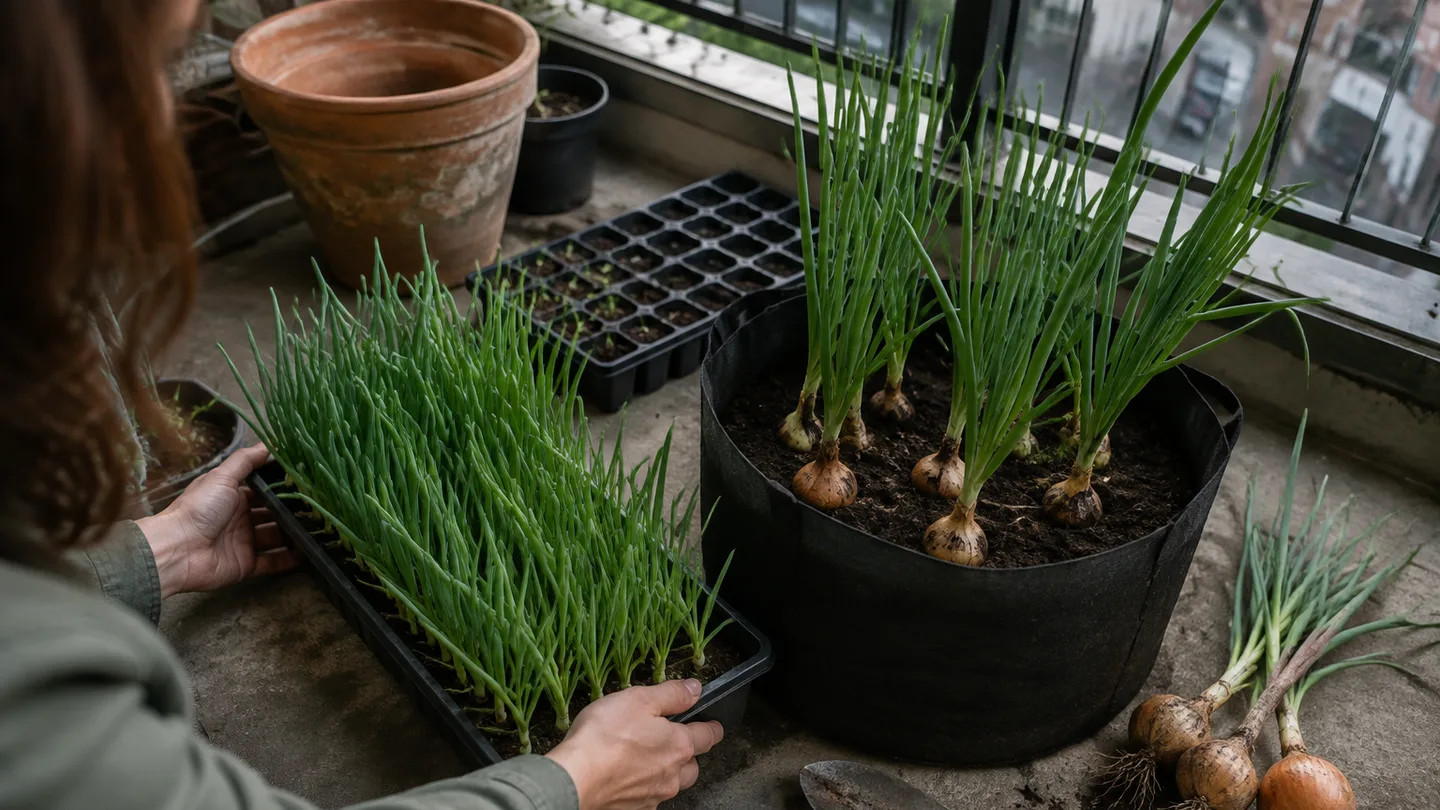
Choose the harvest first: bulb onions need 20–25 cm; green onions can use 12–15 cm
There are two sensible onion crops for a small space. You can grow green onions, also called scallions or bunching onions, and harvest the leaves and slender white bases while they are still young. Or you can grow dry bulb onions and wait for the plant to form a rounded storage bulb.
Green onions are the easier fit for a shallow container. I use about 12–15 cm (5–6 in) of usable root depth as a practical minimum because the crop is harvested before a large bulb has to swell. The plants still need moisture and light, but you are not asking the roots and leaf bases to support a long finishing period.
For bulb onions, make 20 cm (8 in) your floor and 20–25 cm (8–10 in) your preferred range. The extra depth does not make up for poor light, but it gives the roots a more forgiving volume of mix. In a small pot, the mix dries quickly around the edges, and every missed watering interrupts growth just when the bulb is trying to add weight.
For useful bulb formation, I would look for roughly 6–8 hours of direct sun. A position that receives only 1–2 hours may still produce edible onion leaves, but I would not spend the best pot and the whole season expecting full bulbs there. If the site is bright but shaded for much of the day, green onions turn that limitation into a harvest instead of a disappointment.
My own balcony rule is to inspect the growing position before I inspect the plant label. I put the empty container where it will live and watch which part of the pot receives direct sun, rather than assuming that a generally bright balcony is a sunny one. That small audit has stopped me from assigning bulb onions to a spot that was really suitable only for leaves. If you are comparing several planting locations, the light checklist in growing vegetables in pots on balcony follows the same practical logic.
A pot’s mobility is one advantage you do not get in a garden bed. During the season, you can move an onion container closer to the brightest railing, away from a wind tunnel, or under temporary shelter during heavy rain. I would not move a large wet pot casually—its weight rises quickly—but a manageable container can chase better light as the sun’s path changes.
The balcony rule I keep coming back to is this: match the harvest to the light before you match the plant to the pot. Green onions reward limited space quickly; bulb onions repay the effort only when depth, spacing and daylight line up.
Pot maths for onions: 15 cm for scallions, 20–25 cm for bulbs, and no gravel layer
Ignore the word large on a pot label and measure the inside diameter and usable depth. A tapered pot may look generous at the rim but hold much less mix at the base, and a decorative container can lose several centimetres to a thick bottom or an internal reservoir.
| Container size | Approximate usable mix | Best use | Practical planting plan |
|---|---|---|---|
| 20 cm wide × 15 cm deep >(8 × 6 in) | 3–5 L >(0.8–1.3 US gal) | Green onions | About 4–6 plants |
| 30 cm wide × 20–25 cm deep >(12 × 8–10 in) | 10–18 L >(2.6–4.8 US gal) | Bulb onions or a mixed green-onion crop | About 4–6 bulbs or 8–12 green onions |
| 40 cm wide × 25 cm deep >(16 × 10 in) | 20–30 L >(5.3–7.9 US gal) | Larger bulb planting | About 7–10 bulbs, with wider access around the edge |
Those volume figures are buying guides, not laboratory capacities. They allow for a pot that is not a perfect cylinder and for leaving headspace below the rim. Fill the container to about two fingers below the rim so water can soak in instead of immediately running over the sides.
If you are filling several containers, the volume logic in growing vegetables in pots is useful beyond onions: measure the root zone you actually have, then work out how much mix reaches that zone. A 30 cm pot that is only 14 cm deep is not an onion bulb container just because its diameter looks right.
Use a purpose-made potting mix rather than soil dug from the ground. Garden soil contains fine particles that settle and compress in a container, leaving less air around the roots and making the pot slow to drain. A loose mix gives water somewhere to move and leaves root pores open after watering. Whatever mix you use, blend it before filling the pot; a dry pocket beside a wet pocket makes moisture checks misleading.
Drainage means more than having one token hole. Water needs an unobstructed route out of the root zone, and the hole needs to remain open after the container is placed on a balcony floor or saucer. If the pot sits flat against a solid surface, the hole can be sealed by contact. Pot feet, small spacers or a stand help create an exit path.
A perched water table is the wet layer that can remain at the bottom of a container after excess water has drained away. In plain language, the pot may stop dripping while the lowest part of the mix is still saturated. Fine particles hold water by capillary forces, so the root zone does not behave like a pipe with water falling straight through it.
That is why I leave gravel out of the bottom. A gravel layer does not turn a shallow pot into a deeper one or make the water disappear faster; it takes away root space and creates a coarse-to-fine boundary where the finer mix above can still hold a wet zone. Put the drainage holes at the bottom, keep them open, and use the full depth for onion roots instead.
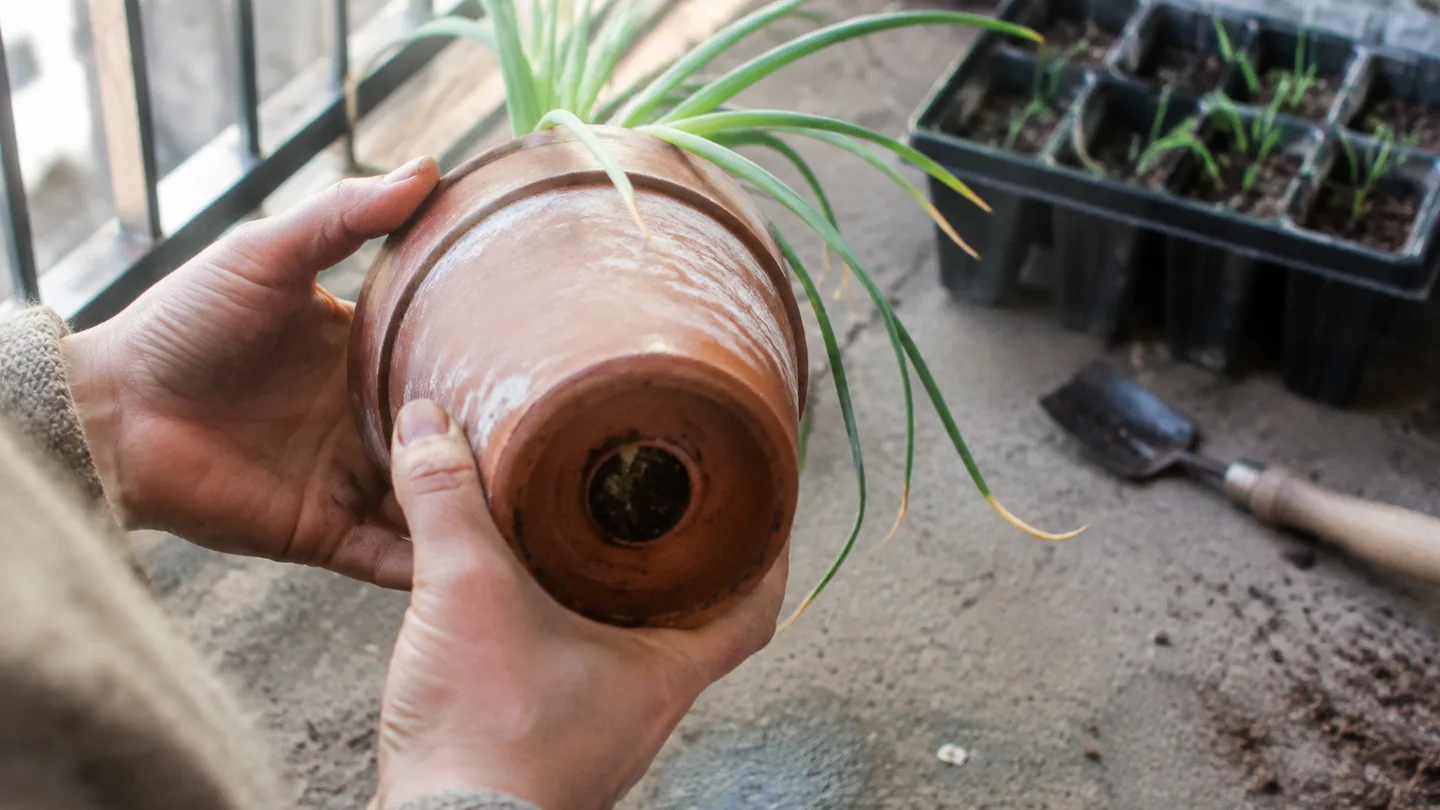
Before planting, pour a little water through the empty pot. If it pools for a long time or exits from only one corner, fix the hole arrangement before adding mix. A saucer is useful for protecting the balcony, but empty it after the pot has finished draining so the container is not standing in collected water.
Timing follows day length, not the first warm weekend
Onions respond to the length of the day as well as to temperature. The plant can make leaves for weeks, then begin swelling its bulb when the daylight reaches the range that suits its variety. Warm weather on its own is not a reliable signal to plant every onion seed packet on the shelf.
For a practical buying rule, treat the day-length classes like this:
- Short-day onions: varieties that begin bulbing at roughly 10–12 hours of daylight.
- Intermediate-day onions: varieties that tend to bulb at about 12–14 hours.
- Long-day onions: varieties that tend to bulb at about 14–16 hours.
The exact boundary varies by variety and growing location, so I use the class as a filter rather than as a promise. If the class is wrong for your latitude, the plant may begin bulbing before it has made enough leaf growth to support a useful onion, or it may keep producing leaves after the season has become too short for a full bulb. A packet that says days to maturity but does not make the day-length class clear deserves a second look.
Here is the timing sequence I would use for a first container crop:
- Seed: start indoors about 8–10 weeks before your local last-frost date if you want transplants ready for spring planting. Use a bright windowsill or grow light so the seedlings do not become pale and floppy.
- Sets or transplants: plant them roughly 2–4 weeks before the local last frost where your local conditions allow. Onion sets are small dormant bulbs; handle them gently and keep the growing tip pointing upward.
- Green onions: sow or plant a small batch every 2–3 weeks during the suitable growing window. Staggering prevents one pot from reaching harvest all at once.
- Autumn planting: treat this as a regional method, not a universal shortcut. Use varieties recommended for mild-winter conditions and check whether your local winter is suitable for overwintering containers.
For frost timing, I would use a local extension or horticultural authority planting calendar rather than copy a date from a different climate. An elevated balcony can be colder and windier than a sheltered garden at the same address, and a dark pot can warm quickly on a clear afternoon. The calendar gives you a starting point; the condition of the mix and the forecast decide whether the pot goes outside.
When I shop, I check the day-length class before I get interested in the colour or the impressive-sounding maturity number. That is my counter-intuitive choice for containers: a variety that is well matched to your daylight pattern is usually a better bet than one that promises a faster harvest but starts its bulb at the wrong point in the season.
If you are planning an autumn container alongside onions, compare the timing with growing garlic in containers. Garlic has a different seasonal rhythm, so it is better treated as a separate schedule than as a second onion planting date.
Spacing sets the yield: a 30 cm pot holds 4–6 bulbs or 8–12 green onions
Spacing is the part of container onion growing that most directly turns into a harvest count. Measure from the centre of one plant to the centre of the next, not from leaf edge to leaf edge. The leaves can overlap; the developing bulbs need their own section of mix and air.
| Round pot diameter | Bulb onions at 10–15 cm >(4–6 in) spacing | Green onions at 4–5 cm >(1.5–2 in) spacing |
|---|---|---|
| 20 cm (8 in) | 1–2 | 4–6 |
| 30 cm (12 in) | 4–6 | 8–12 |
| 40 cm (16 in) | 7–10 | 16–24 |
These are onion counts, not guaranteed weights. A 30 cm pot can produce four large-enough cooking onions, six smaller ones, or a mixture if the variety, daylight class, feeding and sun exposure differ. For a balcony plan, count the number of usable onions you want first; do not buy a large packet and assume the pot will somehow make room.
Bulb onions need about 10–15 cm (4–6 in) between centres. Green onions can be set at roughly 4–5 cm (1.5–2 in) because you are harvesting them before each plant needs the same bulb-swelling space. If you want a compromise, plant the outside ring of a 30 cm pot at bulb spacing and use the centre for a few green onions that you harvest early. Once the green onions come out, the remaining plants have more room.
The mechanism behind the spacing rule is leaf area. Onion bulbs are formed from the bases of the leaves, so the plant needs enough leaf growth to manufacture and store energy. When plants are packed too closely, their roots draw from the same finite mix and their leaves shade one another. The usual result is not dramatic collapse; it is a container full of narrow, soft or undersized bulbs that never reach the size you pictured.
If your main goal is dry onions, I would rather use two 30 cm (12 in) pots than fill one 40 cm (16 in) pot to the edge. Two smaller containers let you stagger varieties or planting dates, move each pot without lifting an awkward load, and remove one pot from a poor patch of light. The larger pot wins for maximum count, but the pair often wins for control.
The phrase container onion yield should therefore mean a realistic number of plants harvested from a known pot, not a promised weight. In my view, a 30 cm pot is a good planning unit because you can see the whole crop, adjust its position and decide whether four to six full bulbs are worth the space. If not, switch the next planting to green onions and harvest sooner.
The season in practice: water, feed, diagnose, then cure for 2–3 weeks
Once the pot and timing are right, onions need a routine that follows the mix and the stage of growth. I would not put them on a fixed Monday-and-Thursday watering schedule. Container moisture changes with pot material, wind, heat, plant size and whether the balcony receives reflected sun from a wall.
Planting week
Fill the pot with pre-moistened mix, stopping two fingers below the rim. Plant sets with their pointed tips at the surface or only lightly covered; burying the neck deeply leaves the tender growing point in a wet pocket. For seedlings, keep the roots covered and the central growing point at the same general level it had in its tray.
Water slowly until a little excess runs from the drainage holes. This first deep watering settles the mix around the roots and reveals whether water can actually escape. If the surface sinks several centimetres, top up with more mix while keeping the onion necks exposed.
Active leaf growth
Check the top 2–3 cm (about 1 in) of mix with your finger. If that layer is dry and the pot feels noticeably lighter, water slowly across the surface until excess appears below. If the top is still cool and damp, wait and check again later rather than watering because the calendar says it is time.
In a black plastic pot in full sun, I would make a daily moisture check during hot or windy weather. A larger glazed pot in part shade may go 2–3 days between checks under the same general conditions, but the plant’s position matters more than the material’s label. The decision is not plastic equals daily or ceramic equals weekly; it is dry root zone versus adequately moist root zone.
Feed the mix at planting with a labelled vegetable fertiliser or a suitable slow-release feed, then follow the product label for a vegetable feed about every 3–4 weeks while the leaves are actively growing. The exact amount depends on the product concentration and how much nutrition was already in the mix, so I would not copy a spoonful from another brand.
More nitrogen is not a shortcut to bigger bulbs. Nitrogen encourages leaf growth, and leaves are necessary, but pushing lush foliage late in the season can leave you with a green top and little storage bulb. Once the plants are approaching bulb formation, I stop trying to correct every pale leaf with extra feed and return to the label rate, steady moisture and better light.
What failure looks like
Yellow leaves with wet, heavy mix: check drainage and watering frequency first. The problem may be a root zone that stays saturated, especially if the pot has a blocked hole or sits in a full saucer. Let the mix dry modestly between waterings, but do not allow a severely wilted plant to swing from bone dry to flooded.
Thin leaves, crispy tips and stalled growth: check moisture at the root depth, not just on the surface. A pot can look damp on top while the lower sides have dried away from the mix. Re-wet it gradually in two passes, allowing a few minutes between them, so water has time to enter instead of running down a gap at the pot wall.
A hollow flower stalk: this is bolting, meaning the onion has switched from leaf and bulb growth to making a flower. Stress, temperature swings and a variety that does not suit the season can all be involved. You can use the green stalk in the kitchen, but the bulb is unlikely to continue swelling in the same way after the plant commits to flowering.
Plenty of green tops but no swelling bulb: check in this order: direct sun, day-length class, spacing, then feeding. That order starts with the conditions that control the crop’s basic signal and ends with the adjustment most likely to create more foliage rather than a better bulb. If the pot receives only 1–2 hours of direct sun, change the harvest plan instead of waiting indefinitely for a dry onion.
Harvest and curing
Green onions are ready whenever the leaves and white bases have reached the size you want. Pull individual plants from the edge of the pot, or harvest the whole container at once. Do not wait for the tops to fall if your aim is a steady supply of young onions; that signal belongs to the dry-bulb harvest.
For bulb onions, look for roughly half to two-thirds of the tops to have fallen over and begun to yellow. The neck above the bulb should be narrowing and drying rather than standing thick and actively green. If the mix is wet, let the surface dry enough to work comfortably, then lift the bulbs carefully rather than yanking hard against a compacted root ball.
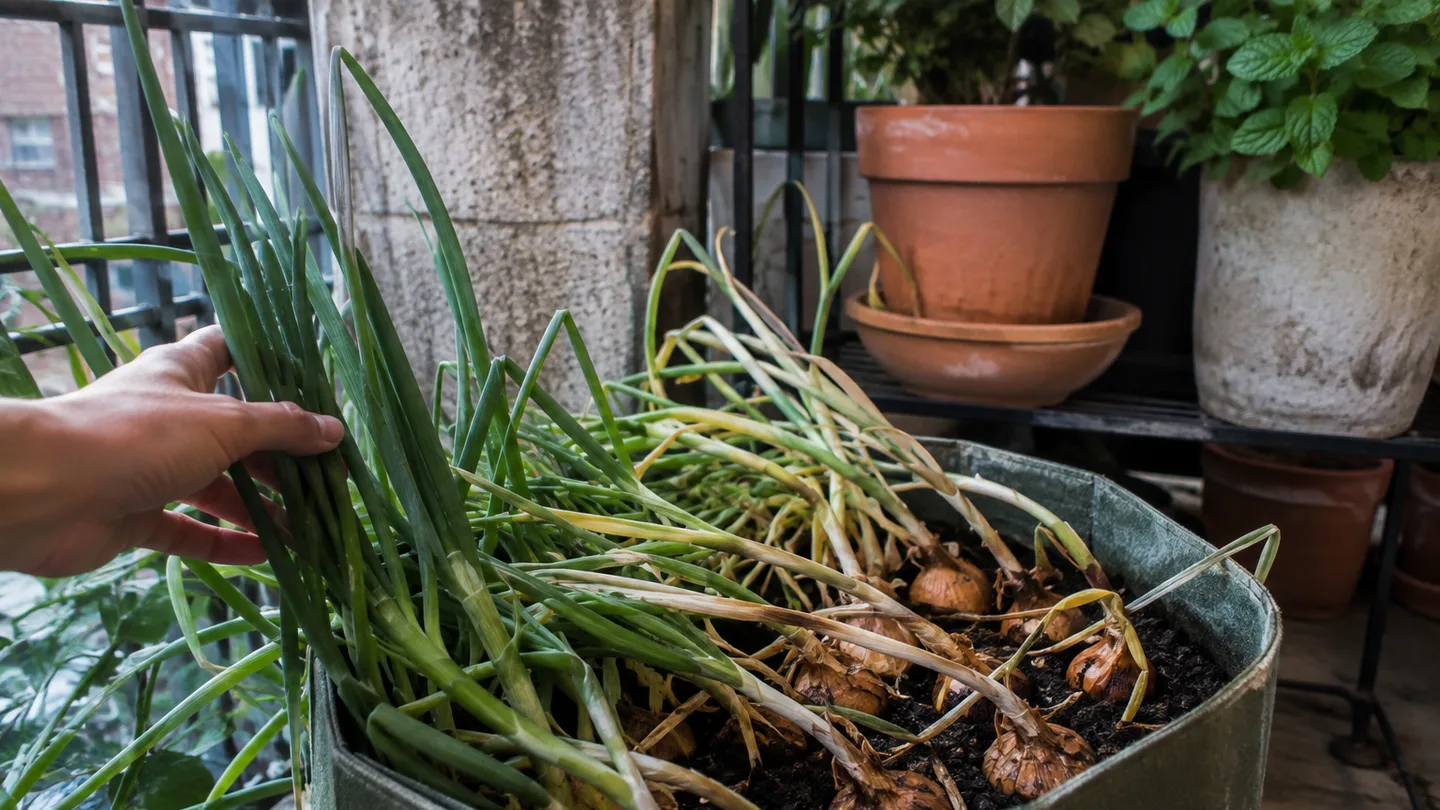
Dry bulb onions need curing before storage. Lay them in a dry, airy place out of harsh direct sun for about 2–3 weeks, with space around each bulb. Curing is finished when the outer skin feels papery and the neck is dry rather than soft or moist. A humid bathroom or tightly packed box works against that process, even if the bulbs look clean.
Do not judge the crop only by the biggest bulb. A container onion that finishes smaller than a supermarket onion can still be a successful use of a balcony if the variety was suited to the daylight, the pot held enough mix and you harvested it at the right stage. The useful comparison is what that pot produced under your light, not what an open field can produce under completely different conditions.
Before buying sets or seed, measure the pot’s inside diameter and usable depth. Confirm that the drainage holes are open, choose the bulb or green-onion spacing from the tables above, and write the planting date on a label. In a week, check whether the mix is drying evenly from edge to centre; that small inspection will tell you more about your watering rhythm than any printed schedule.