Growing Sage in Pots: Pot Size, Soil, and Watering
For one culinary sage plant, start with a pot about 12–16 inches (30–40 cm) wide and 10–12 inches (25–30 cm) deep. That’s usually in the neighborhood of 5–10 gallons (19–38 L), depending on the pot’s shape; the extra mix gives roots room and slows the swing between soaked and dry.
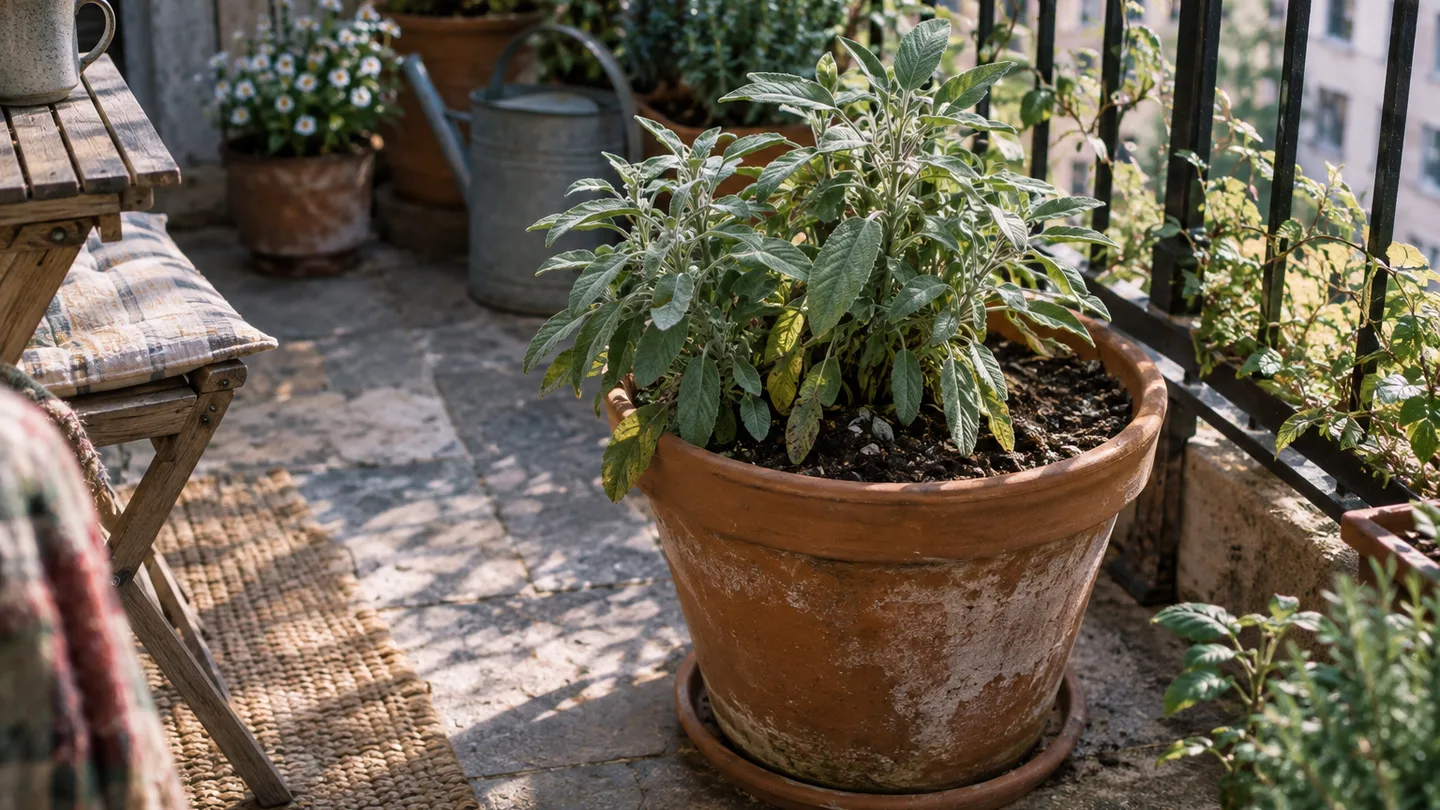
I’d rather see one healthy sage plant in a generous pot than several crowded together in a large-looking planter. Sage is a Mediterranean herb that’s poorly served by a cramped, persistently wet root zone. The practical job is to give it enough soil to buffer watering, then let excess water escape.
The pot to buy: 12–16 inches wide and at least 10 inches deep
Use the dimensions as a buying guide, not a promise that every container with those measurements has the same capacity. A tapered pot holds less mix than a straight-sided one of the same width, and a broad, shallow bowl can look substantial while leaving roots little depth. Check the stated volume if it’s printed on the pot; otherwise, choose by width and depth first.
For one plant, a 12-inch (30 cm) pot is a sensible lower end if you have limited space. A 14–16-inch (35–40 cm) pot gives you more mix to work with and is my preferred choice where the balcony can safely take the weight. Wet potting mix is heavier than dry mix, so consider the filled container, not just the empty pot, if you’re placing it on a rooftop or elevated balcony.
One pot of this size is for one sage plant. Adding a second may seem like a way to get a fuller harvest, but closely packed plants compete for the same root volume and make it harder for air to move through the foliage. If you want more leaves, I’d give each plant its own pot before I’d cram two into one.
Before buying, check for unobstructed drainage holes and a stable base. A saucer can catch runoff, but it shouldn’t become a reservoir: after watering, empty it rather than leaving the pot standing in drained water. And if your only available spot is narrow, take the measurements with you. A pot that fits the balcony but blocks the door or sits in a windy passage is the wrong pot in practice.
Build a fast-draining mix; skip the gravel layer
For a starting mix, combine roughly 70–80% good-quality potting mix with 20–30% coarse perlite or pumice by volume. In a 10-litre (about 2.6-gallon) batch, that means about 7–8 litres of potting mix and 2–3 litres of amendment. The aim isn’t to make the pot dry instantly; it’s to keep the mix open enough that surplus water can move down and out while some moisture remains around the roots.
Use potting mix rather than garden soil. Garden soil can pack down in a container, reducing the air spaces that roots need and making drainage inconsistent. Potting mix is made for use in pots, though bagged mixes vary; if yours already feels very coarse and drains freely, you may need less added perlite. If it stays dense and wet after watering, a coarser amendment is a reasonable adjustment.
Leave gravel out of the bottom. The tempting logic is that water will pass more easily from fine mix into a gravel layer, but a change from fine material to much coarser material can hold water above that boundary instead. That wetter band is called a perched water table: in plain terms, some water remains suspended in the potting mix above the drainage layer rather than immediately dropping into the gravel. A drainage hole at the bottom, kept open, gives excess water a direct exit.
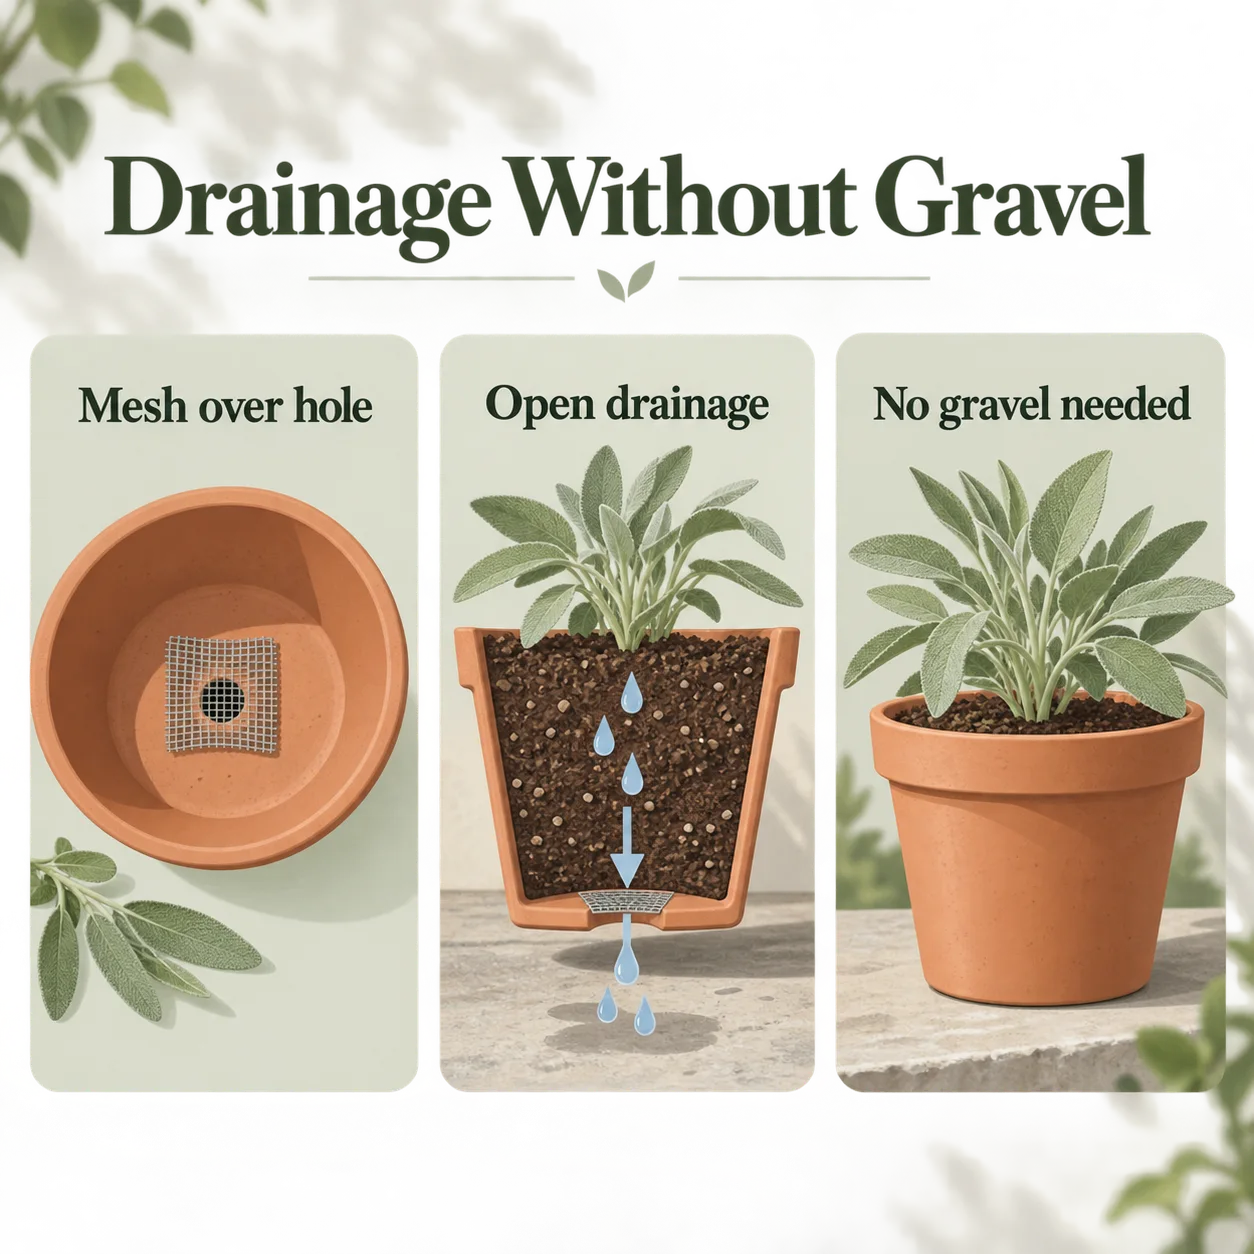
Put a piece of mesh over a large hole if mix keeps washing out, but don’t seal the opening. Fill the pot with mix, set the root ball so its top sits just below the rim, and backfill around it without pressing the mix into a hard lump. Water once to settle the soil; if the level drops, top it up while keeping the plant’s stem base uncovered.
Six hours of sun is a useful target; one or two changes the harvest
Aim for about six or more hours of direct sun if you can provide it. With just one or two hours, sage may still grow, but I’d plan for slower, leggier growth and fewer harvestable leaves rather than expecting a compact, productive plant. A sunny windowsill can help, but a bright room is not automatically the same as direct sun on the leaves.
Do a simple balcony audit before you choose the final spot. Check at morning, midday, and afternoon, and note when sunlight actually lands on the pot. A single look at noon can mislead: a nearby wall may shade the balcony early and late, or afternoon sun may disappear behind another building. If your balcony gets only a short sunny window, try the brightest safe position before deciding the plant itself is failing.
A movable pot is useful here. You can shift it toward the brighter part of the balcony, but don’t trade sun for a spot where strong wind repeatedly knocks the pot over or dries the mix rapidly. A heavier pot can steady the plant, though it makes moving it harder; a wheeled plant stand is an option only if it remains stable and the surface can support the load.
If your balcony is also home to other herbs, compare the light needs before grouping them. The practical notes in growing basil in pots and growing chives in pots can help you decide whether one sunny position suits all three. I wouldn’t combine plants just to save floor space if one will end up shaded or if their watering needs make the shared pot awkward.
Water by the top inch or two, not by the calendar
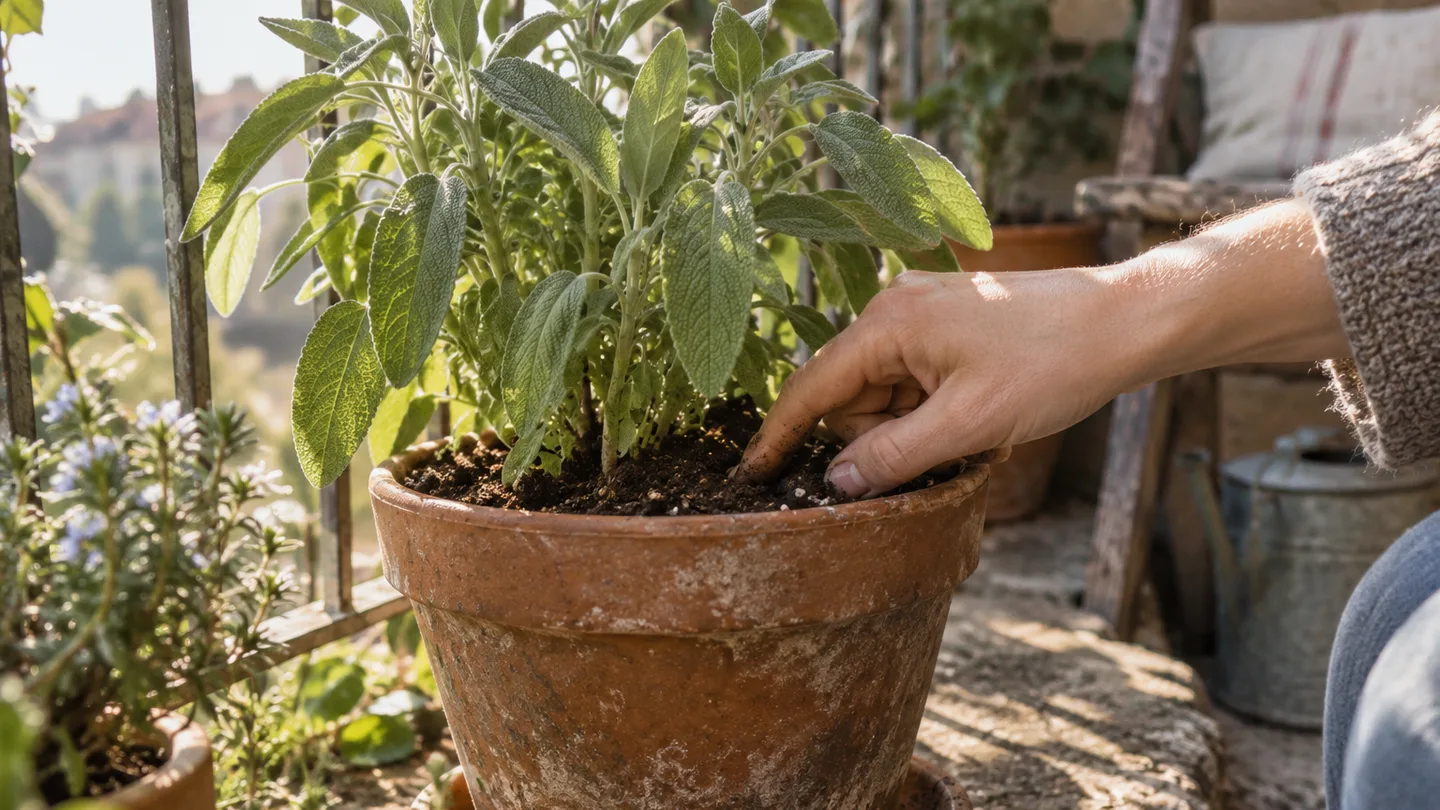
Push a finger about 1–2 inches (2.5–5 cm) into the mix. If that layer feels dry, water the pot thoroughly until water runs from the drainage holes, then empty the saucer. If the mix still feels damp at that depth, wait and check again rather than watering because a particular day of the week has arrived.
The finger test is a cue to inspect, not proof that the whole root ball is dry. The surface can dry in sun and wind while the lower mix remains damp. That’s why I check the top layer and pay attention to the pot’s weight and the plant’s condition together. If you’re uncertain, wait a little and check again; a brief pause is more useful than adding water blindly to a pot that may already be wet below.
In hot, windy weather, check more often because sun and moving air can pull moisture from a container quickly. In cool or overcast conditions, check less often. Those are inspection rhythms, not a fixed watering schedule: pot size, material, wind, exposure, and the mix all change how quickly the root ball dries.
Here’s a worked example, not a record of a grower’s measured plant. Imagine a 14-inch (35 cm) plastic pot on a sunny, exposed balcony during a heat spell. You check at breakfast and again after work. If the top inch is dry after work but the pot still feels heavy and the mix below that surface is cool, don’t assume the roots need a full soak; check the deeper mix the next morning. If the top couple of inches are dry and the pot feels notably lighter, water slowly until runoff appears. This decision uses the plant and pot in front of you, not an invented number of days.
Look at the leaves, too, but don’t diagnose by appearance alone. A limp plant in dry mix may need water. Yellowing leaves in mix that stays wet point me first toward drainage and excessive moisture, not another watering. If water pours straight through while the root ball remains dry, apply it in a slower pass, let it soak in, and water again rather than flooding the surface once.
Feed lightly—or wait until the mix needs it
Read the potting-mix bag before adding fertilizer. Some mixes include a starter feed, so adding another dose immediately can stack nutrients without solving any visible problem. If the mix is pre-fertilized, give the plant time to use what’s there and follow the bag’s directions for when to feed again. If it isn’t, use a fertilizer labeled for edible plants and follow its instructions rather than guessing at a stronger dose.
My preference is to feed conservatively. Heavy feeding can push soft, leafy growth that is less compact than the plant you want to keep in a small container. Pale or weak growth isn’t an automatic request for fertilizer, either: in this container-sage diagnosis, shade and persistently wet roots are plausible causes to check first. Extra fertilizer won’t fix those underlying conditions; correct the light or drainage problem before deciding the plant needs food.
Make one change at a time. If the pot has been sitting in water, improve drainage and let the mix begin to dry before adding fertilizer. If it gets very little direct sun, move it to a brighter safe position. Reassess the new growth rather than trying to force a quick turnaround with repeated feeding.
Take leafy tips, but leave enough growth to recover
Give a newly transplanted plant time to settle before taking much from it. Once it is putting on fresh growth, snip leafy stem tips with clean scissors instead of repeatedly stripping individual leaves from every branch. A light trim gives you leaves for cooking while leaving the plant foliage to keep growing.
As a cautious ceiling, avoid taking more than about one-third of the plant at once. That’s a practical limit, not a guarantee of recovery: a small, stressed, or recently transplanted sage plant needs a gentler harvest. Don’t cut deep into old, woody stems where there are no obvious leaves or fresh shoots to grow from. If a stem is bare and rigid, take leaves from younger growth instead.
One potted sage plant is best thought of as a source of occasional fresh leaves, not an unlimited supply. Pinch or snip a little at a time and let the plant refill. If you need a large amount for a recipe, plan ahead or grow a second plant in a separate pot so each has room and can be watered on its own terms.
Yellow leaves, blackened stems, and winter damage point to different problems
When sage looks unhappy, check the conditions in this order: moisture, drainage, light, then cold or wind exposure. The order is a practical troubleshooting sequence, not a claim that one cause is universally most common. It starts with things you can inspect directly and avoids treating every symptom with more water or fertilizer.
- Yellowing leaves and consistently damp mix: Check that the drainage holes are open and that the saucer isn’t holding water. Let the pot drain; don’t add fertilizer as the first response.
- Wilting with dry mix: Water thoroughly and see whether the mix absorbs it. If water races out while the root ball stays dry, slow down and repeat the watering after the first pass has soaked in.
- Long, sparse growth: Count direct-sun hours before changing the feed. Move the plant toward a brighter position if you can do so without exposing it to damaging wind.
- Blackened or collapsed growth after cold weather: Check the local winter conditions and the plant’s condition before deciding what to prune. A pot’s root ball is exposed to surrounding air on more sides than roots in the ground, so container overwintering depends on the climate and the pot’s exposure.
For local winter advice, look up the RHS sage growing guidance or ask a nearby cooperative extension service; regional conditions matter more than a universal hardiness promise. Insulating the outside of a container may slow heat moving through the pot wall, but it doesn’t change the plant’s local hardiness or make a waterlogged root ball safe from cold. If you insulate, keep drainage holes clear and make sure the pot remains stable.
If the plant is weak, resist changing water, feed, and location all at once. Make the first correction that matches what you can observe, then check the new growth and moisture again. A plant won’t always recover, but a clear diagnosis gives you a better chance of learning what this balcony can support.
Can sage grow indoors year-round?
It can be grown indoors, but choose the brightest available window or consider a grow light if the room gets little direct sun. In a spot with only one or two hours of direct light, expect slower, stretched growth rather than the compact form you’d get in a brighter position.
Can I start sage from seed in a pot?
Yes. A nursery plant or cutting is a quicker route to an established potted plant, while seed takes longer to reach a harvestable size. Follow the seed packet for sowing depth and timing for your area.
Can sage share a pot with rosemary?
Their preference for sharply draining mix can make them seem like natural companions, but separate pots make it easier to manage root space, watering, and pruning. If you do share a container, make sure it is large enough for both plants as they grow and that neither crowds the other.
Before the weekend, measure the spot where you want the plant to live and buy a pot that fits the 12–16-inch (30–40 cm) width range, has open drainage holes, and can be moved safely when full. When you bring the sage home, check the mix with a finger before watering; that first reading gives you a baseline for the next sunny or windy day.
Frequently Asked Questions
Can sage grow indoors year-round?
It can, but it needs a very bright window or supplemental grow light; a room with only 1–2 hours of direct sun is likely to produce weak, stretched growth.
Can I grow sage from seed in a pot?
Yes. It is possible to start sage in a container from seed, but a nursery plant or cutting is a quicker route to an established potted plant; follow the seed packet for sowing depth and timing.
Can sage share a pot with rosemary?
Their preference for sharp drainage is compatible, but both can become woody and compete for limited root space; separate pots make sizing, watering, and pruning easier.