How to Propagate Rosemary: Cuttings, Water and Soil
If you want to know how to propagate rosemary, start with an 8–12 cm (3–5 in) green shoot, not an old woody branch. Cut it just below a node, remove the leaves from the lower 3–5 cm (1–2 in), and you can root it in water or in a lightly damp, airy mix.
My short answer is this: use water if you want to watch roots develop, and use soil if you want the new roots to form where they will stay. Neither method rescues a dried-out, flowering or waterlogged cutting, so the stem you choose matters more than the jar or pot.
The short answer: use an 8–12 cm (3–5 in) green shoot, then choose water or soil
Take a fresh, flexible tip from a healthy rosemary plant. Make the cut just below a node, which is the slight joint where leaves join the stem. Keep roughly two to four pairs of leaves at the top and strip the bare lower section before placing the cutting in water or mix.
| Method | What you can see | Main risk | When I choose it |
|---|---|---|---|
| Water | Roots developing in the jar | Fragile water roots and a difficult transfer if you wait too long | When I want visible progress or am teaching a beginner |
| Soil | Little evidence until new growth appears | Too much moisture around the buried base | When I want the cutting to root directly into its growing mix |
The useful distinction is not water versus soil as winners. It is whether you prefer to manage oxygen and cleanliness in a jar or moisture and air space in a pot. In warm, bright conditions, I plan on roughly two to six weeks for water roots and three to eight weeks for soil roots, but those are working windows rather than promises.
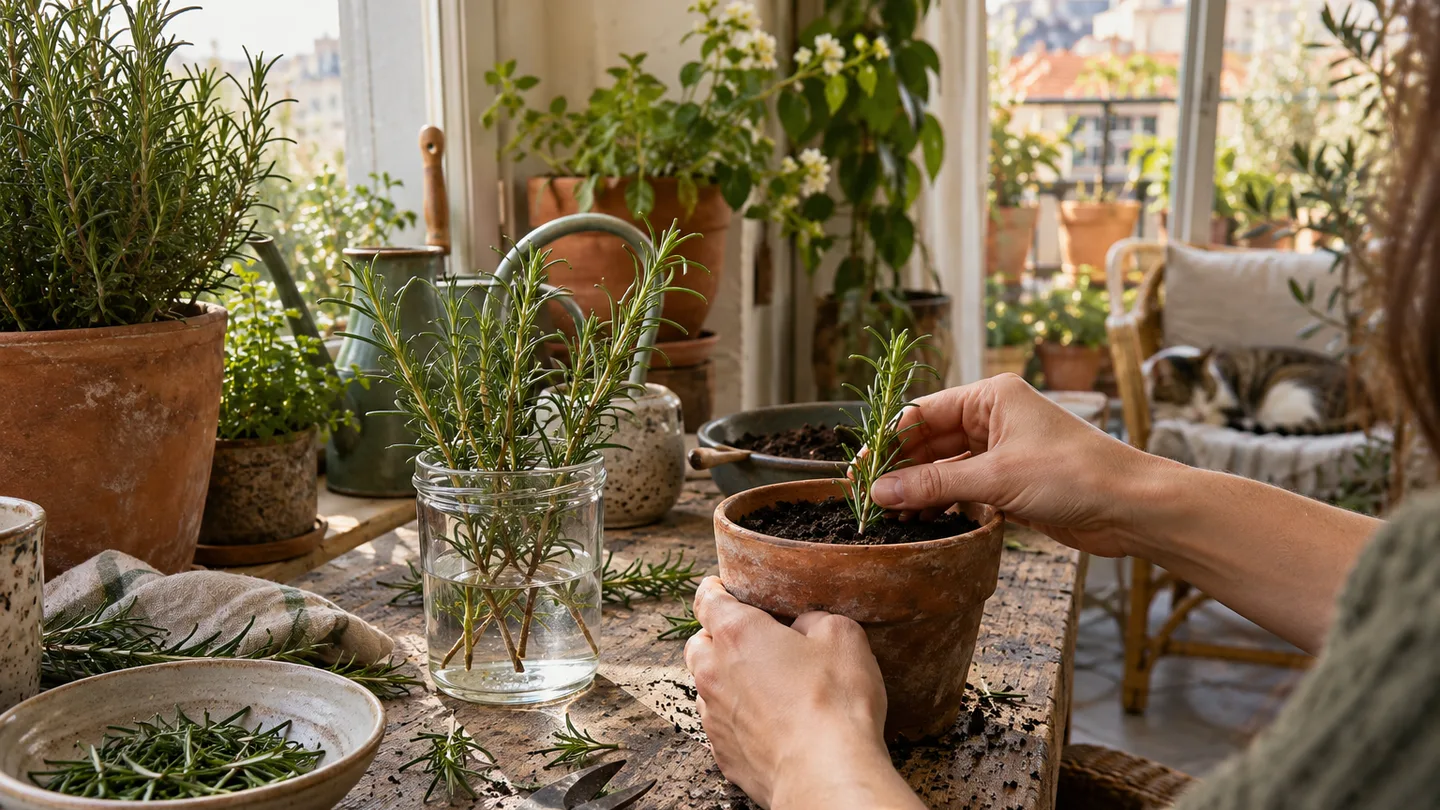
Take the cutting from the right part of the plant: 8–12 cm, flexible and not yet woody
I choose a stem that bends before it breaks. The best piece is usually green or semi-ripe: it has started to firm up but is not yet hard, brown and brittle. An old woody branch can stay alive after cutting, but I find it a poorer first choice for quick propagation because the stem has less actively growing tissue near its tip.
Look at the joints along the stem. A node is where one or more leaves emerge, and it is the place from which new roots or shoots can develop. Your cut should sit just below one of these joints, leaving at least one or two nodes above the future rooting zone.
- Choose a healthy, hydrated parent plant rather than one that is already wilted.
- Take a flexible 8–12 cm (3–5 in) tip with roughly two to four pairs of leaves.
- Avoid a stem carrying a large flower cluster when another tip is available.
- Take cuttings from spring through early autumn outdoors, while the plant is actively producing fresh growth.
That timing follows the same basic logic described in extension guidance on softwood and semi-ripe cuttings: a stem should be young enough to root but mature enough not to collapse as soon as it is separated from the parent plant.
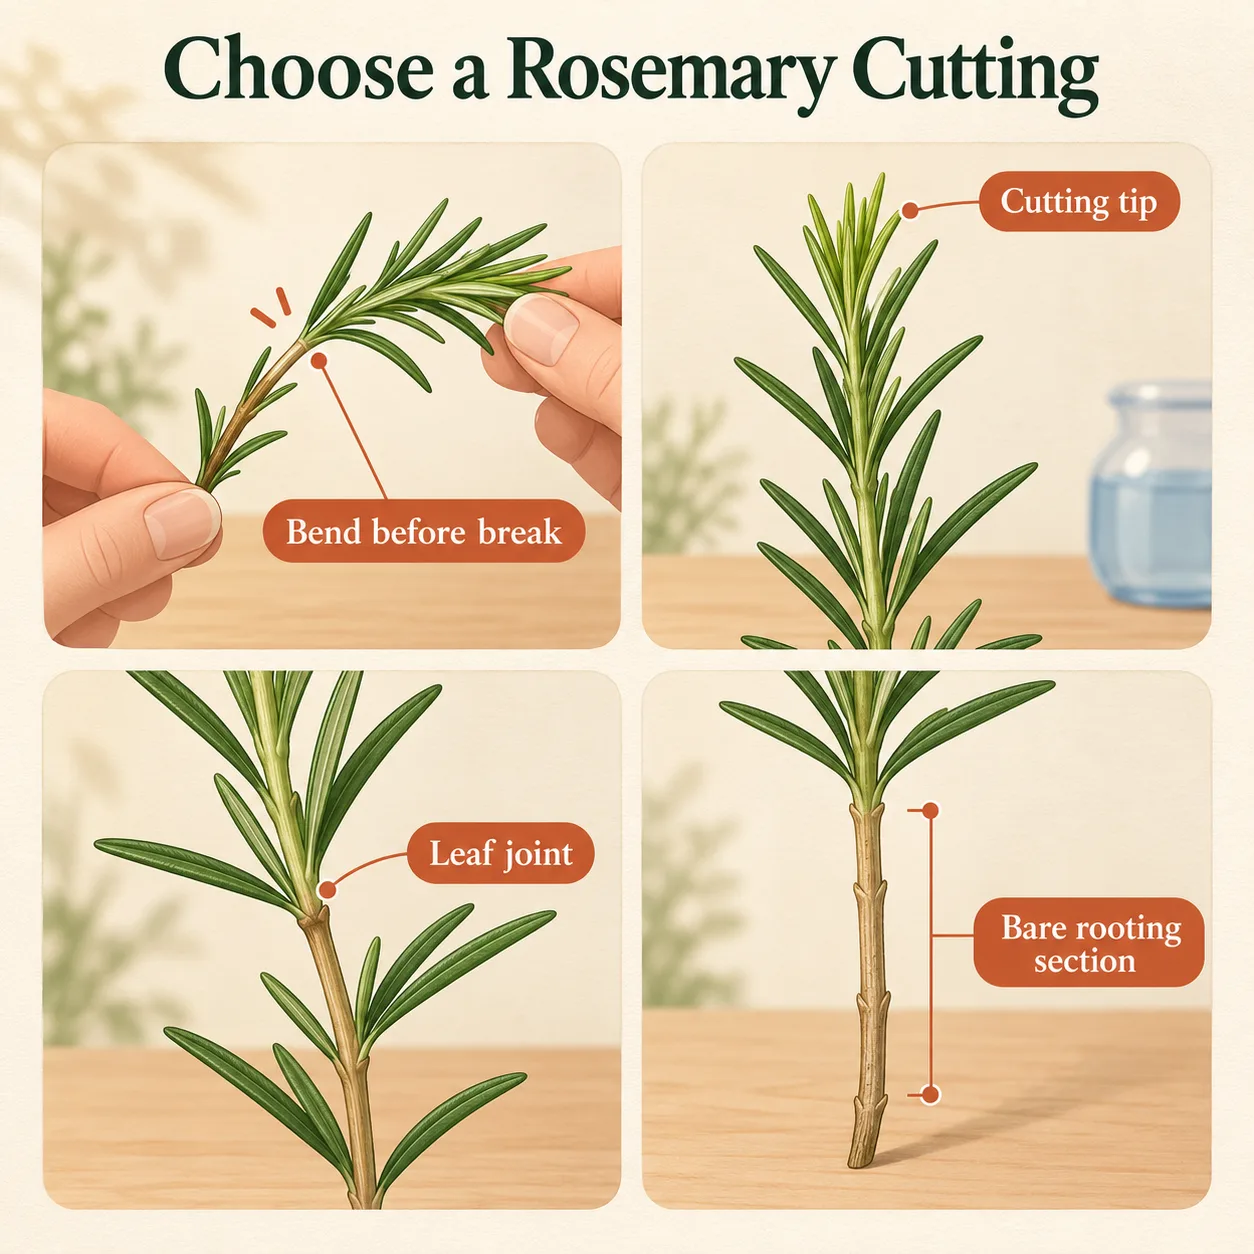
Five minutes of preparation: cut below a node and strip the lower 3–5 cm
Preparation is simple, but the order matters. I want the cutting made cleanly, the lower stem exposed and the propagation setup ready before the cut has time to dry.
- Use clean, sharp snips. A blunt blade crushes the stem instead of making a clean surface. Wash away soil or plant residue first and let the tool dry.
- Make the cut just below a node. Leave the growing tip intact and keep the cut surface short and clean.
- Strip the lower 3–5 cm (1–2 in). Remove every leaf that would sit below the waterline or the surface of the mix.
- Keep the upper leaves. They help the cutting continue photosynthesis, but too much foliage loses more water than an unrooted stem can replace.
- Use rooting hormone only as an optional aid. If you use it, dust or dip only the leafless base and tap off excess. Powder cannot compensate for a cold, dark or saturated setup.
Every leaf below the waterline or buried in the mix becomes a wet piece of soft tissue with little airflow around it. That is why I do not push a leafy stem into the pot and hope for the best. The lower section should look plain and slightly bare.
Water propagation is a visibility game: submerge 2–3 cm, use indirect light and refresh regularly
For water propagation, use a clean narrow jar so the cutting stays upright. Add enough water to cover only the leafless 2–3 cm (about 1 in) base. Every leaf should remain above the waterline.
- Place the jar in bright indirect light. A bright windowsill is useful; hot afternoon sun through glass is not.
- Keep the base submerged and the foliage dry. If the stem slides deeper, lift it back out rather than allowing leaves to sit in water.
- Refresh the water every two to four days, or sooner if it turns cloudy or develops a smell.
- Check the base during each change. A firm pale base is encouraging; a dark, soft or slippery base is a reason to recut above the damage.
Warm, stagnant water is a poor rooting environment because it holds less dissolved oxygen than cooler, moving water. Direct sun also heats a small jar quickly, increasing stress at the exact time the cutting has no roots to replace lost moisture. Bright indirect light gives the leaves energy without turning the container into a miniature greenhouse.
On my balcony, I once put fresh rosemary tips into a narrow glass and left the water unchanged because it still looked clear. Within the week, the submerged bases had become soft even though the leaves were green. I recut one above the damaged section, stripped the lower stem farther up and moved the jar out of afternoon sun. The useful lesson was not that water is a bad method; it was that a clear jar can still have a warm, oxygen-poor base.
I pot up water-rooted cuttings when the roots are about 2.5–5 cm (1–2 in) long and have started to branch. If you wait until the jar contains a dense, tangled mass, the roots are harder to separate without breaking them. For rosemary, water is a visibility tool, not a rooting shortcut.
Soil rooting keeps the roots where they will grow: a 7.5–10 cm pot and an airy, barely moist mix
For soil rooting, use a 7.5–10 cm (3–4 in) pot with drainage holes. Fill it with a free-draining mix containing roughly one-third perlite or another coarse, airy material. Rosemary needs moisture around the cutting, but a permanently saturated base leaves little air space for new roots.
- Moisten the mix first. It should feel evenly damp, not muddy or dripping.
- Make the planting hole before inserting the cutting. Use a pencil, dibber or clean stick. This prevents the mix from scraping the rooting surface off the stem.
- Insert the leafless base. Keep the remaining leaves above the mix and firm the soil gently around the stem.
- Water once from above. Let excess drain fully, then place the pot in bright indirect light.
- Cover loosely if the air is dry. A clear bag or propagator cover can slow leaf moisture loss, but it must be ventilated so still, damp air does not encourage mould.
I aim for roughly 18–24°C (65–75°F) and bright indirect light. For soil, I plan on about three to eight weeks before a cutting shows convincing resistance or fresh growth. Do not pull the stem up to check. Newly forming roots are easy to tear, and a cutting that looks unchanged above the soil may still be building a small root system below it.
Once the first watering has drained, keep the mix barely moist rather than wet. The surface can begin to dry between checks, especially in a plastic pot indoors, but the buried base should not swing from bone-dry to saturated. This is the main trade-off with soil: the roots stay in their final medium, but you have to judge moisture without seeing them.
Read the failure before changing the method: wilt, black stems, mould and no roots
The first thing I check is the base. Rosemary cuttings often look generally unhappy for more than one reason, but the stem texture usually tells me whether to adjust the environment or start again.
- Leaves wilt and stay limp: the cutting may be carrying too much foliage for its rootless stem, or the air may be too dry. Move it out of harsh sun, remove one or two lower leaf pairs if necessary and increase humidity modestly rather than soaking the mix.
- The base is black, soft or slippery: stagnant, saturated conditions have allowed the tissue to decay. Cut back to firm tissue if enough healthy stem remains, then use cleaner water or a drier, airier mix.
- White or grey mould appears: the cover is too tight, the foliage is touching wet surfaces or the air is still. Remove the cover for ventilation and discard heavily affected tissue.
- There are no roots after about four to six weeks: check the stem first. It may be too woody, cut above a useful node, too cold, too dark or repeatedly allowed to dry out.
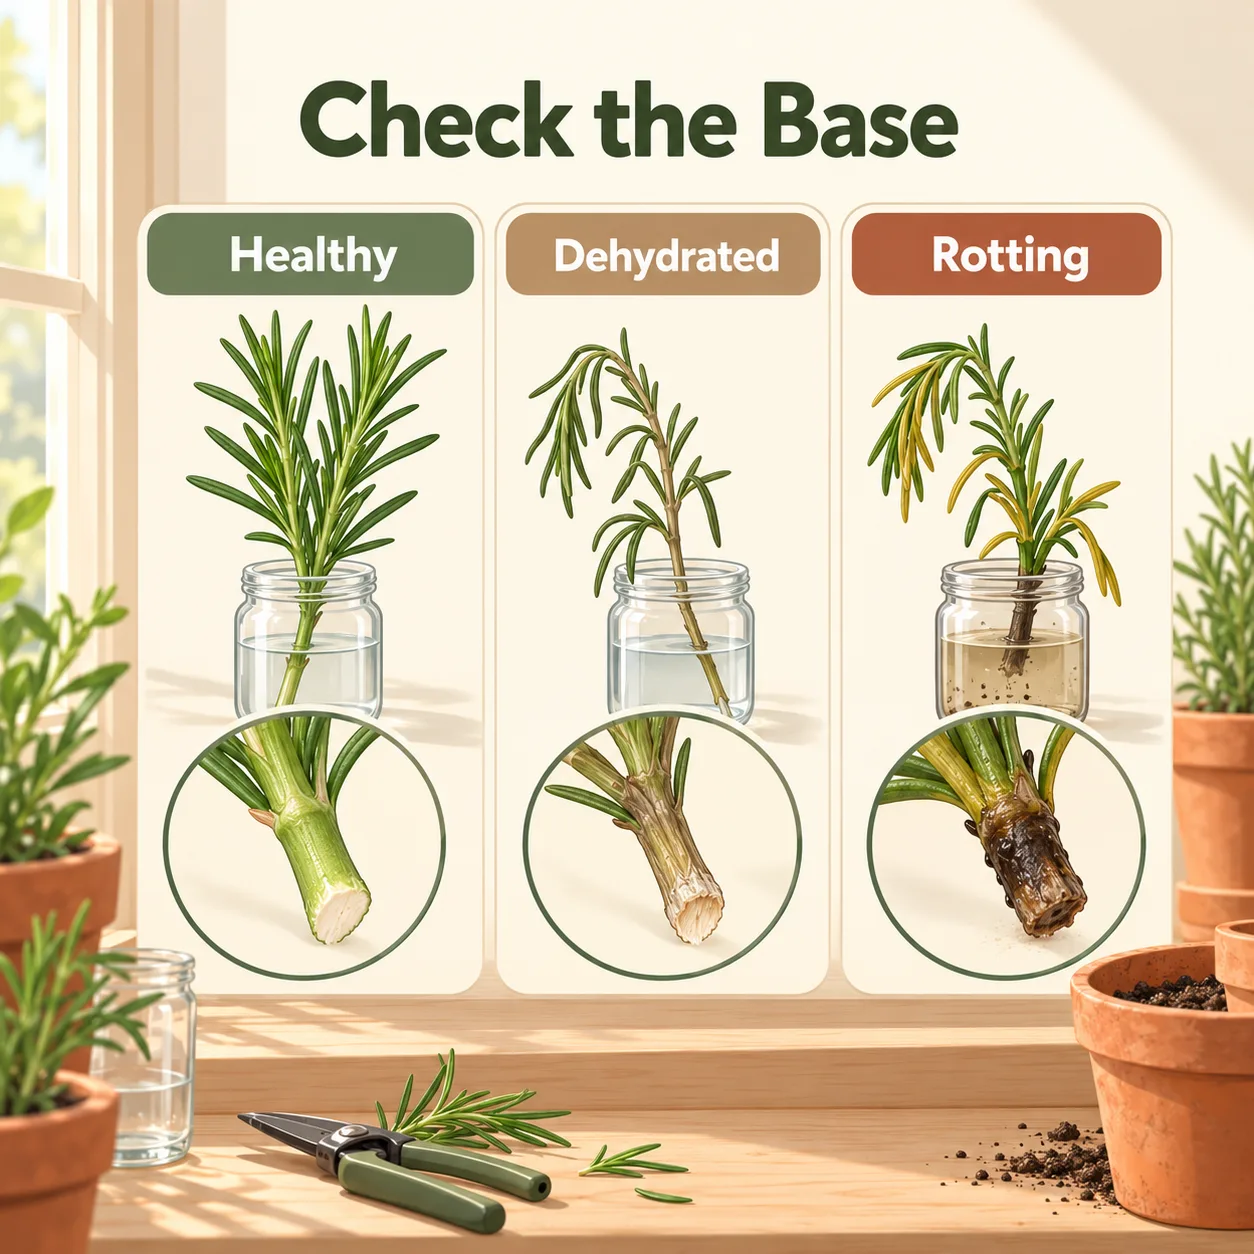
Healthy early roots are usually pale and firm. Brown, slimy tissue that pulls away from the stem is decay, not a late stage of healthy rooting. I restart rather than endlessly adjusting a cutting when the base has softened, the stem has collapsed or the setup has become mouldy. One clean new cutting is often easier to manage than a damaged one with several problems layered together.
Pot up when roots reach 2.5–5 cm, then taper off humidity over 7–10 days
Move a water-rooted cutting into a 10–12 cm (4–5 in) pot with drainage holes once it has a few firm roots. Make a hole large enough to accept them without bending, set the roots into free-draining mix and firm the soil gently. Water thoroughly so the mix settles around the roots, then let the excess drain away.
For a soil-rooted cutting, I look for a gentle resistance when I nudge the stem and, ideally, fresh growth at the tip. Resistance alone is not proof of a large root system, so lift the cutting only when the mix is moist and handle the stem rather than tugging hard on the leaves.
- Keep the newly potted cutting in bright indirect light for the first few days.
- Open or remove the humidity cover for longer periods each day.
- Over roughly seven to ten days, move it toward gentle morning sun if the leaves remain firm.
- Hold off on strong feeding until active new growth resumes. A small root system is easy to overwhelm with concentrated fertilizer.
This gradual handoff matters because the leaves can lose water faster than the new roots can replace it. After the plant settles, let the upper layer of mix dry slightly before watering again. Rosemary is happier with an airy root zone than with soil that stays wet around the stem.
From rooted cutting to kitchen plant: wait for fresh growth before taking a sprig
I wait for firm new shoots and roughly 5–10 cm (2–4 in) of fresh growth before taking the first small harvest. A newly rooted cutting has already spent its stored energy making roots, so stripping it for cooking immediately slows the next stage: building a branching plant.
Once the plant is clearly growing, light tip pruning can encourage side shoots. Take a small sprig from several tips rather than removing one whole branch, and leave plenty of green growth behind. The first few weeks in the final pot should show upright tips, firm grey-green leaves and no softening at the base.
If you want to apply the same pot-and-moisture logic to another herb, compare this process with growing basil in pots. For a wider container shortlist, Easy fruits and vegetables to grow in pots is a useful next read. For broader pruning context, Royal Horticultural Society guidance on rosemary is worth comparing with the conditions on your balcony or windowsill.
Can I propagate rosemary from supermarket sprigs?
Sometimes. Choose sprigs that are fresh, green and firm rather than chilled, dried or already brown at the base. Recut the stem, strip the lower leaves and start several pieces because supermarket stems are less predictable than cuttings taken directly from a living plant.
Can I propagate rosemary in winter?
You can try indoors if you can provide roughly 18–24°C (65–75°F) and bright light. Outdoor winter cuttings are likely to be slower, and cold wet mix gives the base more time to decay before roots form.
Do I need rooting hormone for rosemary cuttings?
No. I do not treat rooting hormone as essential for rosemary. If you use it, apply only a light coating to the leafless base. The more important decisions are choosing fresh growth, keeping the base airy and preventing the foliage from drying out.
Before the weekend, choose one flexible 8–12 cm (3–5 in) stem, prepare a clean jar and a draining pot, and label the start date. In a week, check the base rather than pulling the cutting: it should still be firm, with leaves that are not collapsing.
Frequently Asked Questions
Can I propagate rosemary from supermarket sprigs?
Sometimes, if the stems are fresh, green, firm and not heavily chilled or dried; recut the base and expect less predictable rooting than from a living plant.
Can I propagate rosemary in winter?
Yes indoors if you can provide roughly 18–24°C (65–75°F) and bright light, but outdoor winter cuttings are slower and more prone to rot than spring or early-summer cuttings.
Do I need rooting hormone for rosemary cuttings?
No. Rosemary commonly roots without it; if used, apply only a light coating to the leafless base because excess powder cannot compensate for a cold, dark or waterlogged setup.