Septoria Leaf Spot vs Early Blight: 7 Tomato Leaf Clues
Septoria leaf spot usually starts as a peppering of small, round marks—roughly 1–3 mm (1/16–1/8 in) across—while early blight more often makes broader brown lesions, about 3–15 mm (1/8–5/8 in), with visible rings. Those ranges are useful screening clues, not laboratory cutoffs.
On a tomato I kept in a 35-litre balcony tub, I took two photos of the lower canopy four days apart. The first showed roughly a dozen separate specks on one leaf; by the second, about two dozen marks had merged near the midrib. That was the point where judging one spot at a time became misleading, so I started comparing size, centre, canopy position, and the stem together.
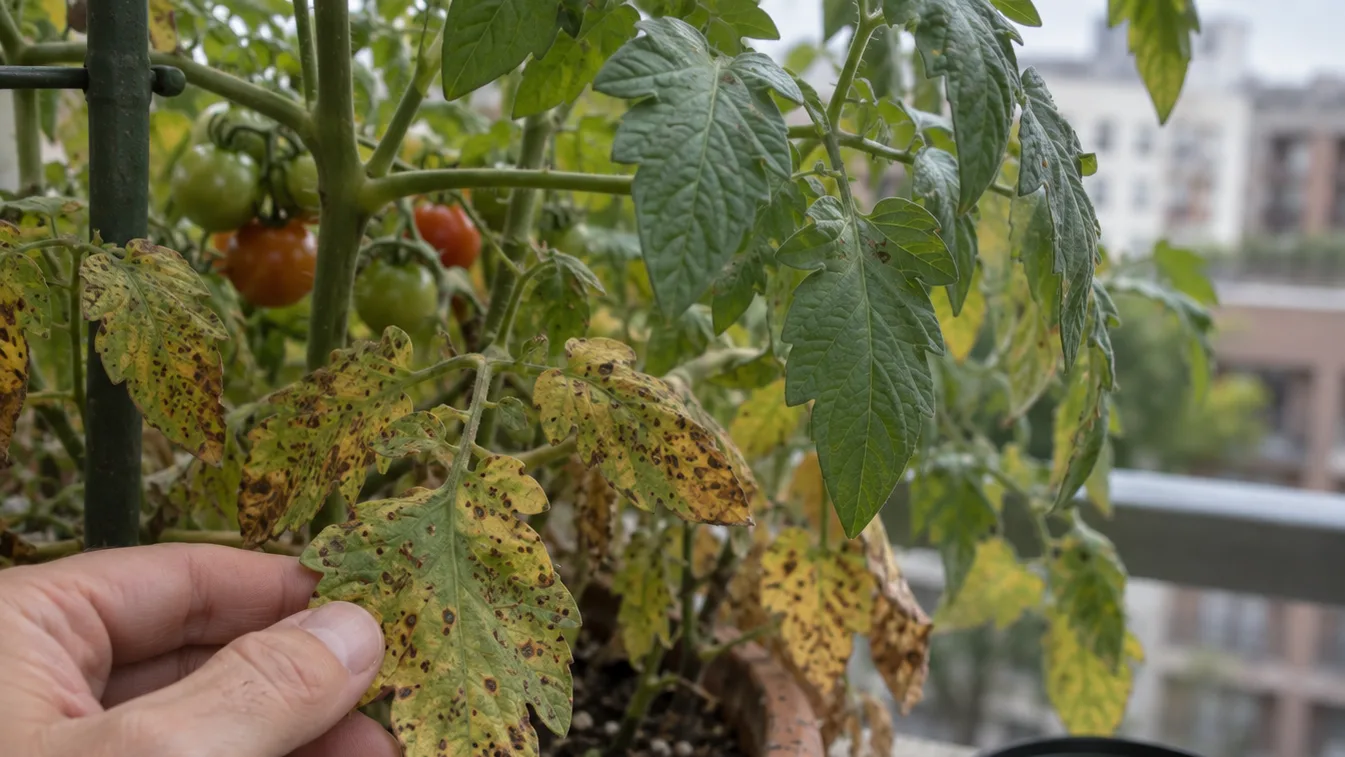
The one-minute read: tiny peppered spots or ringed brown lesions?
If you need a quick first pass, look at several fresh lesions on three leaves rather than staring at the worst leaf on the plant.
| Clue | Septoria leaf spot tends to show | Early blight tends to show |
|---|---|---|
| Typical lesion shape | Many small, round tan or grey spots | Fewer, broader brown patches |
| Centre | Dark pinpoints may appear inside the spot | Centre often looks plain, dry, or brown |
| Pattern | Speckled or peppered across the leaf | Concentric rings can make a target pattern |
| Other plant parts | Usually most obvious on leaf blades | Stem, petiole, and fruit symptoms can strengthen the case |
One damaged leaf cannot give me a confident diagnosis. Splash marks, dust, sunscald, nutrient stress, and two diseases on the same plant can all blur the picture. I use the table to choose what to inspect next, then run the seven clues in order.
Clue 1 — Measure the lesion, not the leaf
Start with five spots that are still separate. Put the leaf flat on a dry surface and place a ruler beside it, or include a familiar coin in the corner of a phone photograph. A camera close-up is especially useful when the spot is too small to judge comfortably at arm’s length.
Septoria leaf spot often remains close to pinhead scale early on. Early blight lesions commonly enlarge into irregular brown patches, with the ring pattern becoming clearer as the tissue dies. The useful comparison is between the original-looking, unmerged spots. Once several lesions join, their outside edge tells you how far the damage has spread, not how large the first lesion was.
Look near the edge of a damaged leaf or on a nearby leaf that has only a few marks. The biggest brown patch on the plant is usually the least helpful specimen.
Clue 2 — Look inside the spot with your phone camera
The centre of each spot deserves a close look. Septoria leaf spot can develop tiny black fruiting bodies inside the lesion, giving the mark a peppered centre. Early blight more often shows a dry brown centre with darker concentric bands around it, creating a target-like appearance.
Use a dry leaf in good daylight. Hold the phone steady, tap the screen to focus, and take one photograph from directly above. Then take a second from a shallow angle. Loose soil, dried spray residue, and insect droppings may sit on the surface and shift when you gently brush them with a dry tissue. A repeated dark point embedded in several lesions is a stronger clue than one black fleck that moves.
Do not scrape a wet leaf to make the pattern clearer. That can tear the tissue and create a mark that was not there before. If you want a second visual check, compare the photo with extension photo guides for Septoria lycopersici and Alternaria solani, using the same lighting and a similar leaf age.
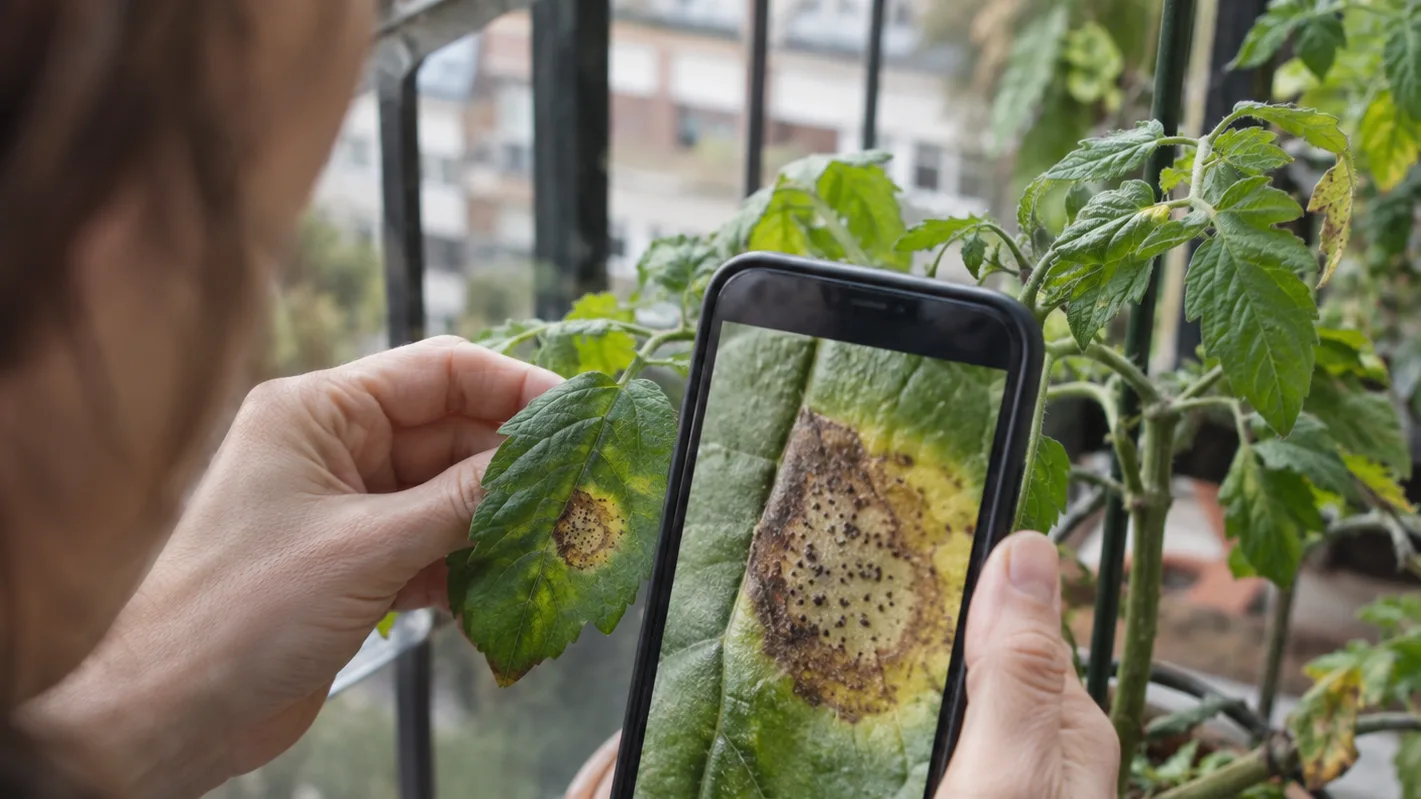
The centre pattern is one of my favourite clues because it survives the early confusion between dirt and disease. It still needs company from lesion size and the rest of the plant.
Clue 3 — Follow the disease from the lower leaves upward
Divide the tomato into three zones: lower leaves near the pot, the middle canopy, and the newest upper growth. Photograph one leaf from each zone before you prune anything. This gives you a record of the pattern instead of a memory shaped by the worst-looking leaf.
Older lower leaves often show trouble first because they have been exposed longer and are more likely to catch soil splash. Rain or overhead watering can move contaminated droplets onto nearby foliage, so a lower-to-upper progression supports a splash-driven spread pattern. It does not identify Septoria by itself; early blight can follow a similar route.
If the top leaves are marked while the lower canopy is clean, I would check for a recently purchased plant, overhead watering, handling during tying, or a nearby source of splash. A very compact determinate plant may also hide its lower leaves, while the spread and pruning rhythm of determinate vs indeterminate tomatoes changes how easy the canopy is to inspect.
Canopy position is therefore a timeline clue. I place more weight on it after I have checked the size and centre of the lesions.
Clue 4 — Treat yellow halos as supporting evidence, not a verdict
A yellow area around a defined brown or tan spot can accompany either disease. The halo tells you that tissue around the lesion is under stress; it does not name the pathogen. This is why I never diagnose a tomato from yellowing alone.
Look at the pattern of the yellowing. A narrow yellow rim around several distinct spots supports a leaf-spot problem. A whole leaf that is fading evenly, especially without clear lesions, sends me toward other possibilities such as root stress, nutrient imbalance, natural ageing, or an overwatered container.
There is a catch: as spots multiply, neighbouring halos can merge and make an entire section of leaf look yellow. Go back to a younger, less damaged leaf and inspect the first few marks. Defined lesions tell you more than the final colour of a leaf that is already collapsing.
Clue 5 — Stems and fruit break the tie
Now inspect three areas beyond the leaf blade: the petioles, which are the short stalks joining leaves to the main stem; the main and side stems; and the fruit, especially around the stem attachment.
Early blight is more likely to produce dark, target-like lesions on stems or petioles, and it may create sunken or dark areas near the stem end of fruit. Those findings do not prove early blight, but they raise its position in my diagnosis because the disease pattern has moved beyond scattered leaf spots.
Septoria leaf spot can leave a plant looking severely tattered while the fruit remains visually sound. A clean fruit does not rule out Septoria, and a marked fruit does not automatically prove early blight. Use the fruit as a tie-breaker alongside the leaf pattern.
Separate disease marks from common fruit problems. Cracks usually split the skin along growth lines. Blossom-end rot creates a dark, sunken patch opposite the stem. Sunscald is a pale, papery area on exposed fruit, while normal ripening changes the colour more evenly. A fuzzy mould, leaking crack, or soft collapse is a food-quality problem regardless of which leaf disease is present.
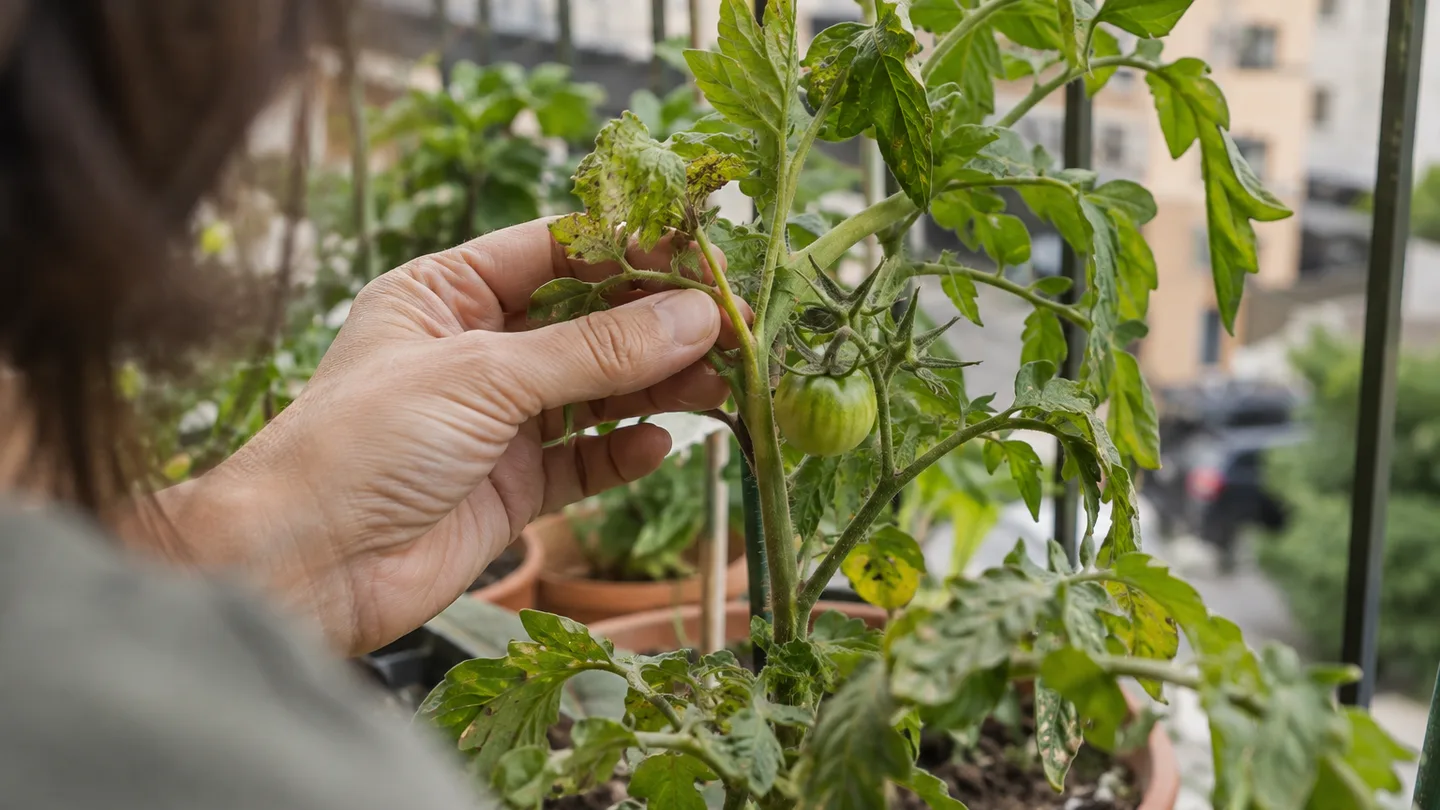
If the leaves suggest Septoria but the stem and fruit show convincing target-like lesions, I manage the plant as a possible mixed or early-blight infection rather than forcing the evidence into one label.
Clue 6 — Weather explains the pattern: wet leaves, warm nights, and splash
Weather supplies context. It does not function as a diagnosis. I reconstruct the previous week before deciding what the spots mean.
- Rain or overhead watering: note whether droplets landed on the leaves and whether soil could have splashed into the lower canopy.
- Leaf-wetness time: ask whether foliage stayed damp into the evening or dried quickly after morning watering.
- Mulch and airflow: check whether bare potting mix is bouncing water onto leaves and whether dense foliage is holding moisture.
For a quick field screen, I treat cooler, wet periods around 15–27°C (59–81°F) as more compatible with Septoria conditions, while warmer, wet periods around 24–29°C (75–84°F) fit the early-blight pattern more readily. The ranges overlap, so a warm rainy week cannot settle the question. A dry spell can also slow visible spread without removing existing lesions.
Container conditions change the balance. A tomato beside a reflective wall may have warm leaves but still receive evening splash from a hose. A sheltered balcony may avoid rain while the foliage stays wet from careless watering. Record the actual conditions around your pot rather than relying on the weather app for the neighbourhood.
Clue 7 — Run the seven-clue decision tree before you prune
Here is the decision tree I use when a tomato leaf looks suspicious:
- Choose three leaves. Take one from the lower, middle, and upper canopy. Skip the leaf with the largest merged patch if a cleaner sample is available.
- Measure five separate lesions. Several small, round marks point toward the Septoria lane. Larger expanding patches move the plant toward the early-blight lane.
- Inspect the centres. Repeated embedded black pinpoints strengthen the Septoria reading. A plain brown centre with ringed bands strengthens the early-blight reading.
- Check for rings. Concentric bands are more useful than a vague dark edge. A single irregular dark border is weak evidence.
- Inspect stems and fruit. Target-like stem or stem-end fruit lesions add weight to early blight. Sound fruit leaves Septoria in play.
- Use yellowing carefully. Halos support a genuine lesion; even whole-leaf yellowing without spots sends me back to root, water, nutrient, or age-related causes.
- Reconstruct the weather. Splash, long wet periods, warm nights, and dense growth support a foliar disease explanation, but they do not choose between the two diseases alone.
My practical reading is simple: many small spots with repeated dark centres place Septoria higher; larger brown lesions with visible rings and stem or fruit symptoms place early blight higher. When both patterns appear on different leaves, call it a mixed infection for management purposes. The useful decision is how to protect new foliage, not whether every damaged leaf can be assigned a perfect name.
Save this short version before you start pruning: three leaves, five spots, one close-up, then stems and fruit. It prevents the common mistake of stripping a plant based on one dramatic leaf.
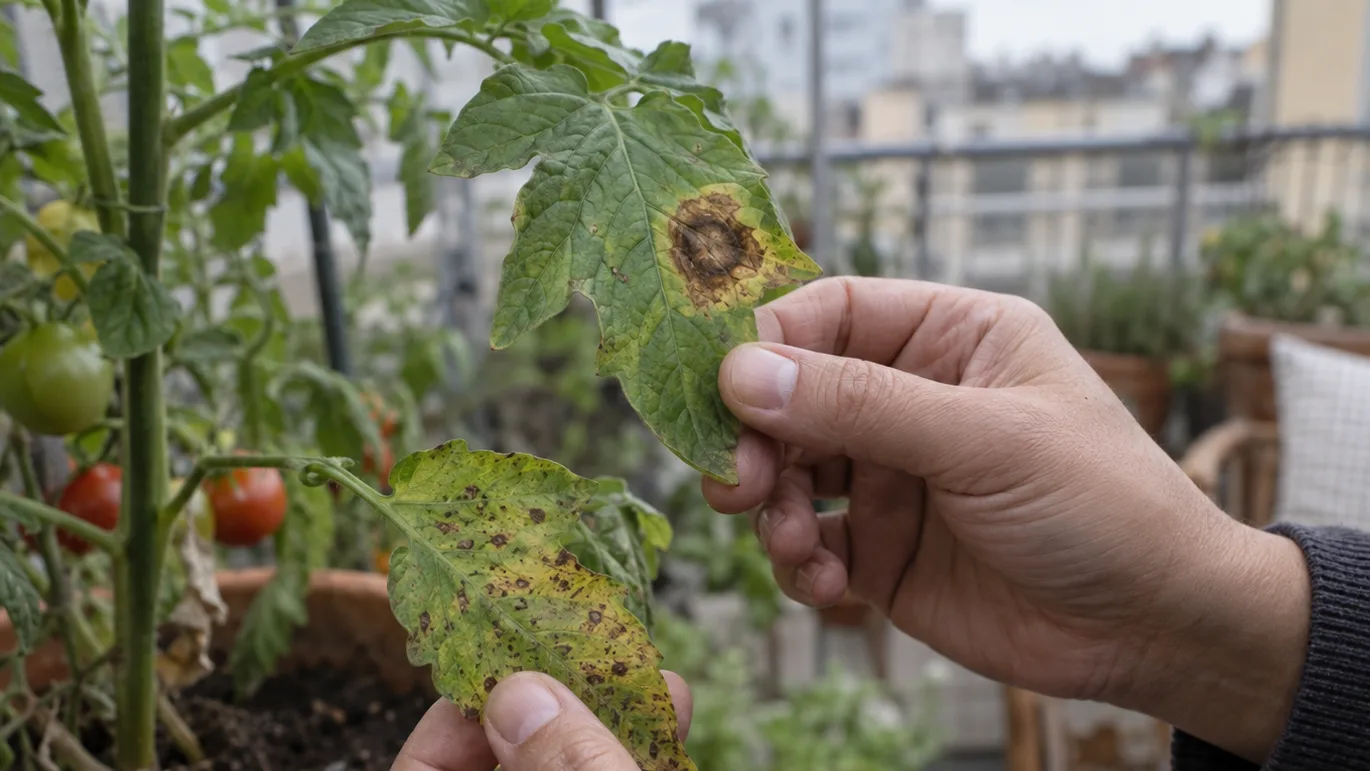
After diagnosis: remove no more than one-third of the foliage at a time
Once I have photographed the plant, I work from the worst lower leaves upward. I choose a dry day, remove leaves with extensive spotting first, and keep the cuts clean. Pruning after the foliage dries reduces the chance of carrying wet plant material from one stem to the next.
- Remove the worst leaves first. Take the entire leaf and its stalk when practical, especially if it is touching the potting mix or blocking airflow.
- Bag the material. Keep spotted leaves out of the pot and away from the support structure. Do not leave them on the balcony floor where watering can move residue back to the plant.
- Clean the tool between plants. Wipe blades and use diluted alcohol according to the product label, or wash them with soap and water and dry them before moving to another tomato.
- Change the watering target. Put the water onto the mix at the pot rim or soil line. A narrow spout lets you avoid wetting the leaves.
In a container, my working ceiling is about one-third of the foliage in one session. That leaves enough leaf area for the plant to keep supplying the fruit while I watch the new growth. If the plant is already severely defoliated, follow the label of any permitted treatment or seek local expert guidance rather than applying a fixed pruning rule.
Sudden removal of a large amount of foliage can expose fruit to intense sun and leave a small root system supporting a stressed canopy. I would rather prune twice, several days apart, than create a bare stem in one afternoon. If you use a fungicide, choose only a product labelled for edible tomatoes and follow its directions; integrated pest management guidance for tomato foliar diseases can help you combine sanitation, watering changes, and labelled products sensibly.
Reset the pot before next season: debris, mix, and a 2–3-year crop gap
Container cleanup is worth doing because the pot gives you a chance to remove the disease source instead of leaving it in a whole garden bed. At the end of the season, pick up every fallen leaf, detached stem, and piece of diseased plant tissue. Clean the pot, saucer, ties, cage, and support before storing them.
For a small container where the mix is easy to replace, I would use fresh potting mix after a severe disease outbreak. That removes a large amount of old root and leaf debris from the next planting. In a large tub that cannot be emptied easily, remove the surface debris and old roots you can reach, clean the container, and rotate away from tomatoes and related crops where practical.
A rotation gap of roughly two to three years without tomatoes, peppers, aubergines or eggplants, and potatoes lowers the chance that old debris will immediately meet another closely related host. It is a risk-reduction measure, not a guarantee. The same cleanup habits matter when you move on to growing peppers in containers or growing potatoes in containers.
Finish the reset with 5–8 cm (2–3 in) of clean mulch on the mix surface, leaving a small clear ring around the stem. Mulch helps interrupt soil splash, but it should not stay pressed against the stem where it can keep the crown damp.
Can I eat tomatoes from a plant with septoria leaf spot?
Sound fruit is not automatically a discard simply because the leaves are spotted. I would remove fruit with disease lesions, mould, leaking cracks, or other spoilage, then wash sound fruit before eating it. When in doubt about a soft or damaged tomato, throw that individual fruit away rather than trying to trim around a questionable area.
Will septoria leaf spot kill a tomato plant?
It can cause serious defoliation, reduce vigour, and lower the plant’s ability to support fruit, especially in a small pot. It does not automatically mean the plant will die. The outcome depends on how much healthy foliage remains, how early the problem is managed, the weather, and the plant’s age.
Can septoria leaf spot and early blight occur on the same tomato plant?
Yes. Overlapping symptoms are one reason I compare several leaves and inspect stems and fruit before pruning. If the evidence points in both directions, remove infected foliage carefully, keep new growth dry, improve airflow, and manage the plant as a mixed foliar-disease problem.
Before the weekend, take three labelled photos—lower, middle, and upper canopy—and measure five unmerged spots in the clearest image. Check the plant again in four days; the new leaves should be the part you judge next, because yesterday’s lesions will not become healthy again.
Frequently Asked Questions
Can I eat tomatoes from a plant with septoria leaf spot?
Septoria leaf spot mainly affects foliage, so sound fruit is not automatically unsafe because the leaves are spotted; discard fruit with disease lesions, mould, cracks, or other spoilage and wash edible fruit before eating.
Will septoria leaf spot kill a tomato plant?
It can cause serious defoliation and reduce vigour or yield, especially in a small pot, but it does not automatically kill the plant; the outcome depends on severity, weather, plant age, and whether healthy foliage remains.
Can septoria leaf spot and early blight occur on the same tomato plant?
Yes. The diseases can overlap, so diagnose from repeated patterns across several leaves and plant parts rather than relying on one lesion; management should prioritise removing infected foliage and keeping new leaves dry.