Spider Mites on Plants: 6 Signs and What to Do Next
Spider mites on plants usually show themselves as pale pinpricks before you see any webbing. The quickest useful response is a 60-second underside check: inspect the newest, middle-aged and damaged leaves, tap one over white paper, and look for tiny moving specks before you reach for a spray.
The six practical signs are fine pale stippling, yellowing or bronzing, curled or crispy leaves, distorted new growth, premature leaf drop and fine webbing. None of those signs proves mites by itself, because watering stress, thrips, aphids and nutrient problems can create overlapping symptoms.
Before you treat: the 60-second underside check
Before I treat a plant, I move it away from its neighbours if I can and check the leaves in good daylight. Spider mites are small enough to be missed on a casual glance, and their preferred hiding place is usually the sheltered underside rather than the broad top surface you notice first.
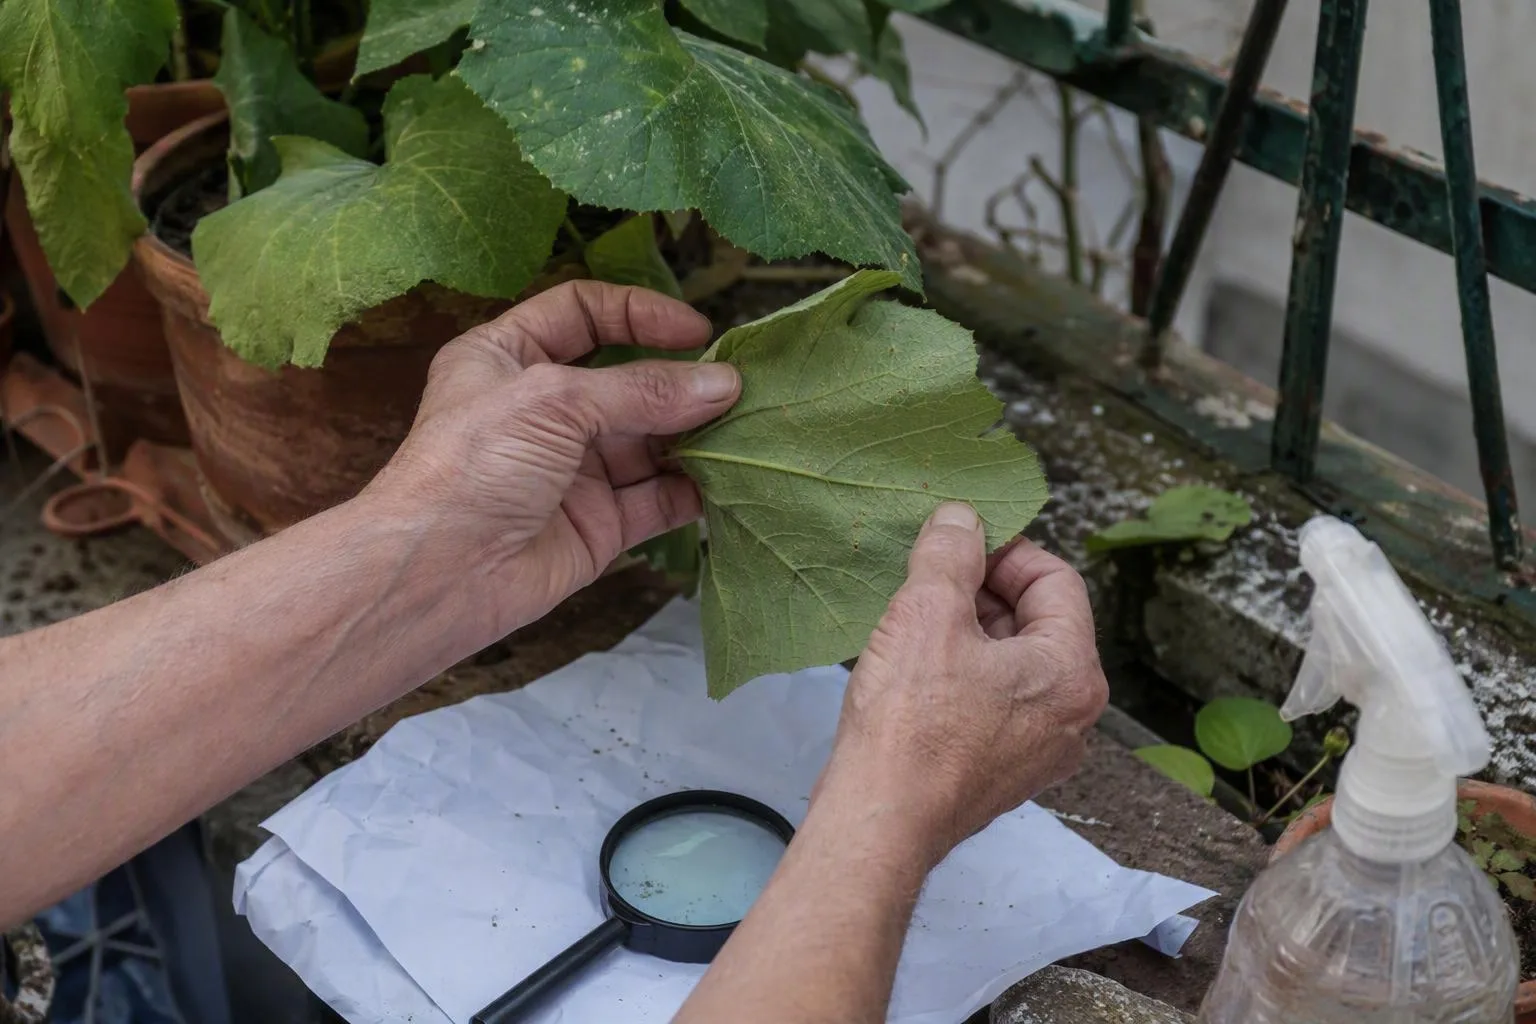
- Slide a sheet of white paper under a suspect leaf. Plain printer paper works. Hold the leaf above it without crushing the plant.
- Tap the leaf and nearby stem gently. A few light taps are enough to dislodge loose debris and any mobile pests. Give the paper a moment, then look for specks that crawl rather than dust that stays still.
- Check three leaf positions. Start with the newest leaf, then inspect a mature leaf in the middle of the plant and one that already shows damage. This tells you whether the problem is confined to older tissue or is moving into fresh growth.
- Use a 10× hand lens if you have one. It is not essential, but magnification makes slow-moving mites easier to separate from grit, pollen and dried spray residue.
A few moving specks support the diagnosis, especially when the leaf also has fine pale stippling. The absence of webbing does not clear the plant. Early infestations can damage leaves before they produce the obvious silk that makes the problem easy to name.
I would not spray because one leaf looks yellow. I would first turn over the leaves and look for a matching pattern: tiny pale marks, a sheltered location and either movement or silk. That combination gives you a much better starting point than colour alone.
Six signs on the plant: from pale stippling to fine silk
The six signs below are best read as a progression, not a rigid timetable. A stressed plant can show several at once, while a lightly infested plant may show just one or two.
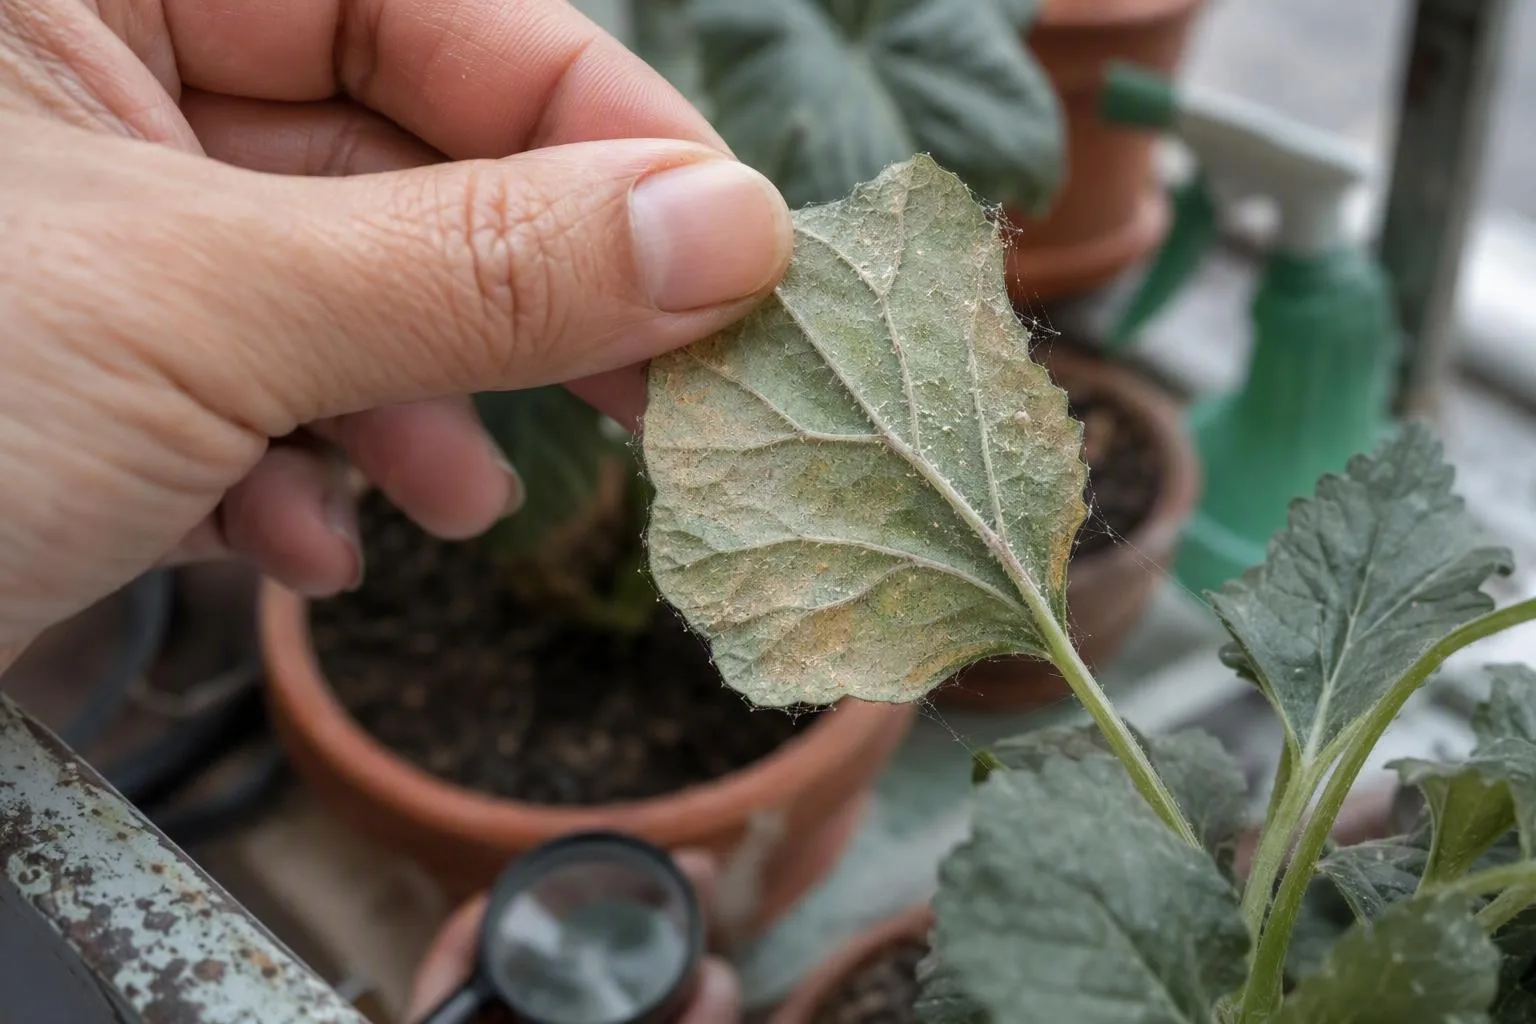
- Fine pale stippling. Look for many tiny cream, yellow or silvery dots scattered across the leaf surface. The marks can look like someone has dusted the leaf with a very fine pinprick pattern. This is often an early clue because feeding injury interrupts healthy green tissue in small patches. Thrips damage, sun stress and some spray injuries can look similar, so turn the leaf over and check for movement.
- Overall yellowing or bronzing. As damage accumulates, a leaf can lose its even green colour and take on a washed-out, yellow or bronze cast. The change may begin around the stippled areas and spread across the leaf. Nutrient-related yellowing can look similar, but it often follows a more recognisable pattern tied to leaf age or veins rather than a peppered surface. Use the underside check before adding fertiliser.
- Curled or crispy leaves. Damaged leaves may curl along the edges, feel papery or develop dry brown patches. This sign is especially easy to confuse with underwatering, hot wind, excess salts or root trouble. If the plant improves after watering but the pale speckling and moving pests remain, watering was part of the stress picture rather than the whole diagnosis.
- Distorted or stunted new growth. Fresh leaves may emerge smaller, uneven or misshapen, particularly when an infestation reaches tender growth. Aphids and thrips can also distort new tissue, so inspect the growing tips rather than relying on shape alone. Look for clusters, cast skins, dark droppings or the same pale stippling seen on older leaves.
- Premature leaf drop. A plant under sustained stress may shed damaged leaves before the season is finished. Leaf drop is a later warning in this list, but it is not specific to mites. Overwatering, root damage, a cold snap or a sudden change in light can produce the same response. Check whether the remaining leaves show the characteristic speckling before blaming one pest.
- Fine webbing. The silk is usually delicate and close to the leaf, stem junctions or growing tips rather than a large open spider web stretched between furniture. Webbing suggests an established or heavier problem, although the amount varies with the plant and conditions. Ordinary spiders can leave perfectly healthy plants covered in webbing, so look for mites, stippling or both before treating.
A useful rule is that the sign tells you where to look next, not what to buy. Pale stippling sends me to the underside. Crispy edges send me to the moisture and heat history as well. Webbing makes me inspect neighbouring pots immediately, but it still does not replace the paper test.
Mite damage or something else? Use these three checks
When the diagnosis is uncertain, I use location, pattern and movement. Those three checks are more reliable than trying to identify a pest from one blurred phone photograph.
1. Where is the pest?
Spider mites tend to shelter and feed on leaf undersides, along veins, around leaf stalks and inside fine silk. Aphids are often easier to see in clusters on tender tips, folded leaves or stems. If you are comparing the symptoms with aphids on container plants, look for the insects themselves and any sticky residue rather than assuming every curled leaf has the same cause.
2. What does the damage pattern look like?
Mite injury often has a peppered, faded appearance across the leaf. Thrips can create silvery scarring, distorted growth and small dark specks, while underwatering more often produces a whole-plant wilt or dry margins that follows a hot, dry spell. Nutrient-related yellowing may follow veins or affect a particular age of leaf. These are clues, not proof, so I compare a healthy leaf with a damaged one from the same plant.
3. Is there movement or silk?
Tap the suspect leaf over white paper again. A moving speck is more useful evidence than a stationary fleck of soil. A lens can help, but the paper test is often enough to tell me whether I am dealing with an active pest or simply old damage. Check the newest leaf, one mature leaf and the worst-looking leaf before deciding.
If none of the three checks supports mites, hold off on a miticide or oil. Correcting the real problem is safer for the plant than adding a treatment that does not match the diagnosis.
The next 24 hours, then days 5–7: a treatment sequence that can work
Once I find live mites or a convincing combination of movement, stippling and silk, I work in an order that reduces reinfestation and improves spray coverage. The sequence matters: isolating first prevents a quick inspection from turning into a tour of every pot, and rinsing before treatment removes loose debris that can shelter pests.
In my own balcony setup, I once treated a pepper after noticing pale leaves and a little silk near the leaf stalks. I sprayed the tops, waited, and assumed the job was finished. The next inspection showed fresh speckling because I had barely wet the undersides. The useful lesson was simple: a product cannot contact pests that the application never reaches.
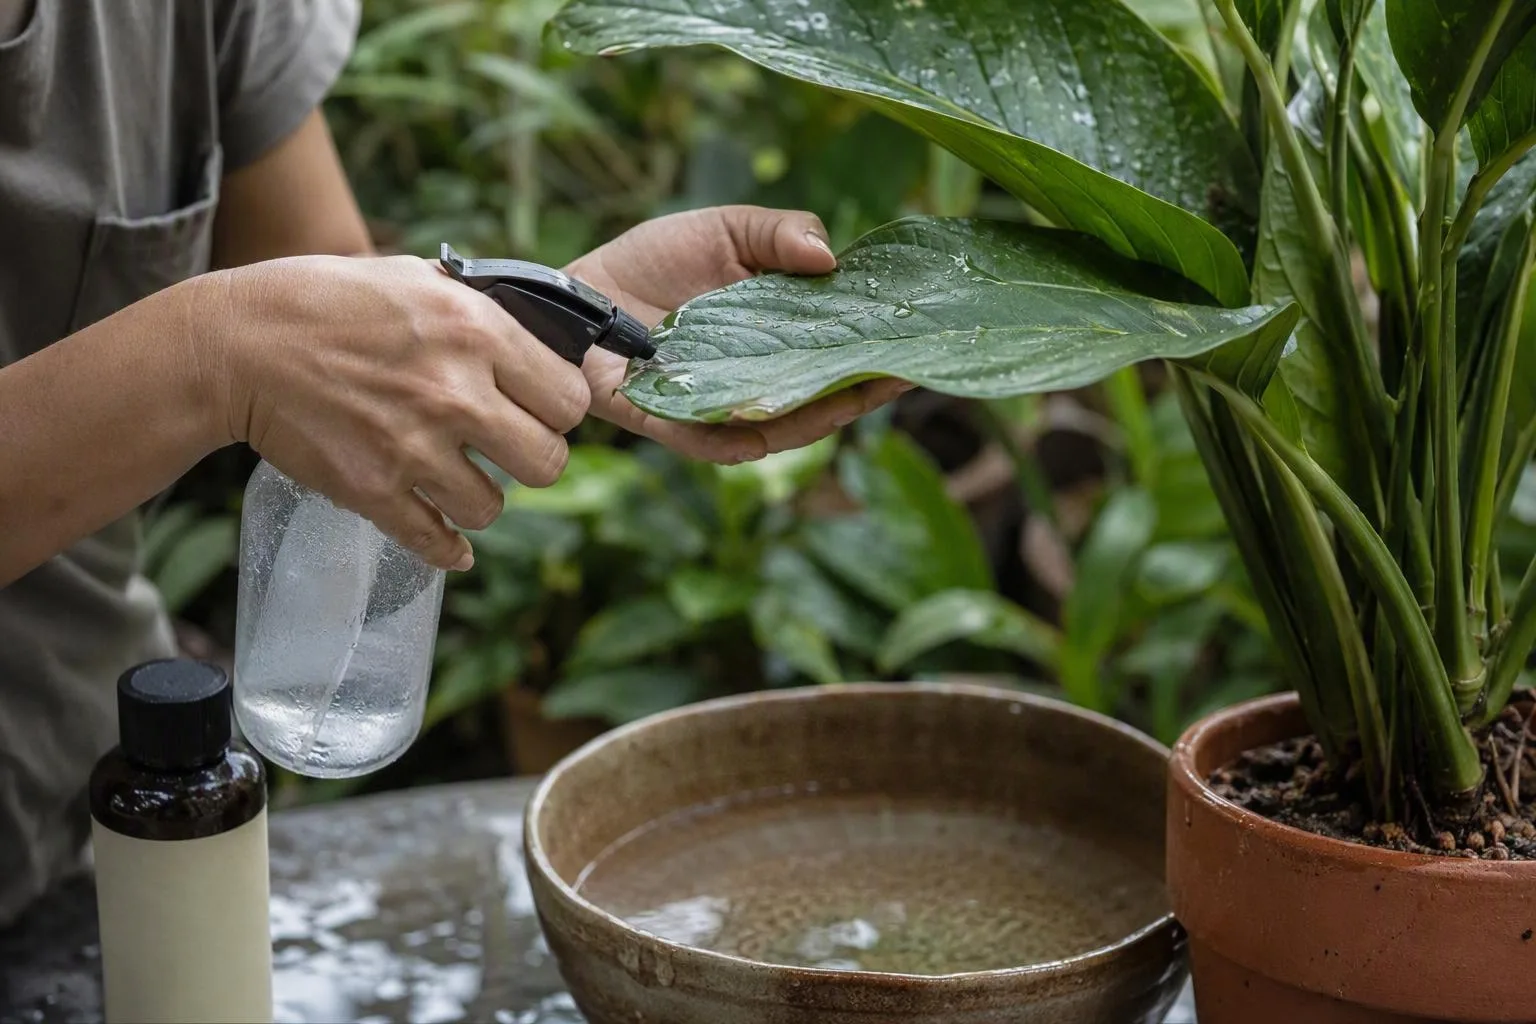
- Isolate the pot and inspect its neighbours. Move the affected plant away from touching foliage. Check the pots beside it, the shelf underneath and any plant whose leaves have brushed against it. Wash your hands before moving back to clean plants, and avoid sharing pruning tools until they have been cleaned.
- Rinse the foliage carefully. Use a steady stream of clean water aimed at the undersides, leaf joints and growing tips. The stream should be firm enough to dislodge some mites and silk but gentle enough not to tear soft leaves or knock over the pot. Let the foliage dry before applying an oil or soap product if the label gives that instruction.
- Remove leaves that are already badly damaged. A leaf that is mostly brown, crispy or heavily webbed is unlikely to contribute much to recovery. Remove it cleanly, but do not strip every leaf from a stressed plant. It still needs healthy foliage to rebuild energy.
- Choose a treatment labelled for the crop. Insecticidal soap and horticultural oil can be useful contact treatments for some crops and situations. They work where the spray wets the pest, rather than acting like a permanent shield over every new leaf. Read the crop listing, dilution instructions and safety directions before mixing anything.
- Patch-test before treating the whole plant. Apply the product to a small section and watch for damage according to the label’s guidance. Avoid spraying a drought-stressed plant, and be cautious in hot direct sun because wet foliage plus heat can increase the chance of leaf injury. Correct severe thirst first, then allow the plant to settle before treating if the label permits.
- Cover the undersides and repeat only as directed. Work methodically from the lower leaves upward, wetting the places where mites shelter. Contact products can miss eggs or pests hidden in folds, so a repeat application after roughly 5–7 days may be allowed or recommended by the label. Do not repeat on your own schedule if the product gives a different interval.
Do not substitute unlabelled dish soap for insecticidal soap. Household detergents vary in strength and additives, and a mixture that cuts grease on dishes can damage leaf surfaces. The same caution applies to homemade oil blends: natural ingredients can still scorch foliage or leave unsafe residues on edible crops.
For edible plants, the registered pesticide label is the final reference for whether the crop is listed, how much product to use and how long to wait between application and harvest. That waiting period is commonly called the pre-harvest interval. Wash harvested produce as directed, and do not assume that a product suitable for ornamentals is automatically approved for food crops.
Heat and drought complicate this job. A plant that is struggling because its pot dries rapidly may be more vulnerable to spray injury and may also attract or support mite outbreaks. Check how often to water potted plants in hot weather by feeling the mix and considering pot material, wind and sun rather than copying a calendar. The same moisture check is more useful than a fixed rule about how often to water container plants.
After treatment, wipe the shelf, remove fallen leaves and rinse tools. This is not a promise that cleaning will solve the infestation by itself; it simply removes places where debris and surviving pests can remain close to the plant. For a second reference, compare your plan with integrated pest-management guidance for spider mites, then let the crop label control the product decision.
Judge recovery by new leaves, not the old damage
Inspect the plant every 2–3 days after treatment. Look underneath the newest leaves for live moving specks, fresh stippling or new silk. You are checking the direction of travel: is the damage reaching clean tissue, or has it stopped?
Old stippled or bronzed leaves usually do not return to their original green colour. That does not automatically mean the plant is failing. A leaf that looks ruined is not the same as a plant that is losing the fight; new growth is the scoreboard.
If coverage was thorough, the product was permitted for the crop and the plant is no longer under severe heat or drought stress, I would expect clean new growth to become the clearest recovery signal over roughly 2–3 weeks. If fresh stippling continues, check the underside coverage first, then the repeat timing, nearby plants and the plant’s moisture stress. Continued damage does not prove that the product was useless.
I would consider discarding a small plant when every growing point is damaged, it keeps reinfesting nearby plants despite isolation and label-compliant treatment, or it is not worth the space and attention required to recover. For a valued perennial, pruning and isolation may be a better trade-off. That is a practical decision, not a rule that every infested plant must be thrown away.
Three questions that come up after treatment
Do spider mites live in potting soil?
They mainly feed and shelter on foliage, stems, leaf joints and fallen plant debris rather than colonising potting mix in the way a root pest might. I would not replace all the soil as the first response. Clean the pot rim, shelf and fallen leaves, inspect the plant carefully and focus treatment where the mites are actually found.
Can spider mites spread from one plant to another?
Yes, nearby leaves can touch, air movement can carry loose pests, and hands or tools can move them during routine care. That is why I isolate the pot and inspect adjacent plants instead of treating one plant in isolation and assuming the job is finished.
Does neem oil or another natural spray always kill spider mites?
No spray deserves that promise. A plant-based oil may help when it is labelled for the crop, applied at the correct concentration, tolerated by the foliage and repeated at the permitted interval. Natural does not mean risk-free, automatically food-safe or effective when the spray misses the leaf underside.
In a week, turn over the newest leaves on the affected plant and the pots beside it. You want to see clean fresh tissue, no moving specks on the paper test and no new silk at the growing tips. If the newest leaves are still being marked, repeat the diagnosis before repeating the bottle.
Frequently Asked Questions
Do spider mites live in potting soil?
Explain that they mainly feed on the plant and shelter on foliage, stems or debris rather than colonising potting mix like a root pest; replacing all the soil is not the first response, but cleaning the pot, shelf and fallen leaves helps remove hiding places.
Can spider mites spread from one plant to another?
Yes. Cover contact, nearby foliage, moving air and contaminated hands or tools as practical routes, then explain why isolating the affected pot and checking adjacent plants matters.
Does neem oil or another natural spray always kill spider mites?
Avoid guarantees. Explain that plant-based oils can work only when the product is correctly labelled, the mites are thoroughly contacted, the plant tolerates the application and repeat treatment follows the label; natural does not mean risk-free or automatically food-safe.