Whiteflies on Plants: 7 Signs and What Actually Works
Seven signs point to whiteflies on plants, but the first one I look for is not the white insect itself: disturb a lower leaf and see whether 1–3 mm adults lift off in a loose cloud. The detail that settles the question is usually underneath the leaf, where pale eggs and flat, attached nymphs can remain after the adults have gone.
In my own balcony setup, I once treated a pepper pot, saw no white cloud the next morning, and assumed the problem was finished. Several days later, I found flat pale nymphs still fixed to the undersides, followed by another flush of adults. That mistake changed my routine: I now treat whiteflies as a sequence of checks rather than a one-spray event.
Here are the seven signs, the leaf-turn check I use before spraying, and the treatment order that gives contact products a fair chance to work.
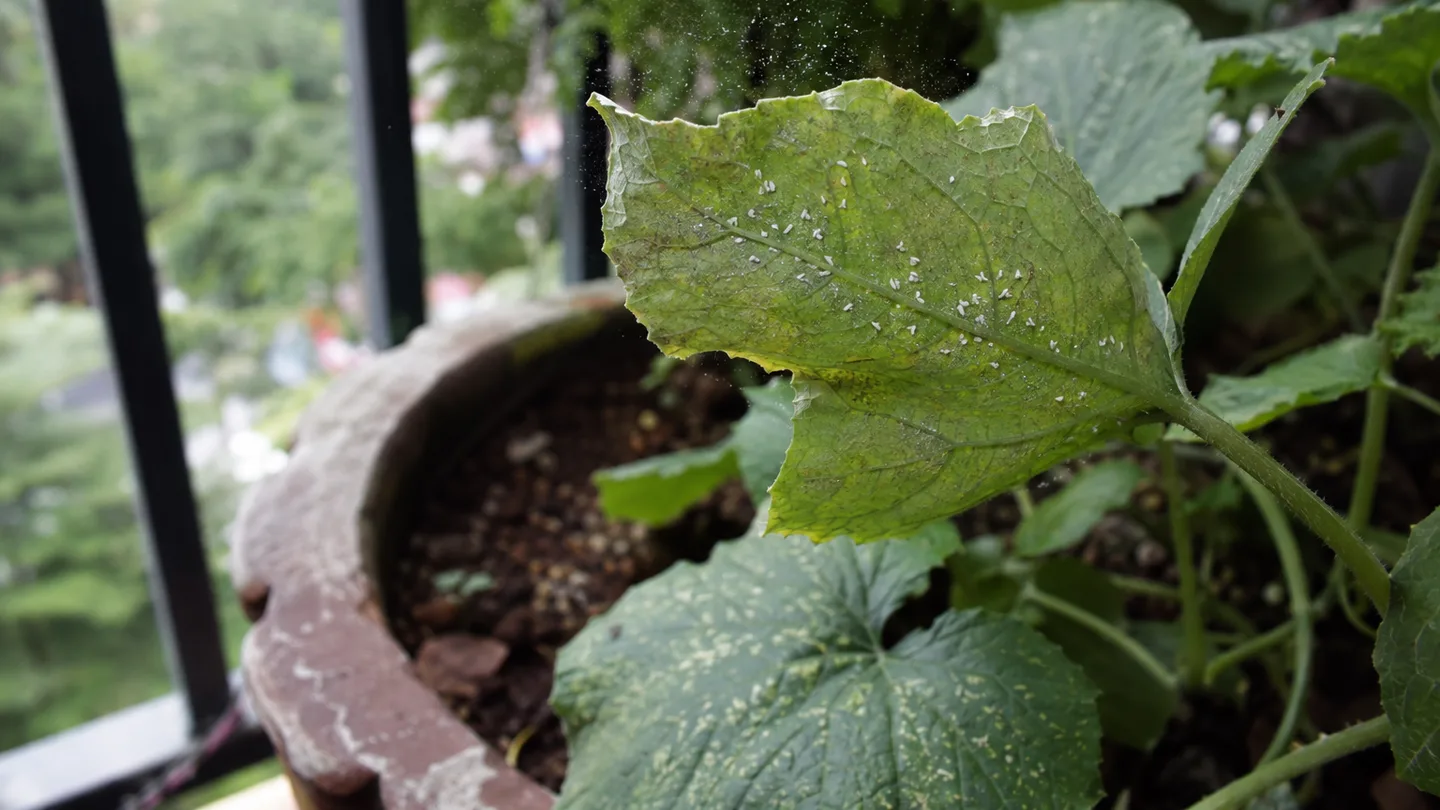
Seven signs, from the first yellow speckling to the white cloud
You do not need to find every sign. One flying adult is weak evidence; a white cloud plus sticky residue and attached nymphs is much stronger. I start on the lower leaves because they are sheltered, often less disturbed, and easy for pests to overlook during a quick watering.
- Adults lift off when a leaf is disturbed. Adult whiteflies are usually tiny, roughly 1–3 mm long, with pale or powdery-looking wings. Tap or shake an infested leaf and they may rise briefly before settling again. This is the familiar small white cloud that gives the pest its common name.
- Pale eggs sit on the leaf underside. Eggs can appear as tiny pale dots or short groups on the underside, often near the veins. They are easy to miss from above because the upper surface may still look clean.
- Flat, scale-like nymphs stay attached. Young whiteflies do not look like flying insects. They can resemble pale, flattened scales stuck to the leaf. This is the stage that makes a single treatment look successful when it has only removed the adults.
- The leaf feels sticky. Whiteflies feed by piercing plant tissue and drawing sap. The excess sugary liquid they leave behind is called honeydew. It may make the leaf tacky, and nearby leaves or the surface beneath the pot can feel slightly glazed.
- Black sooty mould appears. This dark coating grows on honeydew. It is a secondary mould problem, not the whitefly itself, so wiping the black film away without reducing the insects only gives temporary cosmetic improvement.
- Leaves develop yellow stippling or overall paling. Feeding damage can show as many small pale marks, fading between veins, or a generally washed-out colour. Yellowing alone is not proof of whiteflies; watering stress and nutrient problems can create similar symptoms.
- Growth becomes weak, wilted or sparse. A plant under sustained feeding pressure may grow slowly, produce smaller new leaves, wilt more readily in heat, or drop damaged leaves. These are late and non-specific signs, so I use them to judge severity rather than to identify the pest by themselves.
The useful split is this: flying adults, eggs and attached nymphs show that whiteflies are present; honeydew and sooty mould show what their feeding has left behind; yellowing and stunting show how the plant is responding. If the only evidence is one pale insect near a pot, keep checking before reaching for a spray.
The leaf-turn check: confirm whiteflies without confusing them with aphids or fungus gnats
Whiteflies are easy to miscall because a balcony plant may have several small insects moving at once. I use a short confirmation routine rather than treating every tiny bug as the same problem.
- Move the pot away from its neighbours. If a group of adults rises, or if you find honeydew, give the pot some space. Isolation is useful even before identification is perfect because it limits contact between foliage.
- Tap a lower leaf over white paper. Flying whiteflies move up from the foliage. Fungus gnats usually emerge from the potting mix or hover close to the soil surface, so their location gives you an early clue.
- Turn the leaf over. Use your phone light or a simple magnifying glass. Look for pale eggs, flat nymphs and adults resting close to veins. A clean upper surface does not clear the plant if the underside has not been checked.
- Compare the body shape and feeding site. Aphids commonly cluster on soft stems, new tips and folded growth. If that is what you find, compare the pest with aphids on container plants before spraying. Mealybugs look cottony or waxy because their bodies are covered by pale filaments; they tend to sit in leaf joints, along stems or in sheltered nodes rather than forming a flat film attached to a leaf underside.
If the insects are coming from the mix, inspect the watering pattern and compare the symptoms with overwatered plant symptoms before assuming the foliage pest is responsible. If you find a flying group, attached nymphs or sticky residue, the evidence is strong enough to begin control. If you find one unidentified speck and no underside evidence, I would repeat the check later instead of spraying a stressed plant on a guess.
For a second visual reference, look for authoritative guidance on whitefly identification and integrated pest management. The useful material shows the different life stages, not just a photograph of the adult.
The treatment ladder: what works on adults, what reaches nymphs, and what only monitors
Once I have confirmed whiteflies, I start with the least disruptive step that matches the life stage. The order matters. A trap can tell me whether adults are still flying, but it cannot remove nymphs fixed to the leaf. A spray can work on an exposed insect, but only if the droplet reaches it.
| Option | What it can affect | How I use it | Where it falls short |
|---|---|---|---|
| Hand removal or a small handheld vacuum | Adults and visible clusters | Remove adults from the foliage, then inspect the leaf undersides. | It is easy to miss eggs and attached nymphs, and adults may return from a nearby pot. |
| Firm water spray | Adults and some exposed immature stages | Rinse the undersides and stems with a firm but controlled stream, then let the plant dry in moving air. | It may not dislodge attached stages, and a tender plant can be damaged by excessive pressure. |
| Pruning | All stages on the removed leaf or shoot | Remove the worst leaves, seal or discard them away from the growing area, and clean the tool. | It reduces the source but does not clear insects from other leaves or neighbouring pots. |
| Yellow sticky traps | Flying adults | Place a trap just above the foliage to show whether adult activity is rising or falling. | It is a monitoring aid, not a treatment for eggs or attached nymphs. |
| Labelled insecticidal soap | Adults and exposed nymphs that the spray wets | Cover both leaf surfaces, especially the undersides, and test a small part of the plant first. | Missed insects survive, and foliage may be damaged in heat, direct sun or drought stress. |
| Labelled horticultural oil | Stages reached by the spray | Apply only under the product directions, with thorough coverage and suitable weather. | Oil can injure foliage when the plant is heat-stressed, dry, or incompatible with another recent treatment. |
| Other labelled pesticide | The life stages and crops named on its label | Choose a product that specifically permits use against whiteflies on that crop, then follow the rate, safety and harvest instructions. | A product approved for an ornamental plant is not automatically suitable for an edible crop. |
My practical sequence is to isolate the pot, rinse or remove what I can see, then use a contact product only if the infestation warrants it. I would rather make two careful applications with full underside coverage than coat the top of the plant repeatedly while the insects remain protected below.
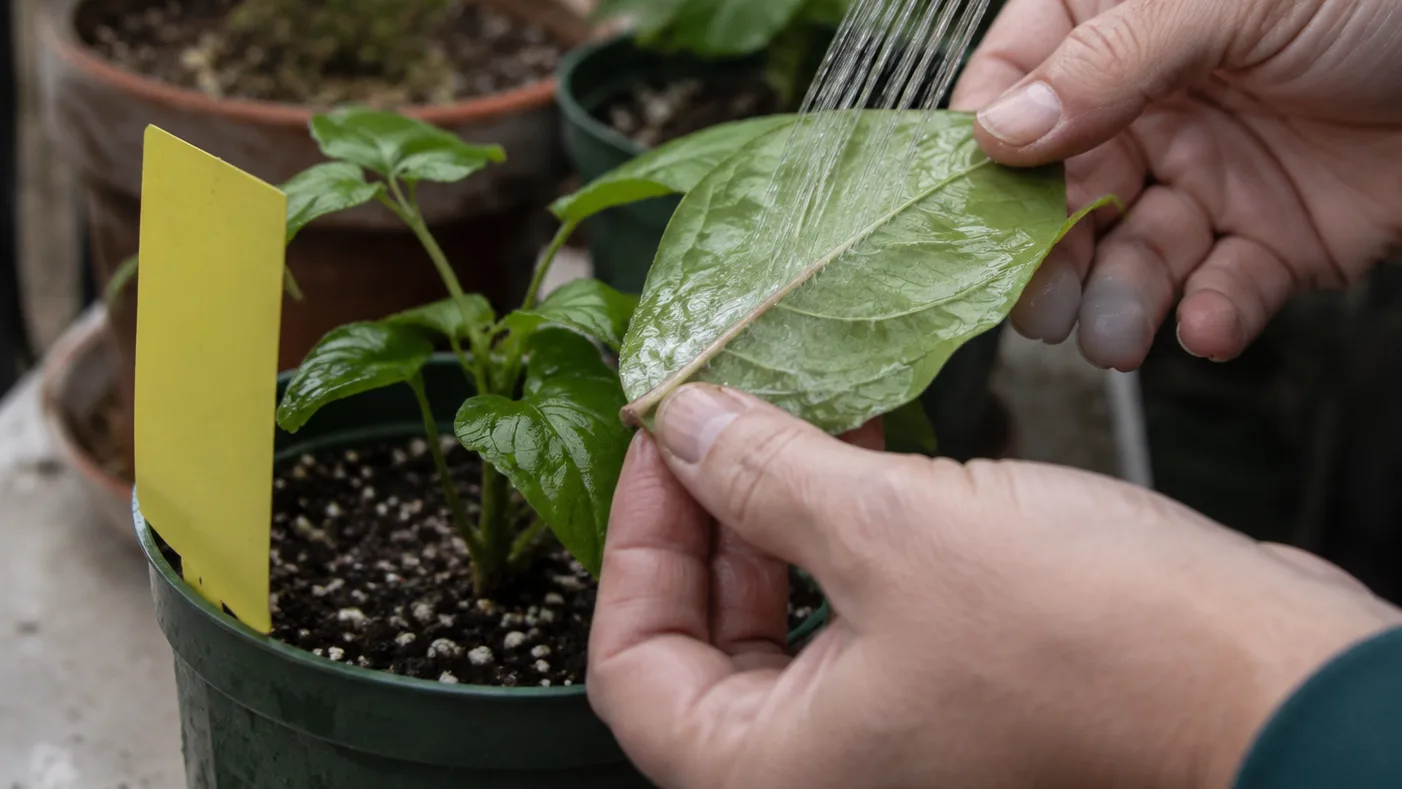
Contact is the non-negotiable detail. If a droplet lands only on the upper surface, it has not treated a nymph hiding underneath. I hold the leaf gently, direct the spray into the underside, and stop if the foliage is already limp from heat or lack of water. Afterward, I watch for leaf spotting or edge scorch before treating the whole plant again.
A 5–7-day repeat interval is something you may see on some product labels, not a universal whitefly timetable. If the label says seven days, use seven. If it says ten, use ten. If it gives no repeat direction, do not invent one by mixing a stronger solution or spraying daily.
Ordinary dish soap is not the same as labelled insecticidal soap. Dishwashing products vary in detergents and additives, and a mixture that seems mild in a sink can damage leaves. The safer choice is a product whose label names the use, followed by a small-area test and the stated waiting period.
For edible crops, check local pesticide regulator guidance on product labels and pre-harvest intervals. Treat that as the actual instruction, not a suggestion borrowed from a different plant. If the label does not cover your crop, whiteflies and the intended use, I would not improvise.
The 7–14-day rebound check: stop the next generation from repopulating the pot
The rebound is not proof that the product failed. It may mean the first pass removed flying adults while eggs or protected nymphs remained. The follow-up is where a temporary knockdown becomes a reasonable control plan.
- Day 0: Photograph or note the worst leaves, place a yellow trap near the canopy, and rinse, prune or spray according to the treatment you chose. Check every nearby pot before putting the plant back with the group.
- Days 2–4: Turn over several lower leaves and inspect the new growth. You are looking for fresh adults, pale attached stages and new honeydew, not just whether the trap has insects on it.
- At the label repeat interval: Repeat a contact treatment only if the product allows it and the plant is in suitable condition. Re-wet the undersides instead of increasing the concentration. A missed leaf is usually a coverage problem, not an invitation to make the mixture stronger.
- Days 7–14: Recheck the original pot and its neighbours. If adult numbers are falling and no new leaves are becoming sticky, continue monitoring. If the cloud returns quickly, inspect for an untreated plant, poor underside coverage or a new plant introduced nearby.
Honeydew and sooty mould deserve their own clean-up after the insects are being reduced. Wipe broad, sturdy leaves with clean water and a soft cloth, or rinse the plant gently if its leaves can tolerate it. The black film may remain until it is washed away, so its presence immediately after treatment does not by itself prove that whiteflies are still feeding.
For a small annual that is already near the end of its useful season, repeated treatment may not be worth the time or leaf loss. That is a judgement call, not a rule: I would keep a valued pepper or herb, but I would discard a badly infested short-lived plant if it is repeatedly affecting the rest of the balcony.
Prevention is mostly inspection. Check new plants and cuttings before they join the collection, especially the undersides and the soft new growth. Before moving a plant indoors for winter, inspect it outside, wash what can be washed, and keep it apart from established plants while you make more than one check. The same caution helps with overwintering plants in pots, because a pest that is easy to spot on a balcony can spread through a warm windowsill unnoticed.
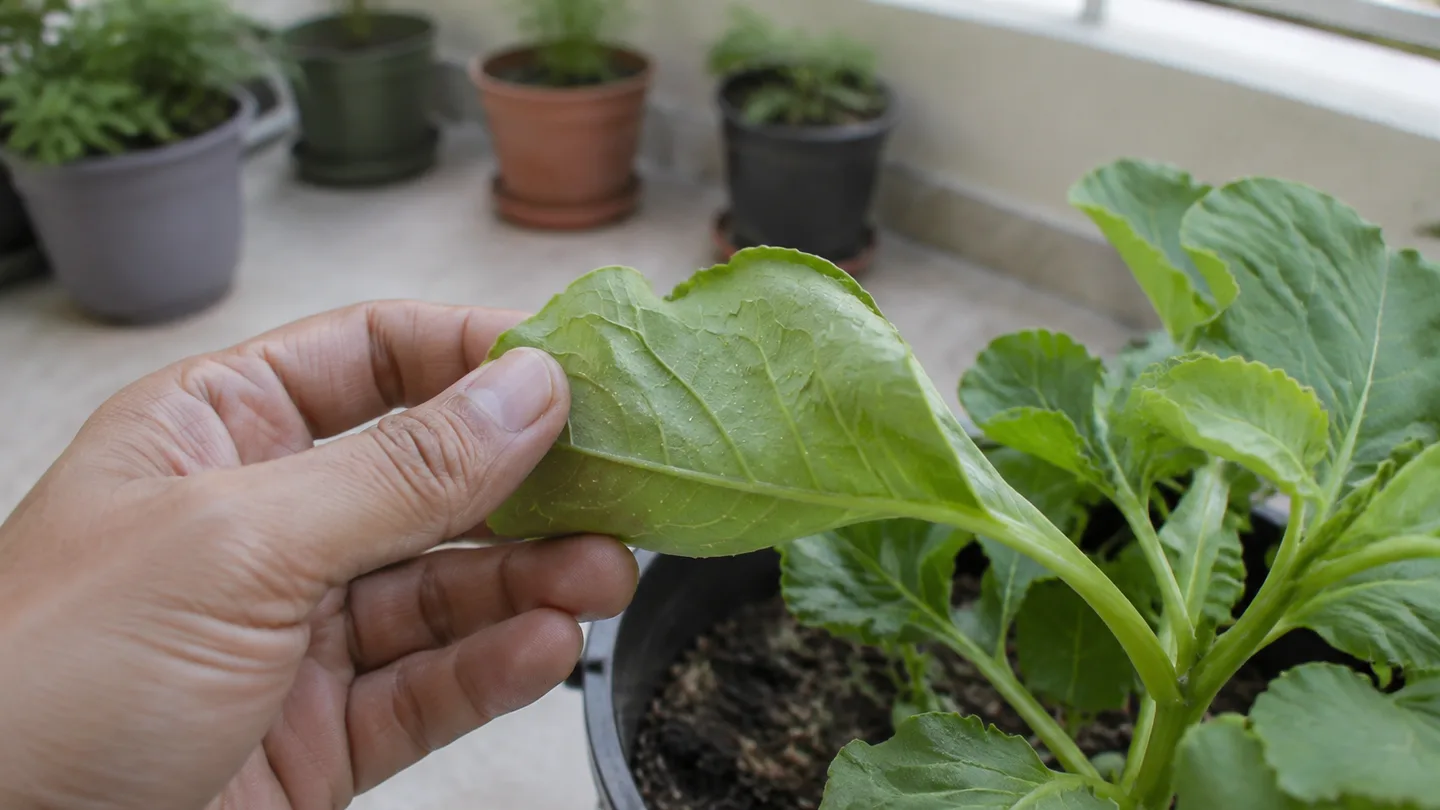
My saveable checklist is simple: turn the lower leaves, tap the plant over white paper, identify the life stage, then choose the least disruptive option that can actually reach it. Tonight, inspect three leaves on each nearby pot. Before the weekend, buy yellow traps for monitoring and a labelled insecticidal soap only if the plant and crop are covered by its directions.